Service Adjustments and Calibrations
COLOR PURITY ADJUSTMENT | CONVERGENCE CALIBRATION |
1.Position the CRT face turned to east or west.
2.Set Bright and Contrast controls to their maximum positions.
3.Leave the set heating up for 60 minutes at white screen.
4.Fully degauss the picture tube by using an external degauss coil.
5.Apply a red pattern.
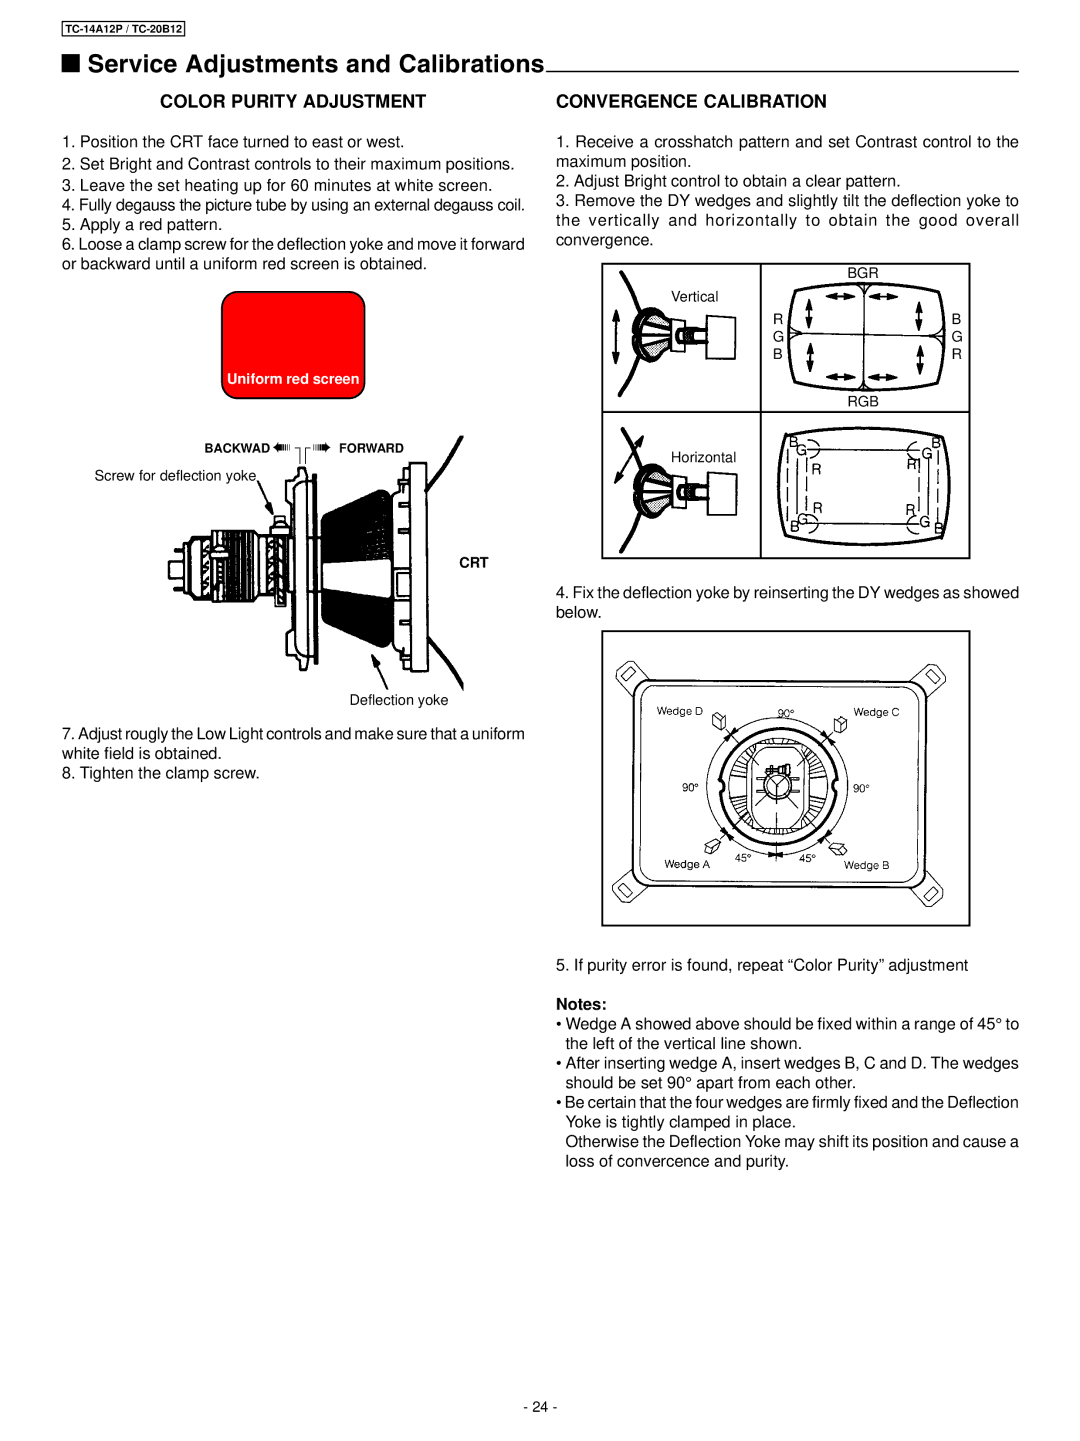
6.Loose a clamp screw for the deflection yoke and move it forward or backward until a uniform red screen is obtained.
Uniform red screen
BACKWAD à | ⎤ ⎡ | à FORWARD |
|
|
Screw for deflection yoke
CRT
Deflection yoke
7.Adjust rougly the Low Light controls and make sure that a uniform white field is obtained.
8.Tighten the clamp screw.
1.Receive a crosshatch pattern and set Contrast control to the maximum position.
2.Adjust Bright control to obtain a clear pattern.
3.Remove the DY wedges and slightly tilt the deflection yoke to the vertically and horizontally to obtain the good overall convergence.
|
| BGR |
Vertical |
|
|
| R | B |
| G | G |
| B | R |
|
| RGB |
Horizontal |
|
|
|
|
|
4.Fix the deflection yoke by reinserting the DY wedges as showed below.
5. If purity error is found, repeat “Color Purity” adjustment
Notes:
•Wedge A showed above should be fixed within a range of 45° to the left of the vertical line shown.
•After inserting wedge A, insert wedges B, C and D. The wedges should be set 90° apart from each other.
•Be certain that the four wedges are firmly fixed and the Deflection Yoke is tightly clamped in place.
Otherwise the Deflection Yoke may shift its position and cause a loss of convercence and purity.
- 24 -