Multi Shot 3D
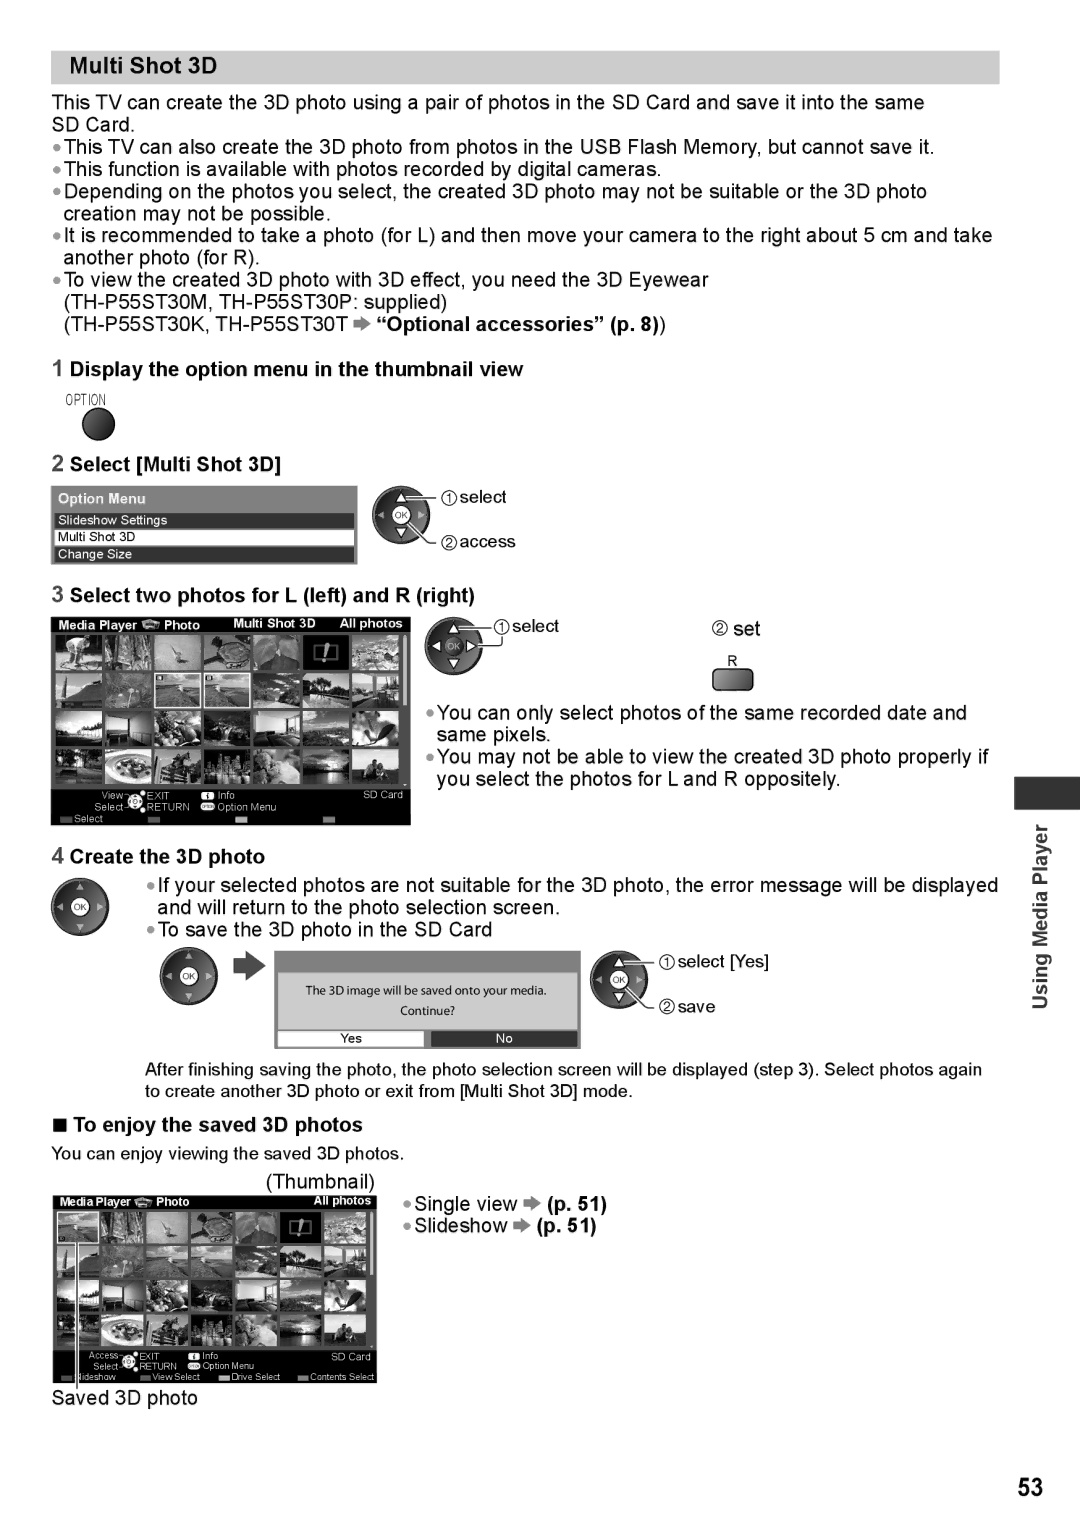
This TV can create the 3D photo using a pair of photos in the SD Card and save it into the same SD Card.
•This TV can also create the 3D photo from photos in the USB Flash Memory, but cannot save it.
•This function is available with photos recorded by digital cameras.
•Depending on the photos you select, the created 3D photo may not be suitable or the 3D photo creation may not be possible.
•It is recommended to take a photo (for L) and then move your camera to the right about 5 cm and take another photo (for R).
•To view the created 3D photo with 3D effect, you need the 3D Eyewear
![]() “Optional accessories” (p. 8))
“Optional accessories” (p. 8))
1 Display the option menu in the thumbnail view
OPTION
2 Select [Multi Shot 3D]
Option Menu | select |
Slideshow Settings
Multi Shot 3D![]() access
access
Change Size
3 Select two photos for L (left) and R (right)
Media Player | Photo | Multi Shot 3D | All photos | ||
|
|
|
|
|
|
|
|
|
|
|
|
LR
View | EXIT | Info | SD Card |
Select | RETURN | OPTION Option Menu |
|
Select |
|
|
|
select | set |
| R |
•You can only select photos of the same recorded date and same pixels.
•You may not be able to view the created 3D photo properly if you select the photos for L and R oppositely.
4 Create the 3D photo
•If your selected photos are not suitable for the 3D photo, the error message will be displayed and will return to the photo selection screen.
•To save the 3D photo in the SD Card
![]()
![]() select [Yes]
select [Yes]
The 3D image will be saved onto your media.
Continue?![]() save
save
YesNo
After finishing saving the photo, the photo selection screen will be displayed (step 3). Select photos again to create another 3D photo or exit from [Multi Shot 3D] mode.
■To enjoy the saved 3D photos
You can enjoy viewing the saved 3D photos.
| (Thumbnail) | •Single view | (p. 51) | |||
Media Player Photo |
| All photos | ||||
3D |
|
|
|
| •Slideshow | (p. 51) |
|
|
|
| |||
|
|
|
|
|
|
|
Access | EXIT | Info | SD Card |
Select | RETURN OPTION | Option Menu |
|
Slideshow | View Select | Drive Select | Contents Select |
Saved 3D photo
Using Media Player
53
