Projecting an image | Projecting an image |
Confirm the connections of the peripheral devices (Æpage 19, 20) and mains lead (Æpage 21). Switch on the power (Æpage 23) and the projector starts projecting. Select the input signal and adjust the image.
Selecting the input signal
1 ) Switch on the connected devices.
When playing a connected DVD player, if SIGNAL SEARCH in the DISPLAY OPTION menu is set to ON, the input signal is detected and projected automatically when the projector is switched on. (Æpage 39)
zzSet the INPUT GUIDE under the
2 ) Select an input signal.
The image selected with the INPUT SELECT button is projected. (Æpage 26)
Note
zzChange the setting of the PICTURE menu according to the connected device and DVD, video tape, etc., to be played. (Æpage 33)
zzConfirm the aspect ratio of the screen and image. Select the optimum aspect ratio. (Æpage 35)
Positioning the image
When setting up the projector for the first time or setting up at a new place, you must perform the following operations.
1111Adjust the vertical angle of the projector.
zzPlace the projector at the right angle from the screen.
zzPress the adjuster buttons and adjust the vertical projection angle. Then, adjust the projected image to the centre of the screen.
Basic Operation
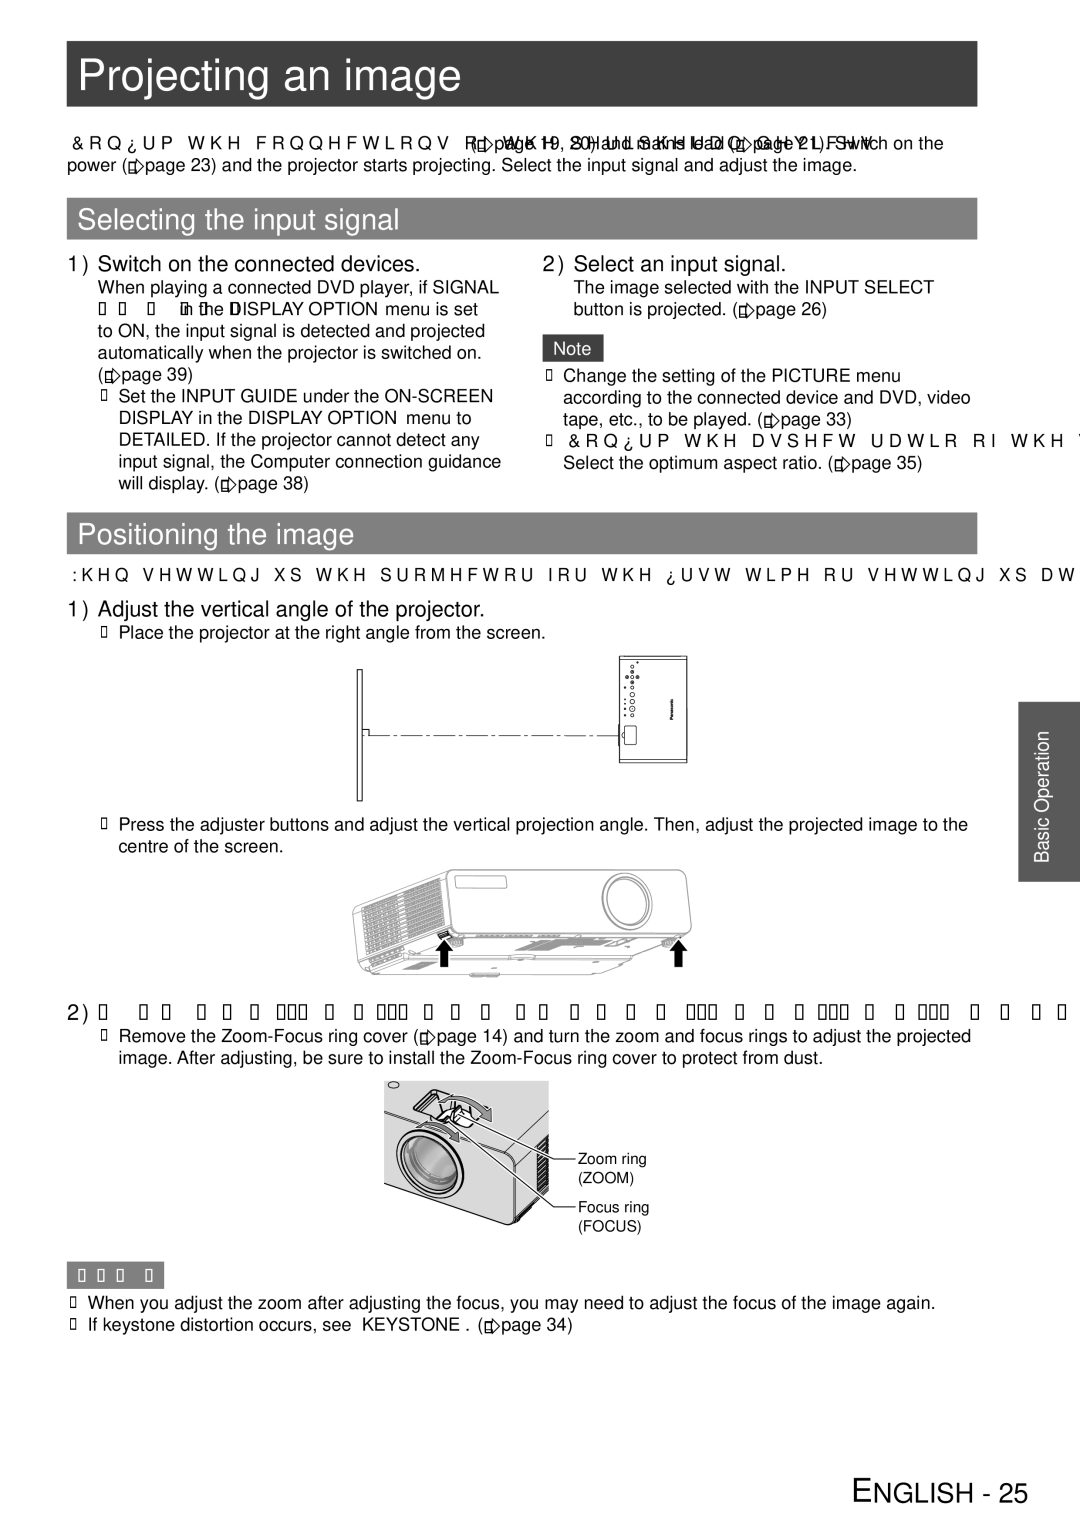
2222 Adjust the projection size and focus.
zzRemove the
![]()
![]()
![]()
![]()
![]()
![]()
![]()
![]()
![]()
![]()
![]() Zoom ring
Zoom ring
(ZOOM)
Focus ring (FOCUS)
Remarks
zzWhen you adjust the zoom after adjusting the focus, you may need to adjust the focus of the image again. zzIf keystone distortion occurs, see “KEYSTONE”. (Æpage 34)
ENGLISH - 25