Care and Replacement
JJLamp replacement procedure
zzWhen the projector is mounted in the ceiling, do not work directly under the projector or put your face close to the projector.
zzBe sure to install the lamp unit and attach the lamp unit cover securely. If they are not installed securely, it may cause the protection circuit to operate so that the power cannot be turned on.
1111 Disconnect the mains plug from the mains socket according to “Switching off the projector” (Æpage 24), wait for at least 1 hour, and check if the lamp unit bottom is cooled.
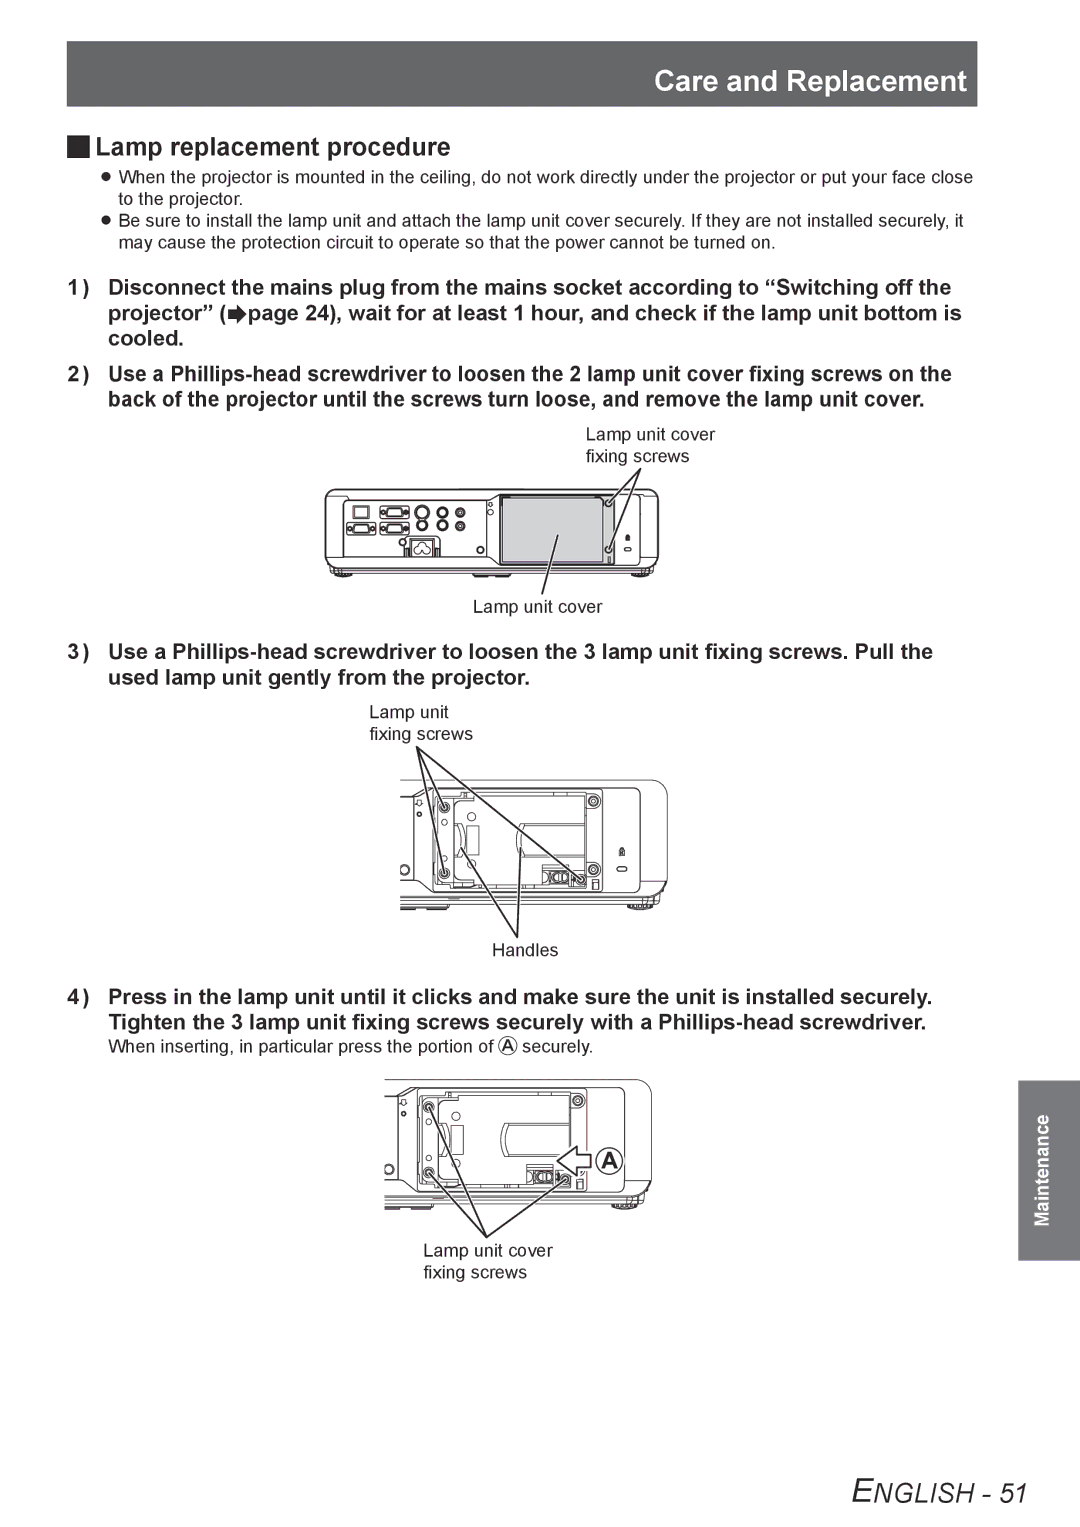
2222 Use a
Lamp unit cover fixing screws
Lamp unit cover
3333 Use a
Lamp unit fixing screws
Handles
4444 Press in the lamp unit until it clicks and make sure the unit is installed securely. Tighten the 3 lamp unit fixing screws securely with a
When inserting, in particular press the portion of ![]() securely.
securely.
Maintenance
Lamp unit cover fixing screws
ENGLISH - 51