Setup Procedures
Caution: Setup of this product should only be performed by qualified service personnel or system installers.
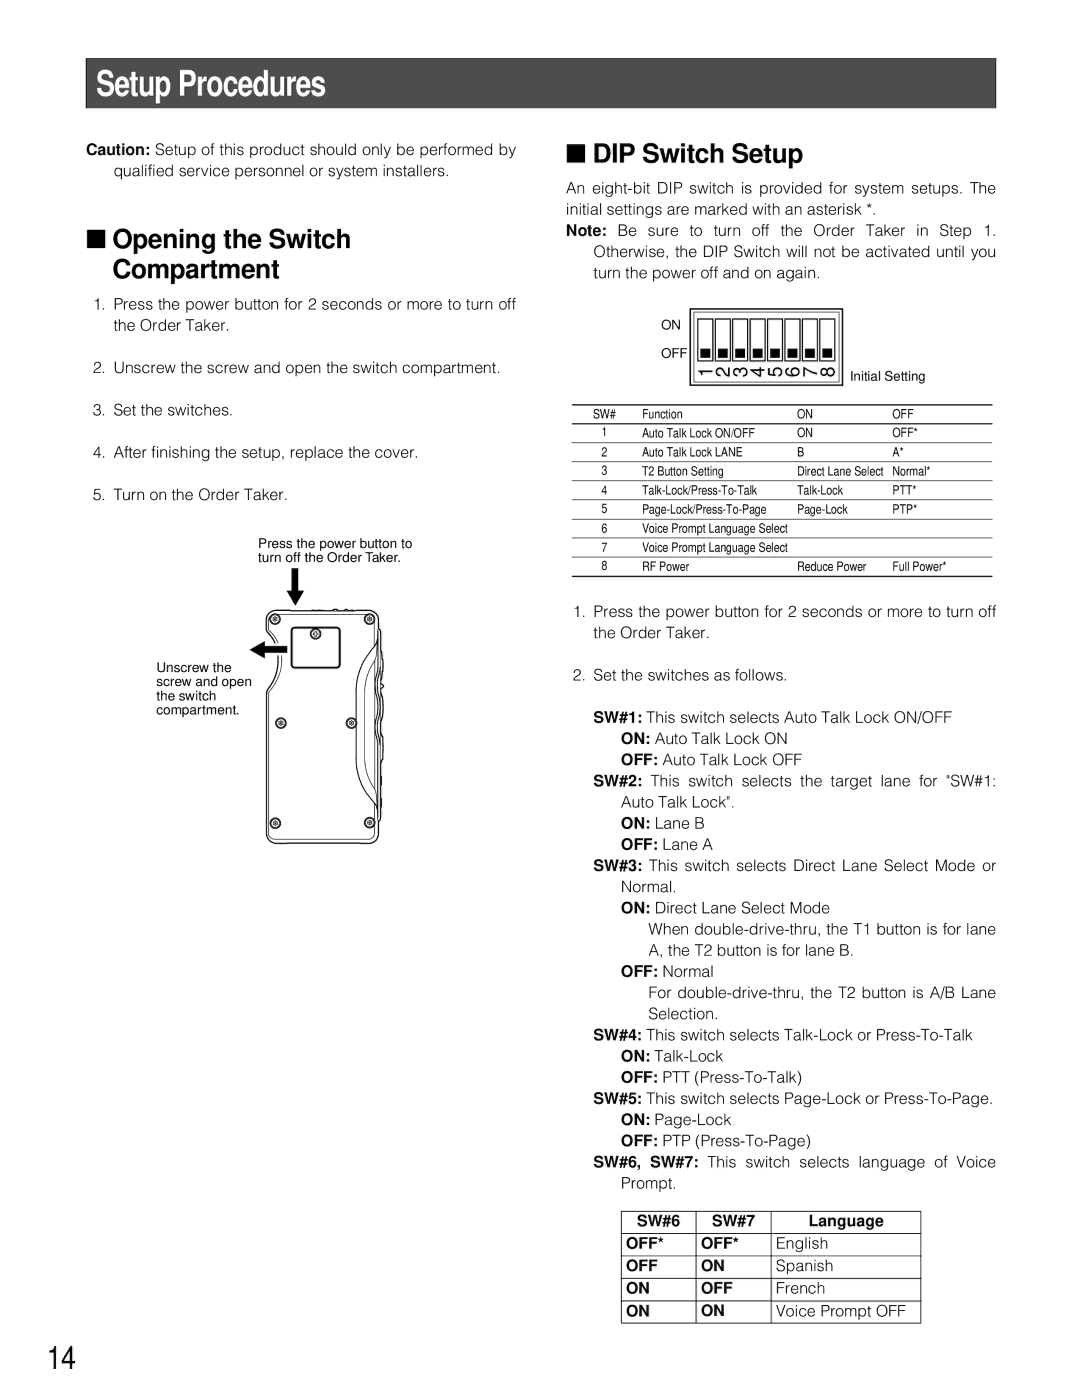
■Opening the Switch Compartment
1.Press the power button for 2 seconds or more to turn off the Order Taker.
2.Unscrew the screw and open the switch compartment.
3.Set the switches.
4.After finishing the setup, replace the cover.
5.Turn on the Order Taker.
Press the power button to turn off the Order Taker.
Unscrew the screw and open the switch compartment.
■DIP Switch Setup
An
Note: Be sure to turn off the Order Taker in Step 1. Otherwise, the DIP Switch will not be activated until you turn the power off and on again.
ON |
|
OFF |
|
1 2 3 4 5 6 7 8 | Initial Setting |
|
SW# | Function | ON | OFF |
1 | Auto Talk Lock ON/OFF | ON | OFF* |
|
|
|
|
2 | Auto Talk Lock LANE | B | A* |
3 | T2 Button Setting | Direct Lane Select | Normal* |
|
|
|
|
4 | PTT* | ||
5 | PTP* |
6Voice Prompt Language Select
7Voice Prompt Language Select
8 | RF Power | Reduce Power | Full Power* |
1.Press the power button for 2 seconds or more to turn off the Order Taker.
2.Set the switches as follows.
SW#1: This switch selects Auto Talk Lock ON/OFF ON: Auto Talk Lock ON
OFF: Auto Talk Lock OFF
SW#2: This switch selects the target lane for "SW#1: Auto Talk Lock".
ON: Lane B
OFF: Lane A
SW#3: This switch selects Direct Lane Select Mode or Normal.
ON: Direct Lane Select Mode
When
OFF: Normal
For
SW#4: This switch selects
OFF: PTT
SW#5: This switch selects
OFF: PTP
SW#6, SW#7: This switch selects language of Voice Prompt.
SW#6 | SW#7 | Language |
OFF* | OFF* | English |
|
|
|
OFF | ON | Spanish |
|
|
|
ON | OFF | French |
|
|
|
ON | ON | Voice Prompt OFF |
|
|
|
14
