IMPORTANT SAFEGUARDS AND WARNINGS
Observe the following warnings before installing and using this product.
1.Installation and servicing should only be done by qualified service personnel and conform to all local codes.
2.Unless the unit is specifically marked as a NEMA Type 3, 3R, 3S, 4, 4X, 6, or 6P enclosure, it is designed for indoor use only and it must not be installed where exposed to rain and moisture.
3.Only use replacement parts Pelco recommends.
4.After replacing or repairing this unit’s electrical components, measure the resistance between the line and exposed parts to verify the exposed parts have not been connected to line circuitry.
5.The installation method and materials should be capable of supporting four times the weight of the enclosure, pan and tilt, camera and lens combination.
The product and/or manual may bear the following marks:
This symbol indicates that dangerous voltage constituting a risk of electric shock is present within this unit.
This symbol indicates that there are important operating and maintenance instructions in the literature accompanying this unit.
CAUTION:
RISK OF ELECTRIC SHOCK.
DO NOT OPEN.
Please thoroughly familiarize yourself with the information in this manual prior to installation and operation.
DESCRIPTION
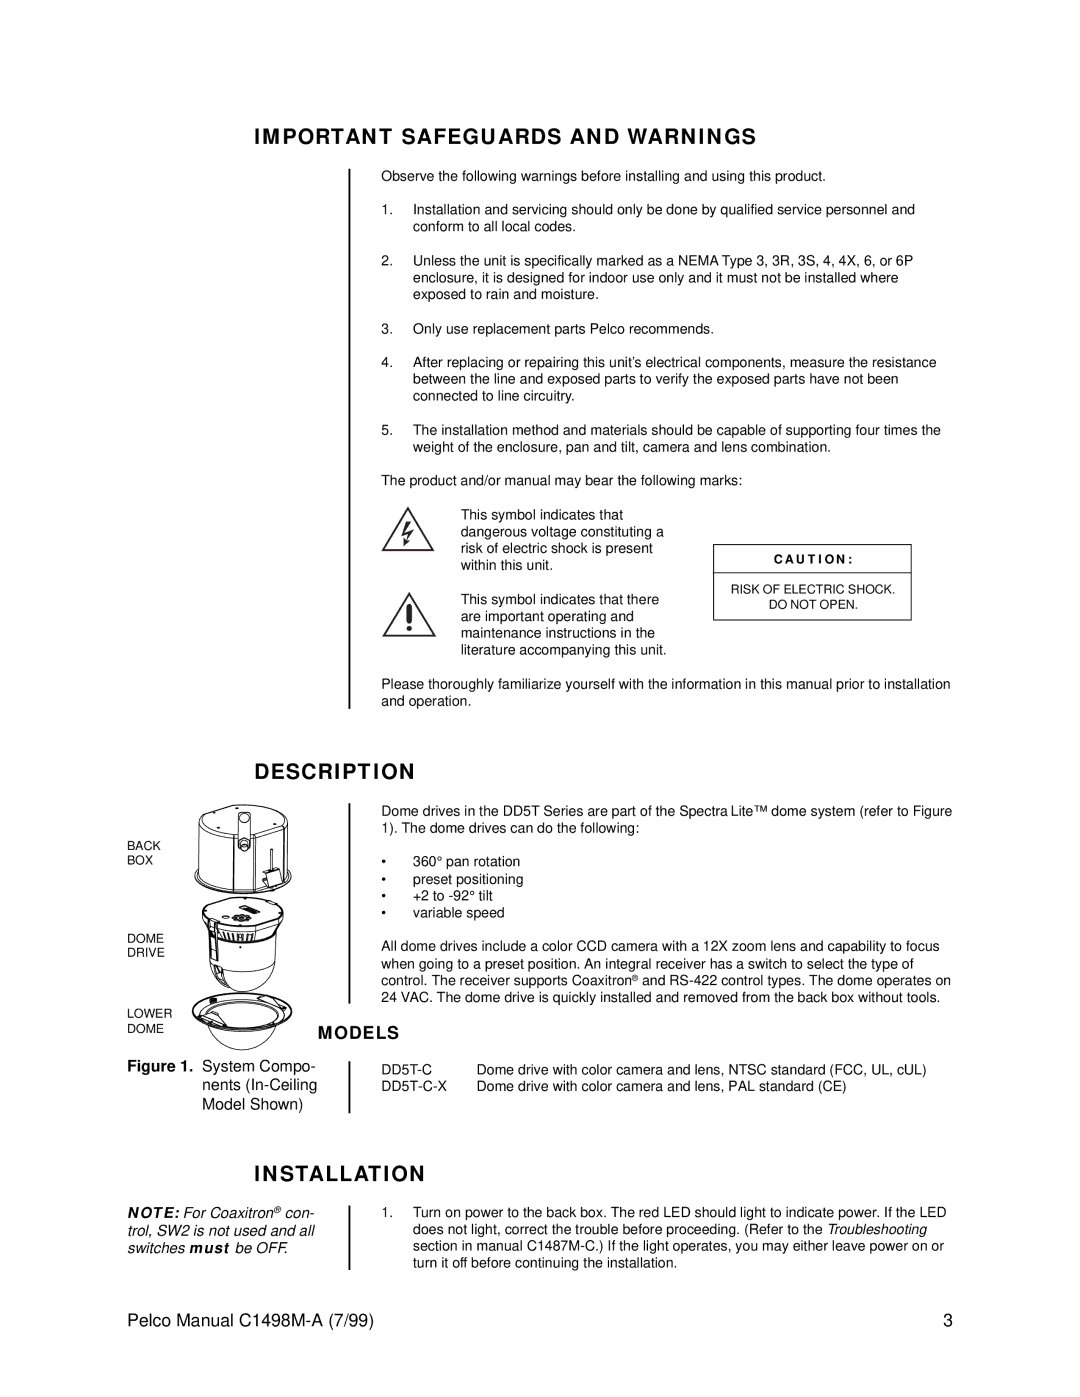
BACK
BOX
DOME DRIVE
LOWER DOME
Dome drives in the DD5T Series are part of the Spectra Lite™ dome system (refer to Figure
1). The dome drives can do the following:
•360° pan rotation
•preset positioning
•+2 to
•variable speed
All dome drives include a color CCD camera with a 12X zoom lens and capability to focus when going to a preset position. An integral receiver has a switch to select the type of control. The receiver supports Coaxitron® and
MODELS
Figure 1. System Compo-
nents (In-Ceiling
Model Shown)
INSTALLATION
NOTE: For Coaxitron® con- trol, SW2 is not used and all switches must be OFF.
1.Turn on power to the back box. The red LED should light to indicate power. If the LED does not light, correct the trouble before proceeding. (Refer to the Troubleshooting section in manual
Pelco Manual | 3 |
