3.1.3 Pendant Mounting
NOTE: The length of pipe used may effect noticeable motion on the video display. If this occurs additional sup- port of the pipe by bracing, guy wir- ing, etc. will be required.
NOTE: For outdoor models apply pipe thread sealant to the pipe threads prior to assembly.
The pendant back box is designed to be suspended from a suitable length of
To install the pendant type back box, perform the following steps:
1.Select and install the mount of choice according to the instructions provided with the mount. This may be a good time to route any needed wiring through the mount. Refer to Section 3.2, WIRING INSTRUCTIONS.
2.Select the appropriate length of pipe
3.Slide the back box “cap” up the pipe.
On outdoor units first slide one (1) of the two (2)
On indoor models while holding the “cap” in place, bring the back box into place and engage the threaded flange on the back box with the pipe. (Be sure to back out the locking screw in the flange prior to this.)
4.Spin the back box onto the pipe. The latches inside the back box may be used as handles to provide a light torque to the box (approximately 20 ft/lb). Tighten the lock screw.
5.Lower the “cap” onto the top of the back box. On outdoor models also lower the external
Proceed to Section 3.2, WIRING INSTRUCTIONS.
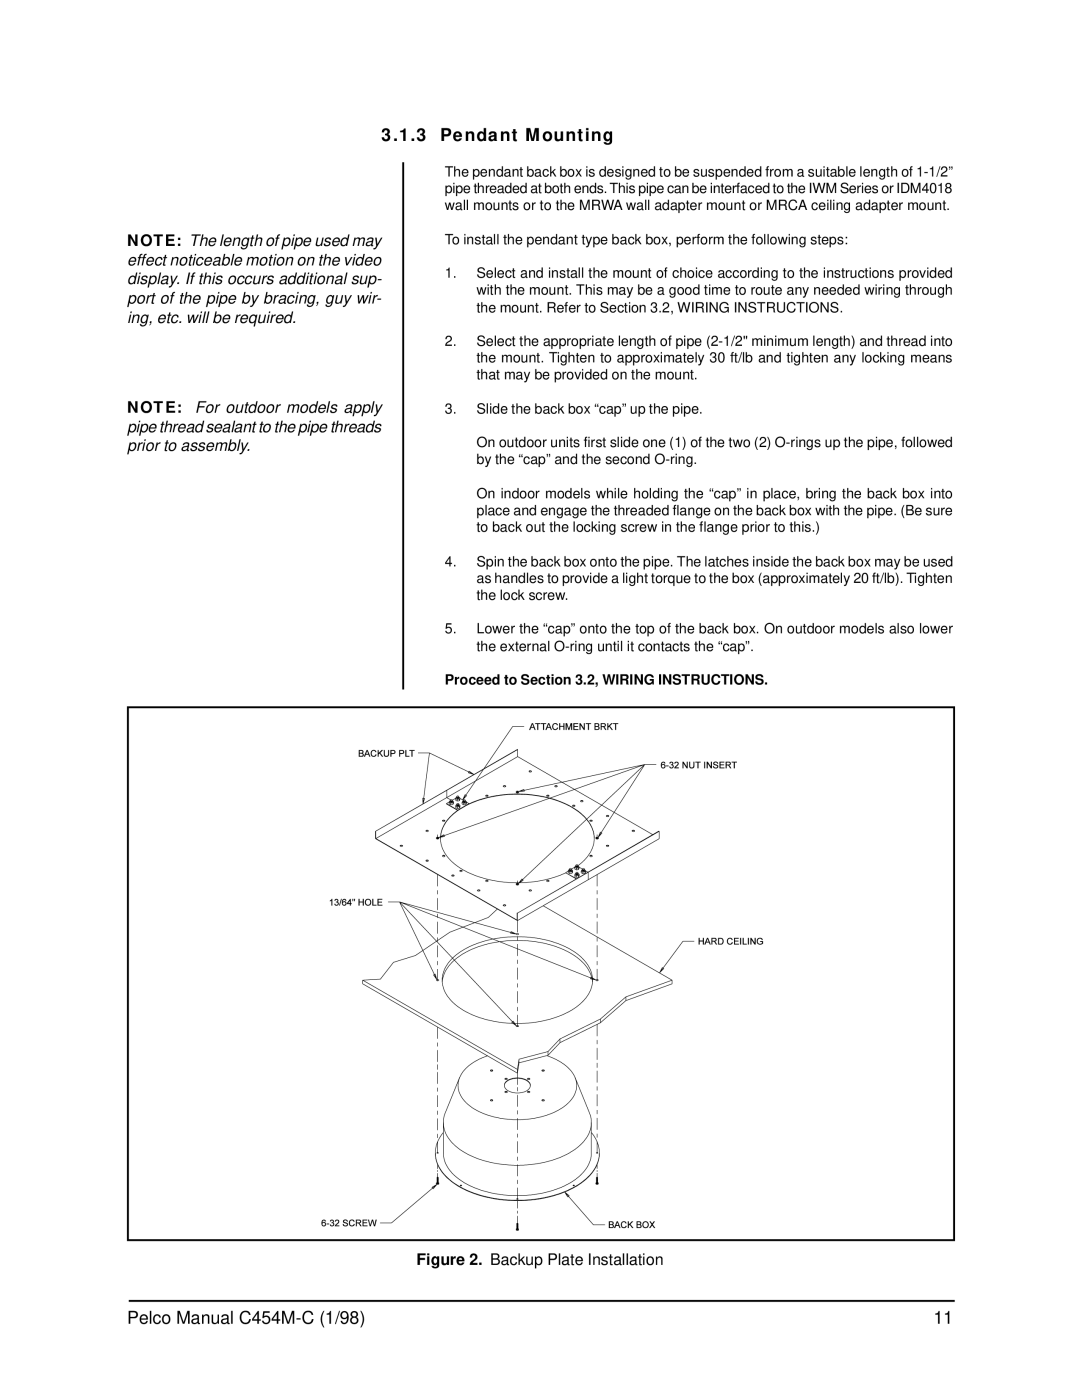
Figure 2. Backup Plate Installation
Pelco Manual | 11 |
