
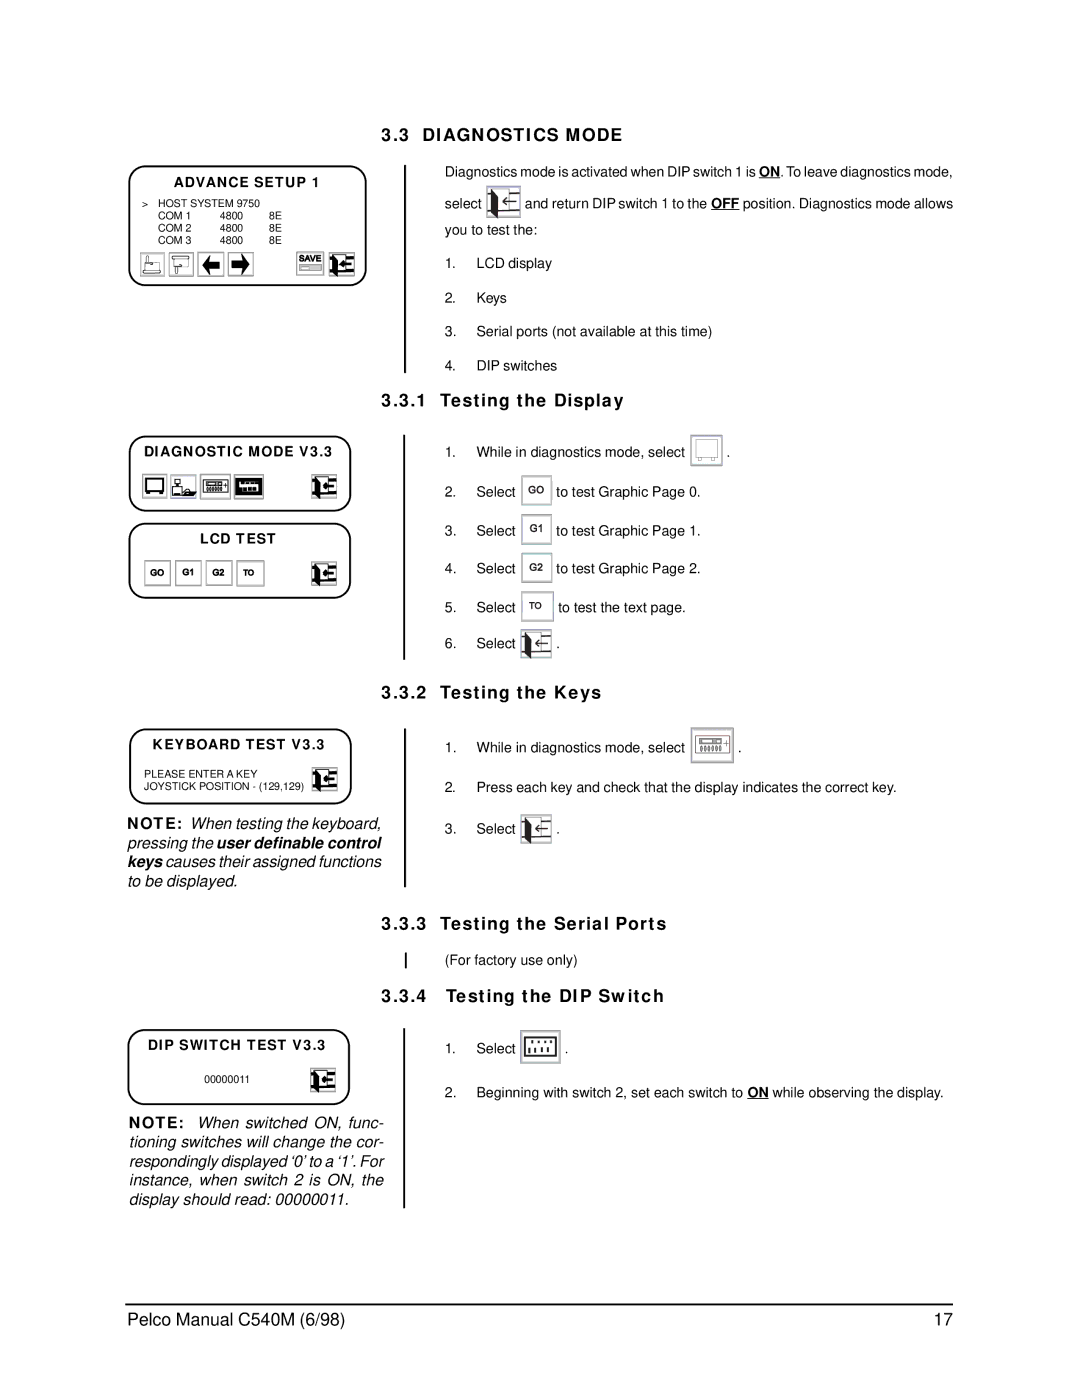
C540M (6/98), CM9760-KBR specifications
The Pelco CM9760-KBR and C540M (6/98) are part of Pelco’s renowned line of video management solutions, tailored for both security and surveillance operations. These devices embody the cutting-edge technology and features that Pelco is known for, providing flexibility, functionality, and seamless integration in diverse environments.The Pelco CM9760-KBR is a sophisticated keyboard and control system designed to manage various cameras and monitor systems effectively. It is equipped with an intuitive interface that allows operators to control PTZ (pan-tilt-zoom) cameras, adjust settings, and navigate between multiple camera feeds effortlessly. The user-friendly design of the CM9760-KBR ensures that even operators with minimal training can efficiently manage surveillance tasks.
One of the standout features of the CM9760-KBR is its ability to interface with multiple Pelco systems, making it highly compatible and adaptable for various surveillance setups. The keyboard supports a wide range of configurations and can integrate with different Pelco video multiplexers and decoders, offering a comprehensive control mechanism for video feeds.
The C540M is a reliable monitor that complements the CM9760-KBR, ensuring that operators have a clear view of their surveillance areas. It provides high-resolution video output, enabling detailed observation and analysis, which is critical in security monitoring. The monitor's robust construction and quality display make it suitable for both indoor and outdoor environments, maintaining performance even under challenging conditions.
Both the CM9760-KBR and C540M are designed to prioritize security features. They incorporate advanced encryption technologies to protect data and ensure privacy, which is essential for compliance with various regulatory standards. Additionally, the devices support remote access capabilities, allowing security personnel to monitor and manage their systems from offsite locations, enhancing operational flexibility.
In terms of technology, Pelco’s commitment to innovation is evident in these products. They utilize state-of-the-art video processing technology to deliver high-quality images, even in low-light conditions. This ensures that surveillance is effective 24 hours a day, making it easier to track movement and identify potential security threats.
In summary, the Pelco CM9760-KBR and C540M (6/98) are integral components of modern surveillance systems. With their advanced features, robust design, and high compatibility, they provide security professionals with the tools they need to ensure comprehensive monitoring and protection across various applications. Pelco continues to set the standard in surveillance technology, making their products a preferred choice for security operations worldwide.