Connecting the Expansion Unit to the DX8100
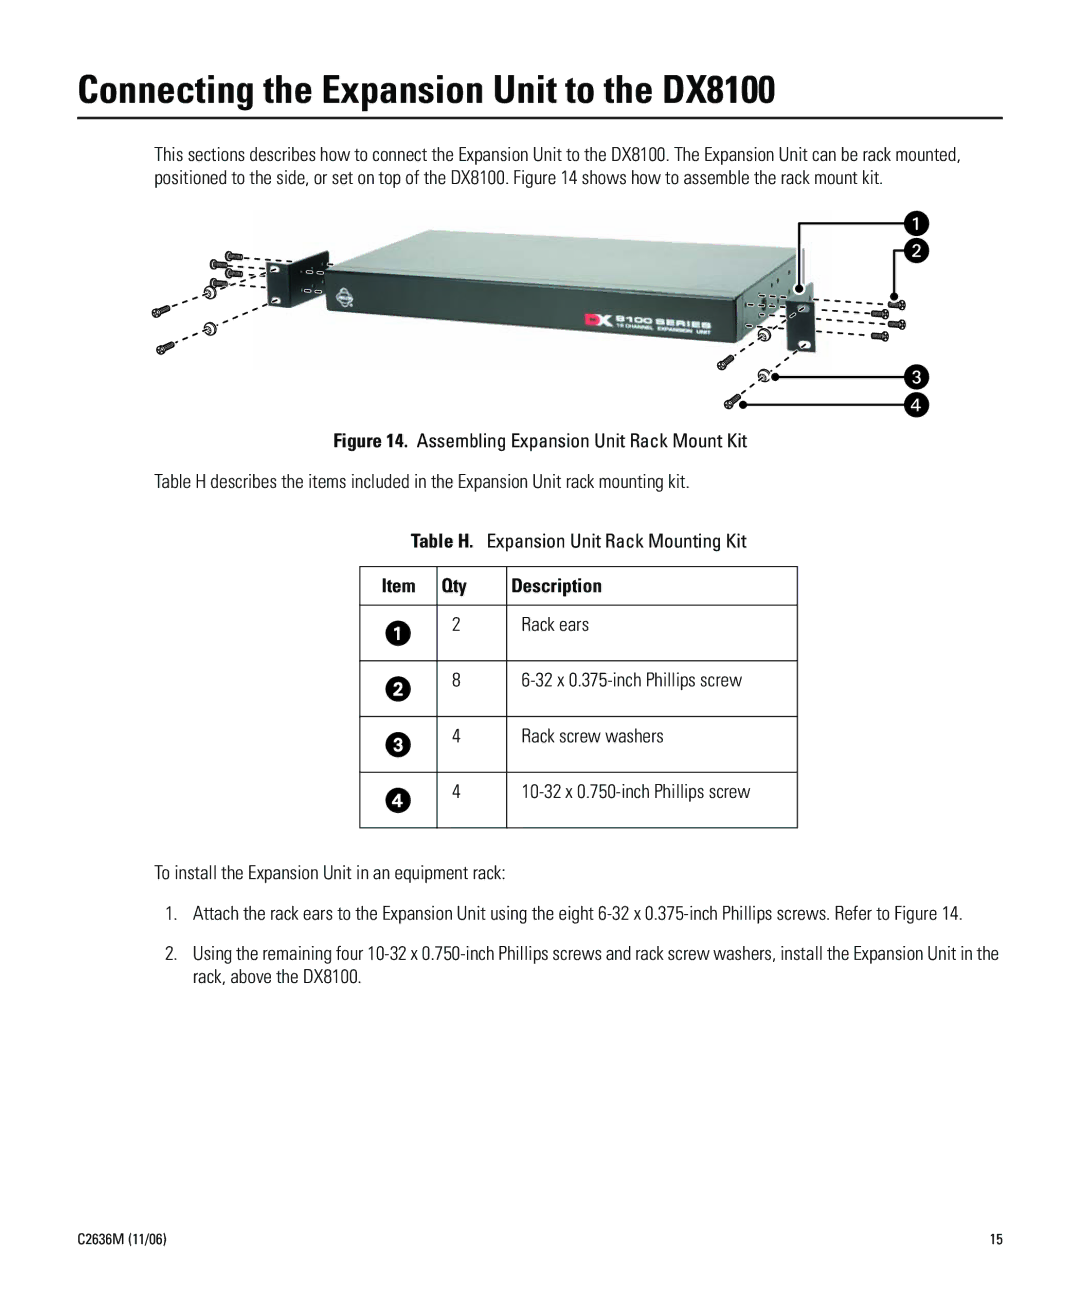
This sections describes how to connect the Expansion Unit to the DX8100. The Expansion Unit can be rack mounted, positioned to the side, or set on top of the DX8100. Figure 14 shows how to assemble the rack mount kit.
Figure 14. Assembling Expansion Unit Rack Mount Kit
Table H describes the items included in the Expansion Unit rack mounting kit.
Table H. Expansion Unit Rack Mounting Kit
Item Qty | Description |
2 | Rack ears |
8
4
Rack screw washers
4
To install the Expansion Unit in an equipment rack:
1.Attach the rack ears to the Expansion Unit using the eight
2.Using the remaining four
C2636M (11/06) | 15 |
