S • A L L D O O R S
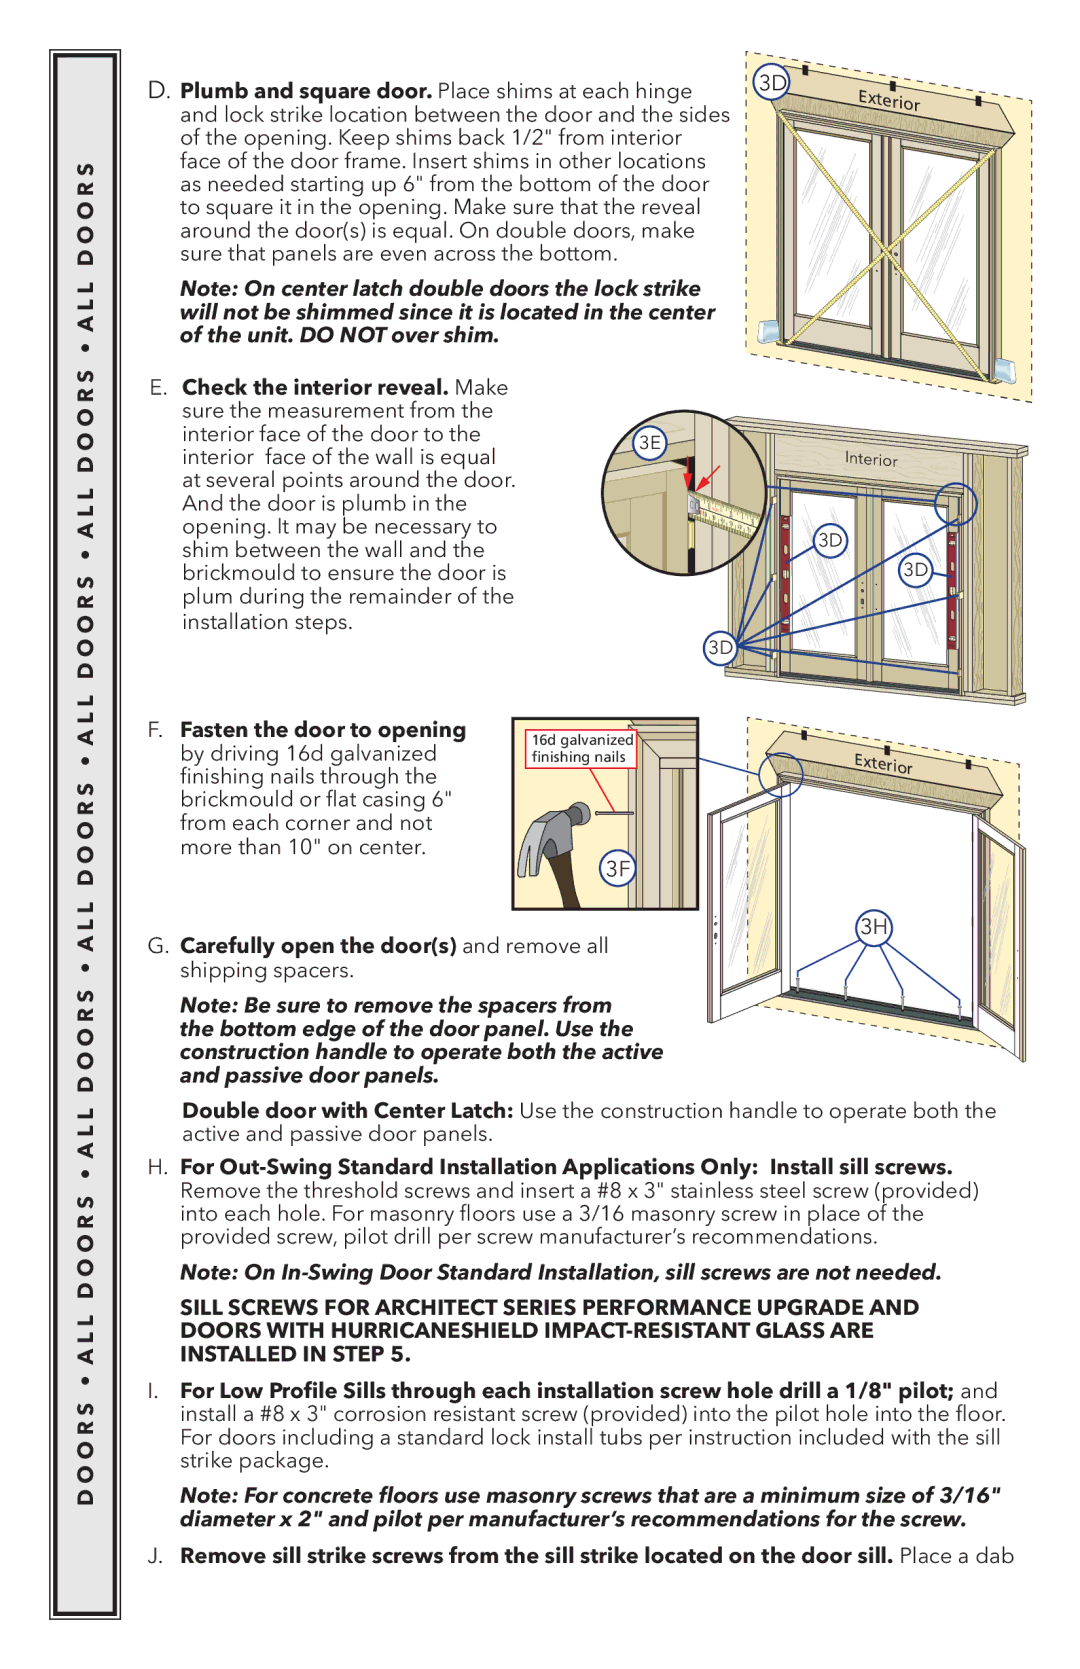
D. Plumb and square door. Place shims at each hinge | 3DÓ |
and lock strike location between the door and the sides |
|
of the opening. Keep shims back 1/2" from interior |
|
face of the door frame. Insert shims in other locations |
|
as needed starting up 6" from the bottom of the door |
|
to square it in the opening. Make sure that the reveal |
|
around the door(s) is equal. On double doors, make |
|
sure that panels are even across the bottom. |
|
Note: On center latch double doors the lock strike will not be shimmed since it is located in the center of the unit. DO NOT over shim.
![]() &YUFSJPS
&YUFSJPS
L D O O R S • A L L D O O R
E.Check the interior reveal. Make sure the measurement from the
interior face of the door to the | 3E | |
interior face of the wall is equal | ||
| ||
at several points around the door. |
| |
And the door is plumb in the |
| |
opening. It may be necessary to |
| |
shim between the wall and the |
| |
brickmould to ensure the door is |
| |
plum during the remainder of the |
| |
installation steps. |
|
mm | 1 | INCHES |
| 2 |
|
|
| 20 | 30 | 40 |
| 3 | |
|
|
| 50 | 60 | ||
|
|
|
|
| 70 |
3D ![]()
Interior
3D
3D ![]()
L L D O O R S • A L
F.Fasten the door to opening by driving 16d galvanized finishing nails through the brickmould or flat casing 6" from each corner and not more than 10" on center.
16d galvanized |
finishing nails |
3F |
![]() Exterior
Exterior
3H
D O O R S • A L L D O O R S • A L L D O O R S • A
G. Carefully open the door(s) and remove all
shipping spacers.
Note: Be sure to remove the spacers from the bottom edge of the door panel. Use the construction handle to operate both the active and passive door panels.
Double door with Center Latch: Use the construction handle to operate both the active and passive door panels.
H.For
Note: On
SILL SCREWS FOR ARCHITECT SERIES PERFORMANCE UPGRADE AND DOORS WITH HURRICANESHIELD
I.For Low Profile Sills through each installation screw hole drill a 1/8" pilot; and install a #8 x 3" corrosion resistant screw (provided) into the pilot hole into the floor. For doors including a standard lock install tubs per instruction included with the sill strike package.
Note: For concrete floors use masonry screws that are a minimum size of 3/16" diameter x 2" and pilot per manufacturer’s recommendations for the screw.
J.Remove sill strike screws from the sill strike located on the door sill. Place a dab