O R S • A L L D O O R S
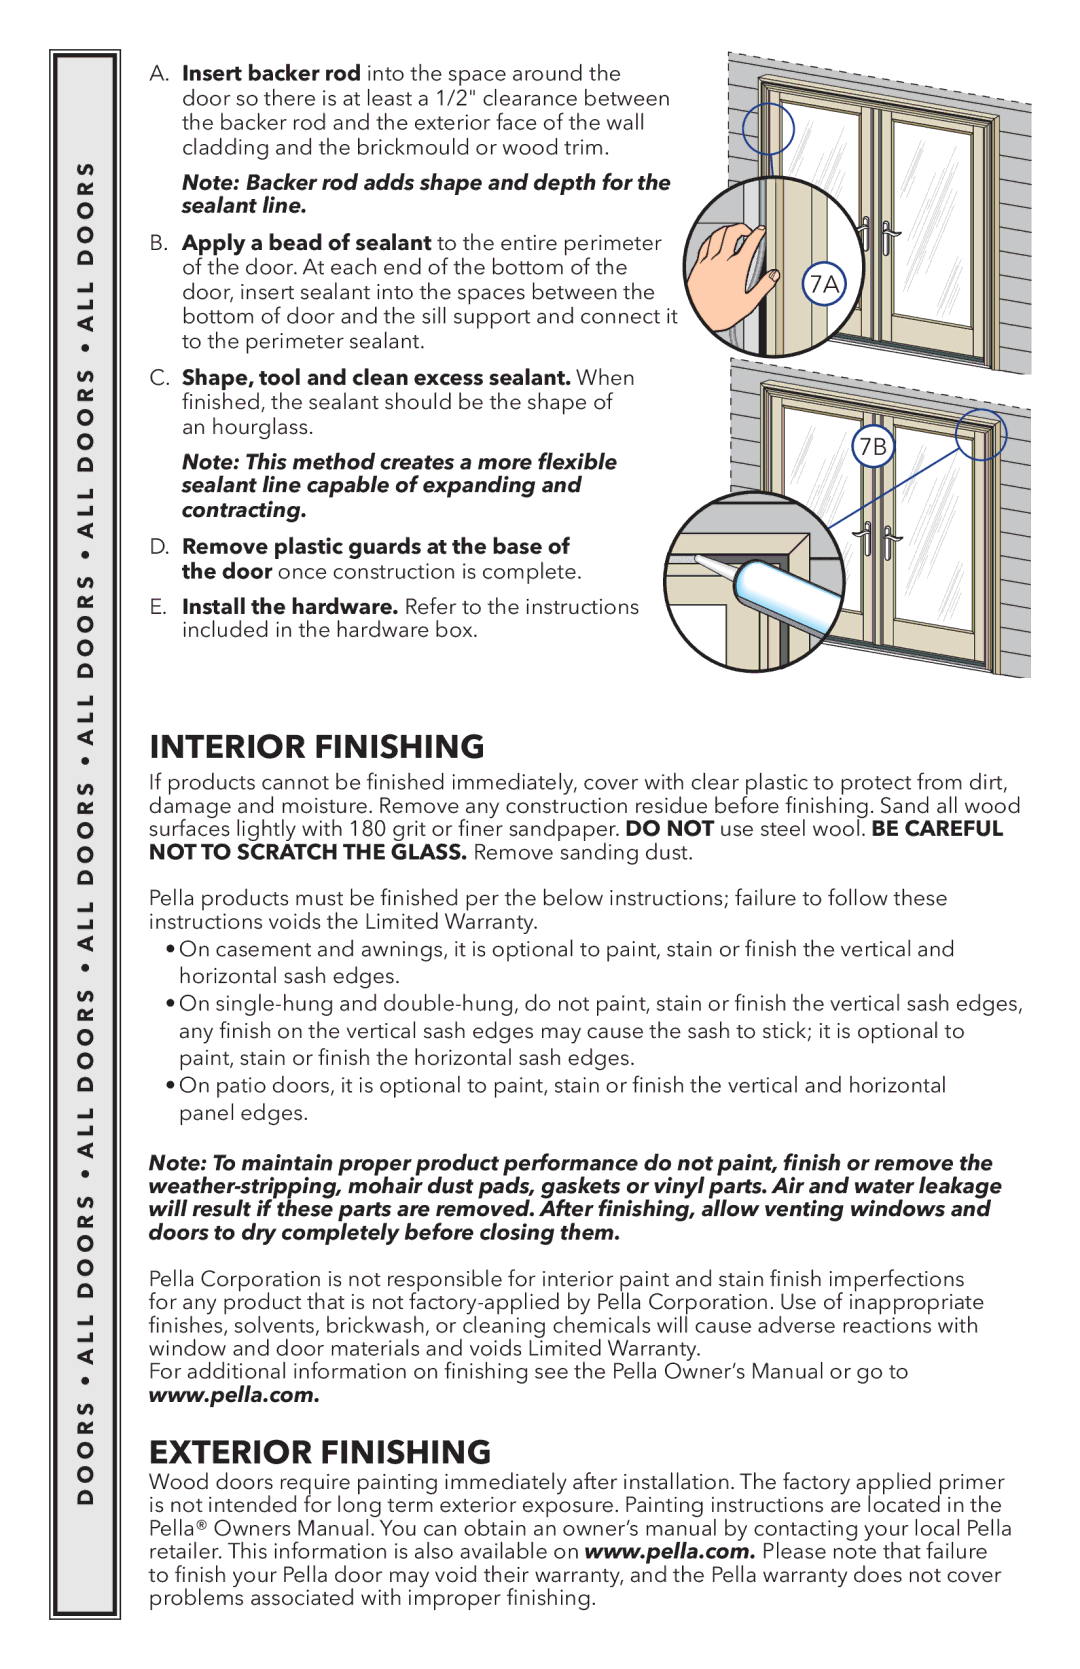
A. Insert backer rod into the space around the door so there is at least a 1/2" clearance between the backer rod and the exterior face of the wall cladding and the brickmould or wood trim.
Note: Backer rod adds shape and depth for the sealant line.
B. Apply a bead of sealant to the entire perimeter |
|
of the door. At each end of the bottom of the | x |
door, insert sealant into the spaces between the | 7A |
bottom of door and the sill support and connect it |
|
to the perimeter sealant. |
|
C.Shape, tool and clean excess sealant. When finished, the sealant should be the shape of an hourglass.
S • A L L D O
Note: This method creates a more flexible sealant line capable of expanding and contracting.
D. Remove plastic guards at the base of the door once construction is complete.
7Bx
D O O R S • A L L D O O R S • A L L D O O R S • A L L D O O R S • A L L D O O R
E. Install the hardware. Refer to the instructions included in the hardware box.
INTERIOR FINISHING
If products cannot be finished immediately, cover with clear plastic to protect from dirt, damage and moisture. Remove any construction residue before finishing. Sand all wood surfaces lightly with 180 grit or finer sandpaper. DO NOT use steel wool. BE CAREFUL NOT TO SCRATCH THE GLASS. Remove sanding dust.
Pella products must be finished per the below instructions; failure to follow these instructions voids the Limited Warranty.
•On casement and awnings, it is optional to paint, stain or finish the vertical and horizontal sash edges.
•On
•On patio doors, it is optional to paint, stain or finish the vertical and horizontal panel edges.
Note: To maintain proper product performance do not paint, finish or remove the
Pella Corporation is not responsible for interior paint and stain finish imperfections for any product that is not
For additional information on finishing see the Pella Owner’s Manual or go to www.pella.com.
EXTERIOR FINISHING
Wood doors require painting immediately after installation. The factory applied primer is not intended for long term exterior exposure. Painting instructions are located in the Pella® Owners Manual. You can obtain an owner’s manual by contacting your local Pella retailer. This information is also available on www.pella.com. Please note that failure to finish your Pella door may void their warranty, and the Pella warranty does not cover problems associated with improper finishing.