Using the iPronto
Once you have adjusted the general settings and network settings, you can start using the iPronto. In this chapter you read how to operate the touch screen, what the hard buttons are for and how you can use the iPronto’s applications and functions.
The Touch Screen
You can operate the iPronto touch screen in two ways. One way is to use the
Warning Never use an actual pen, pencil or other sharp object. These objects can damage the touch screen.
You can also operate the touch screen with your finger. This is less precise than using the stylus. However, you may find it more comfortable to use your finger on the touch screen.
iPronto User Guide
The Status Display
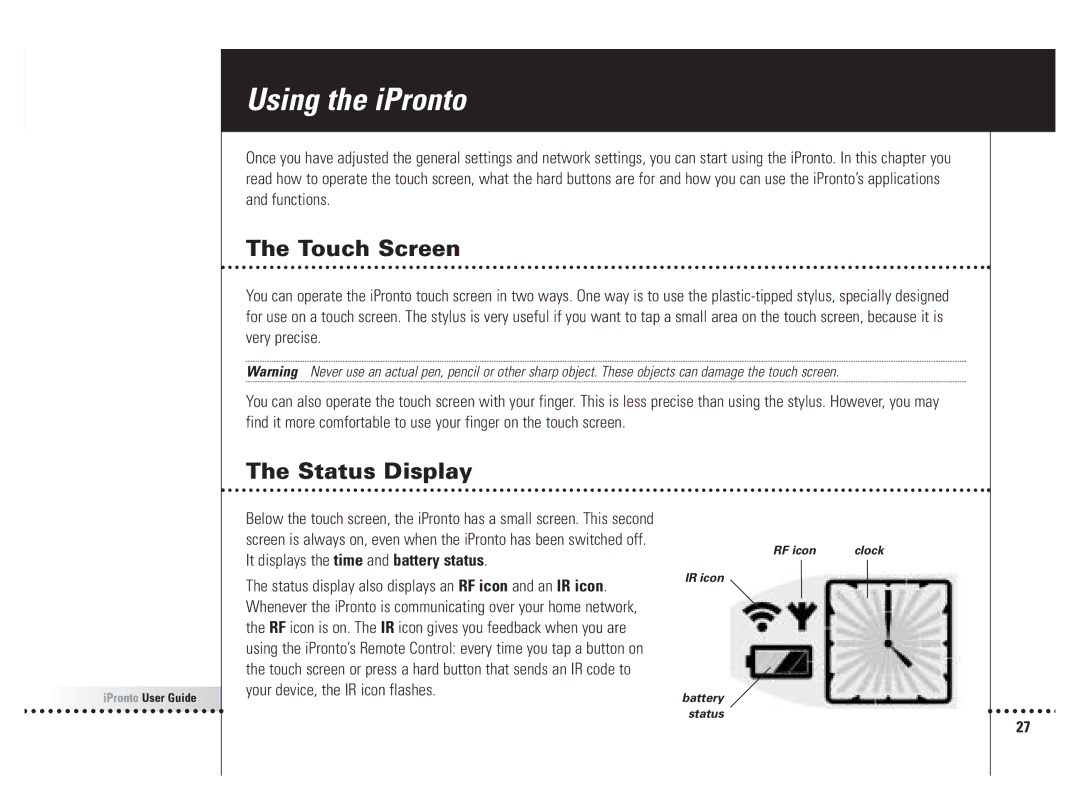
Below the touch screen, the iPronto has a small screen. This second screen is always on, even when the iPronto has been switched off. It displays the time and battery status.
The status display also displays an RF icon and an IR icon. Whenever the iPronto is communicating over your home network, the RF icon is on. The IR icon gives you feedback when you are using the iPronto’s Remote Control: every time you tap a button on the touch screen or press a hard button that sends an IR code to your device, the IR icon flashes.
RF icon | clock |
IR icon
battery status
27
