User Manual BDL4251V
Connection & Button Overviews
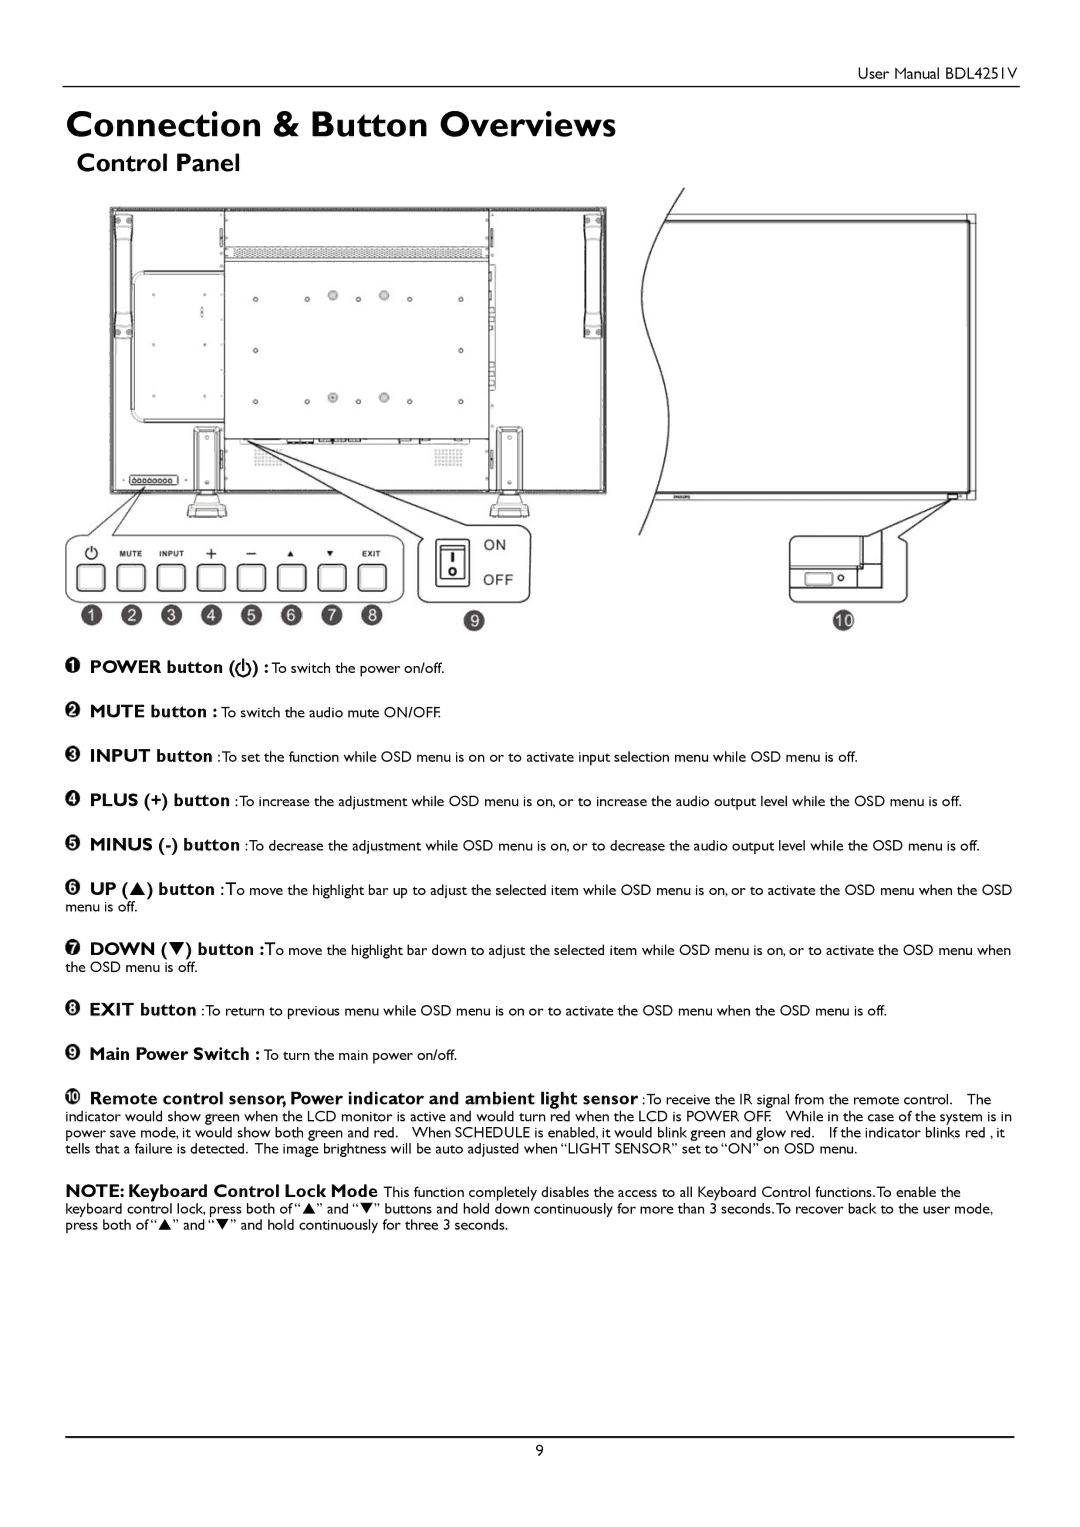
Control Panel
POWER button (![]() ) : To switch the power on/off.
) : To switch the power on/off.
MUTE button : To switch the audio mute ON/OFF.
INPUT button :To set the function while OSD menu is on or to activate input selection menu while OSD menu is off.
PLUS (+) button :To increase the adjustment while OSD menu is on, or to increase the audio output level while the OSD menu is off.
MINUS
![]() UP () button :To move the highlight bar up to adjust the selected item while OSD menu is on, or to activate the OSD menu when the OSD menu is off.
UP () button :To move the highlight bar up to adjust the selected item while OSD menu is on, or to activate the OSD menu when the OSD menu is off.
![]() DOWN () button :To move the highlight bar down to adjust the selected item while OSD menu is on, or to activate the OSD menu when the OSD menu is off.
DOWN () button :To move the highlight bar down to adjust the selected item while OSD menu is on, or to activate the OSD menu when the OSD menu is off.
EXIT button :To return to previous menu while OSD menu is on or to activate the OSD menu when the OSD menu is off.
Main Power Switch : To turn the main power on/off.
![]() Remote control sensor, Power indicator and ambient light sensor :To receive the IR signal from the remote control. The
Remote control sensor, Power indicator and ambient light sensor :To receive the IR signal from the remote control. The
indicator would show green when the LCD monitor is active and would turn red when the LCD is POWER OFF. While in the case of the system is in power save mode, it would show both green and red. When SCHEDULE is enabled, it would blink green and glow red. If the indicator blinks red , it tells that a failure is detected. The image brightness will be auto adjusted when “LIGHT SENSOR” set to “ON” on OSD menu.
NOTE: Keyboard Control Lock Mode This function completely disables the access to all Keyboard Control functions.To enable the keyboard control lock, press both of “” and “” buttons and hold down continuously for more than 3 seconds.To recover back to the user mode, press both of “” and “” and hold continuously for three 3 seconds.
9