Mount in the dashboard
![]() Note
Note
•Check wire connections before you mount the unit into a car.
•If preset radio stations are lost when the ignition key is turned OFF and then back ON, reconnect the red leads crosswise to the yellow ones.
1 If the car does not have an
•If you disconnect the car battery in a car that has an
•If the car battery is not disconnected, to avoid
2Ensure that the horizontal slant of the car dashboard opening is between 0 and 20 degrees. The unit cannot be used if the dashboard opening’s slant angle is above 20 degrees.
3Fix the four plastic buckles (supplied by the car manufacturer for the original audio system) to the unit.
10EN
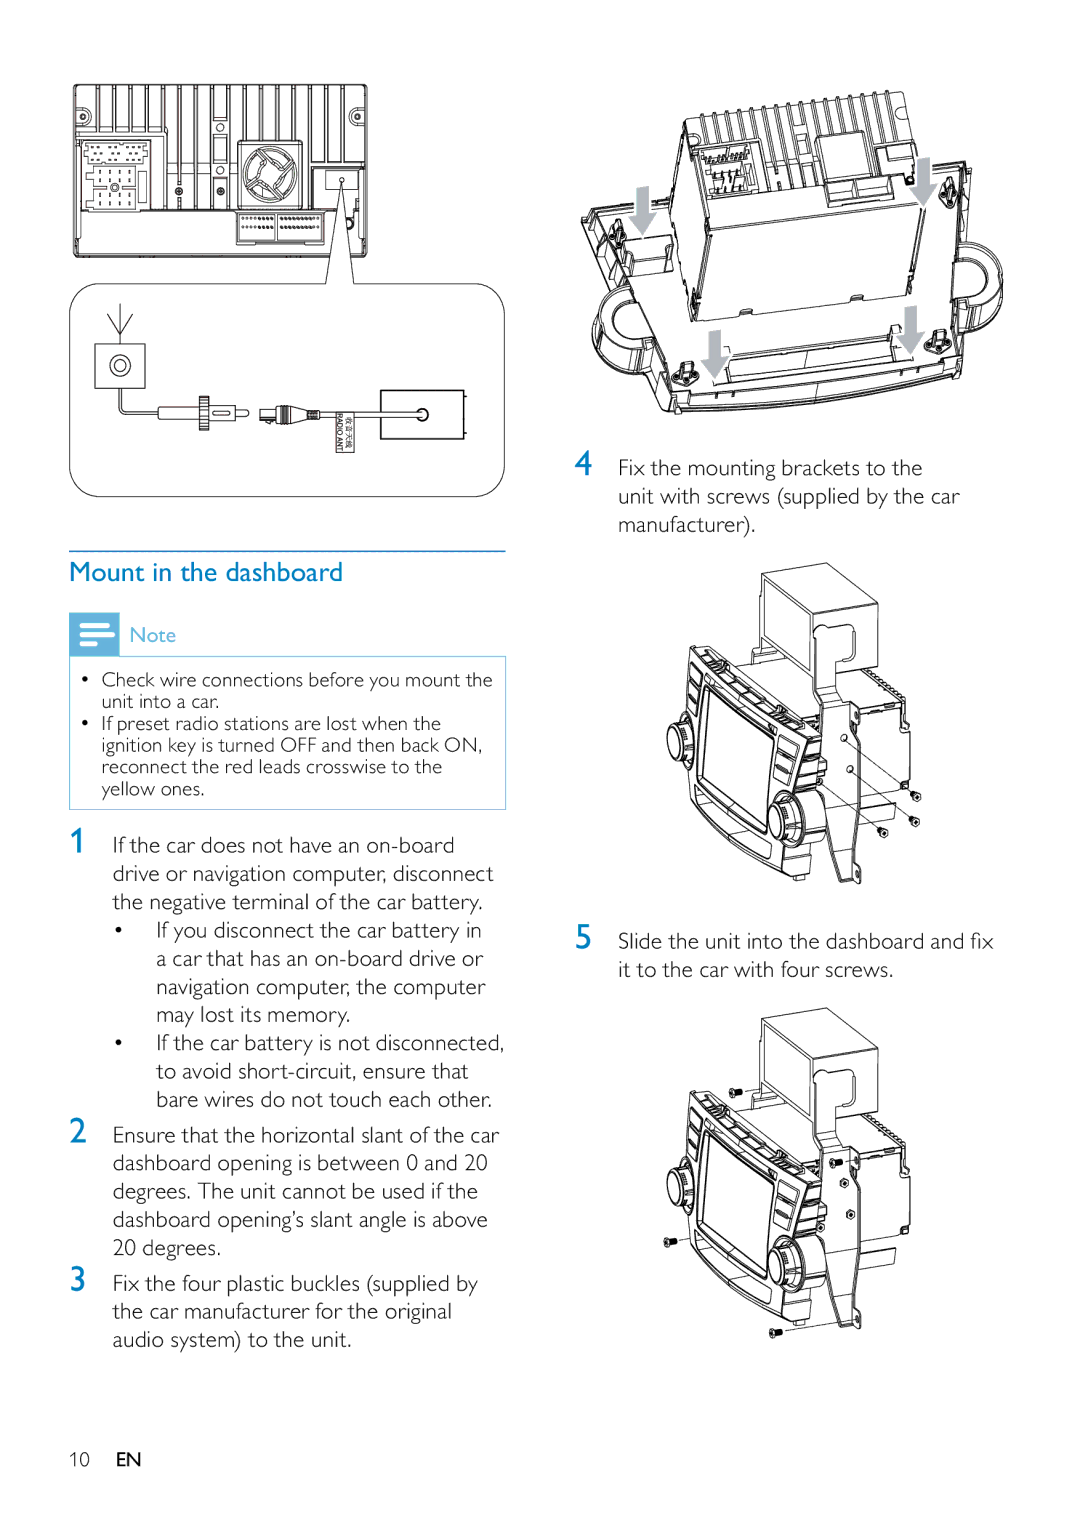
4Fix the mounting brackets to the unit with screws (supplied by the car manufacturer).
5Slide the unit into the dashboard and fix it to the car with four screws.