H9821MD_DFU_EN1_0214 2/14/05 11:14 AM Page 27
Timer Recording (cont’d) 27
●If you are recording from other equipment, select L1 or L2.To determine L1 or L2, refer to the Helpful Hints.
●If you are using a Cable Box/Satellite Receiver, select the Cable Box/Satellite Receiver output channel (03 or 04). Then, at the Cable Box/Satellite Receiver, select the channel you want to record. Leave the Cable Box/Satellite Receiver on for the timer recording. Details are on page 8.
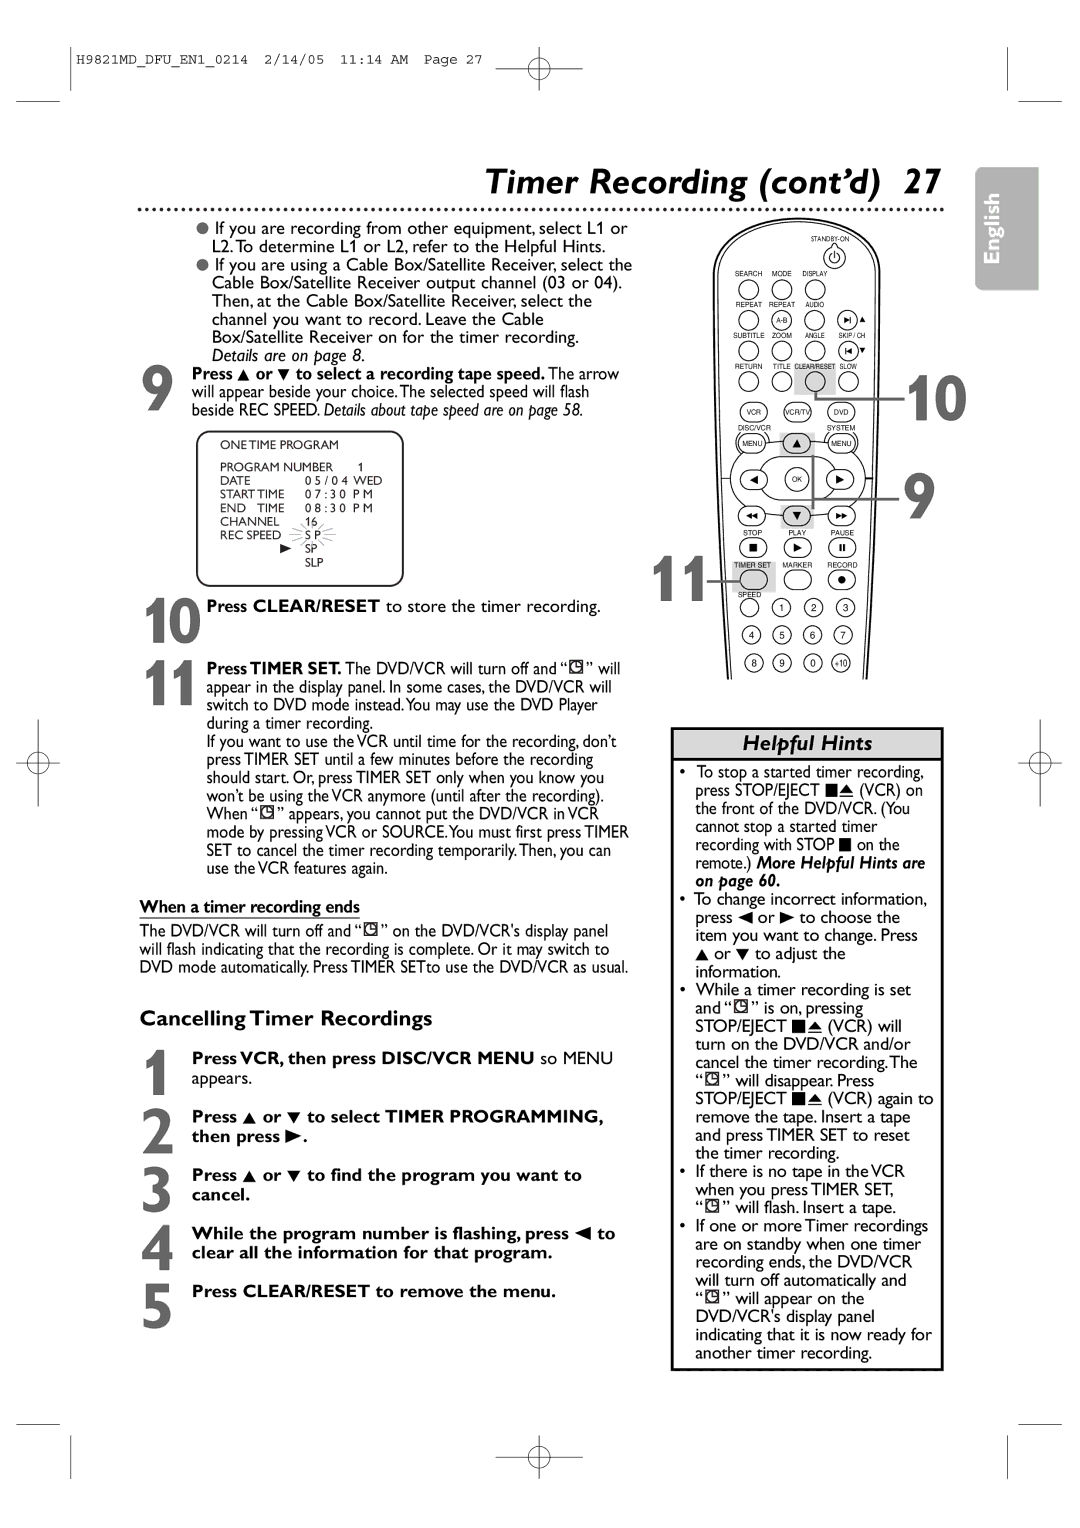
9 Press K or L to select a recording tape speed. The arrow will appear beside your choice.The selected speed will flash beside REC SPEED. Details about tape speed are on page 58.
ONE TIME PROGRAM |
| ||
PROGRAM NUMBER | 1 | ||
DATE | 0 5 | / 0 4 WED | |
START TIME | 0 7 | : 3 0 | P M |
END TIME | 0 8 | : 3 0 | P M |
CHANNEL | 16 |
|
|
REC SPEED | S P |
|
|
B | SP |
|
|
| SLP |
|
|
|
|
|
|
10Press CLEAR/RESET to store the timer recording.
11Press TIMER SET. The DVD/VCR will turn off and “![]() ” will appear in the display panel. In some cases, the DVD/VCR will switch to DVD mode instead.You may use the DVD Player during a timer recording.
” will appear in the display panel. In some cases, the DVD/VCR will switch to DVD mode instead.You may use the DVD Player during a timer recording.
If you want to use the VCR until time for the recording, don’t press TIMER SET until a few minutes before the recording should start. Or, press TIMER SET only when you know you won’t be using the VCR anymore (until after the recording). When “![]() ” appears, you cannot put the DVD/VCR in VCR mode by pressing VCR or SOURCE.You must first press TIMER SET to cancel the timer recording temporarily.Then, you can use the VCR features again.
” appears, you cannot put the DVD/VCR in VCR mode by pressing VCR or SOURCE.You must first press TIMER SET to cancel the timer recording temporarily.Then, you can use the VCR features again.
When a timer recording ends
The DVD/VCR will turn off and “![]() ” on the DVD/VCR's display panel will flash indicating that the recording is complete. Or it may switch to DVD mode automatically. Press TIMER SETto use the DVD/VCR as usual.
” on the DVD/VCR's display panel will flash indicating that the recording is complete. Or it may switch to DVD mode automatically. Press TIMER SETto use the DVD/VCR as usual.
Cancelling Timer Recordings
1 Press VCR, then press DISC/VCR MENU so MENU appears.
2 Press K or L to select TIMER PROGRAMMING, then press B.
3 Press K or L to find the program you want to cancel.
4 While the program number is flashing, press s to clear all the information for that program.
5 Press CLEAR/RESET to remove the menu.
|
|
|
| ||
| SEARCH | MODE | DISPLAY |
| |
| REPEAT REPEAT | AUDIO |
|
| |
|
|
|
|
| |
| SUBTITLE | ZOOM | ANGLE | SKIP / CH |
|
| RETURN | TITLE CLEAR/RESET SLOW | 10 | ||
| VCR | VCR/TV | DVD | ||
| DISC/VCR |
|
| SYSTEM | |
| MENU |
|
| MENU | 9 |
|
| OK |
|
| |
11 | STOP | PLAY | PAUSE |
| |
TIMER SET | MARKER | RECORD |
| ||
SPEED
1 2 3
4 5 6 7
8 9 0 +10
Helpful Hints
•To stop a started timer recording, press STOP/EJECT CA (VCR) on the front of the DVD/VCR. (You cannot stop a started timer recording with STOP C on the remote.) More Helpful Hints are on page 60.
•To change incorrect information, press s or B to choose the item you want to change. Press K or L to adjust the information.
•While a timer recording is set and “ ![]() ” is on, pressing STOP/EJECT C A (VCR) will turn on the DVD/VCR and/or cancel the timer recording.The
” is on, pressing STOP/EJECT C A (VCR) will turn on the DVD/VCR and/or cancel the timer recording.The
“![]() ” will disappear. Press STOP/EJECT C A (VCR) again to remove the tape. Insert a tape and press TIMER SET to reset the timer recording.
” will disappear. Press STOP/EJECT C A (VCR) again to remove the tape. Insert a tape and press TIMER SET to reset the timer recording.
•If there is no tape in the VCR when you press TIMER SET,
“ ” will flash. Insert a tape.
•If one or more Timer recordings are on standby when one timer recording ends, the DVD/VCR will turn off automatically and
“![]() ” will appear on the DVD/VCR's display panel indicating that it is now ready for another timer recording.
” will appear on the DVD/VCR's display panel indicating that it is now ready for another timer recording.
