Map the audio inputs to the | ||||||||||
When you connect your Home Theater | connected devices |
|
|
|
| |||||
System to devices that support standby, you |
|
|
|
|
|
|
|
|
|
|
can use your Home Theater System remote |
|
|
| Note |
|
|
|
| ||
|
|
|
|
|
|
| ||||
control to put your Home Theater System |
|
|
|
|
|
|
| |||
|
|
|
|
|
|
|
|
|
| |
and all connected HDMI devices in standby |
| • Before you start, ensure that the audio output | ||||||||
mode. You can perform |
|
| of the HDMI TV and other HDMI devices have | |||||||
using the remote control from any of the |
|
| been connected to the audio input jacks on | |||||||
|
| this Home Theater System. | ||||||||
connected HDMI devices. |
|
| ||||||||
|
|
|
|
|
|
|
|
|
| |
|
|
|
|
|
|
|
|
|
| |
System Audio Control |
|
|
|
|
|
|
|
|
|
|
When you connect your Home Theater |
|
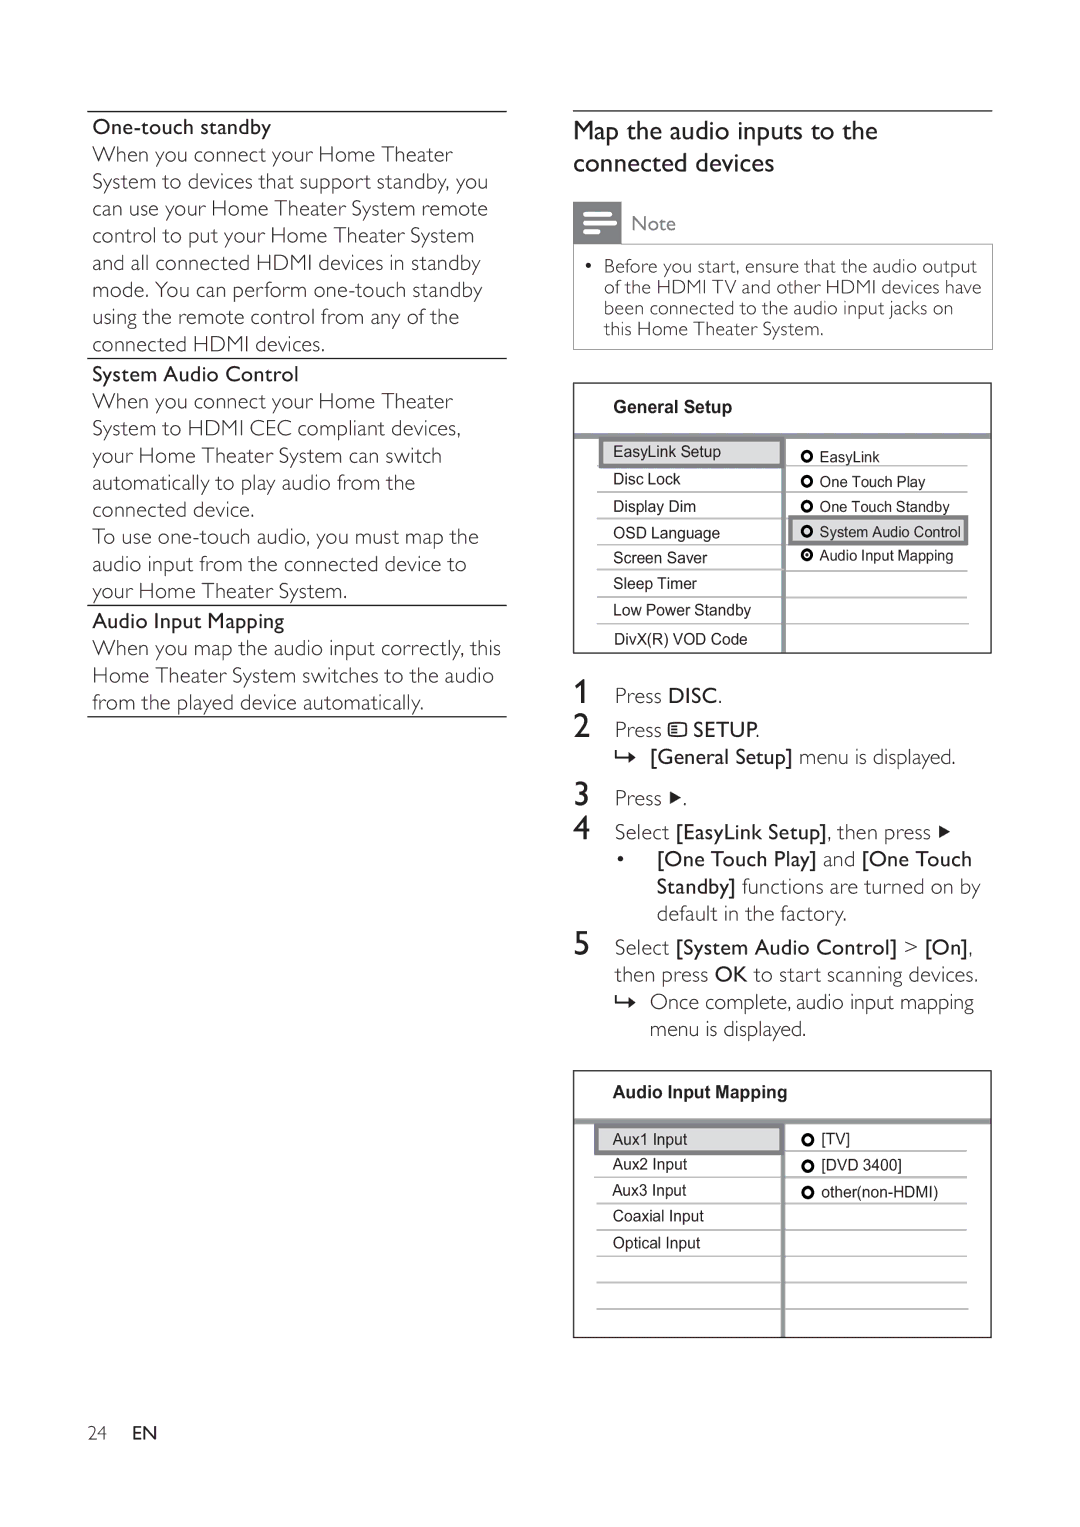
| General Setup |
|
|
|
| |||
System to HDMI CEC compliant devices, |
|
|
|
|
|
|
|
|
|
|
your Home Theater System can switch |
|
| EasyLink Setup |
|
| EasyLink |
| |||
automatically to play audio from the |
|
| Disc Lock |
|
| One Touch Play |
| |||
connected device. |
|
| Display Dim |
|
| One Touch Standby |
|
| ||
To use |
|
| OSD Language |
|
| System Audio Control |
|
|
| |
audio input from the connected device to |
|
| Screen Saver |
|
| Audio Input Mapping |
|
|
| |
|
|
|
|
|
|
|
| |||
your Home Theater System. |
|
| Sleep Timer |
|
|
|
|
|
| |
|
|
|
|
|
|
|
|
|
| |
|
| Low Power Standby |
|
|
|
|
|
| ||
Audio Input Mapping |
|
|
|
|
|
|
|
| ||
|
| DivX(R) VOD Code |
|
|
|
|
|
| ||
When you map the audio input correctly, this |
|
|
|
|
|
|
|
| ||
|
|
|
|
|
|
|
|
|
| |
Home Theater System switches to the audio | 1 | Press DISC. |
|
|
|
| ||||
from the played device automatically. |
|
|
|
| ||||||
| 2 | Press SETUP. |
|
|
|
| ||||
|
|
|
|
| ||||||
| 3 | » [General Setup] menu is displayed. | ||||||||
| Press . |
|
|
|
| |||||
| 4 Select [EasyLink Setup], then press | |||||||||
|
|
| • [One Touch Play] and [One Touch | |||||||
|
|
|
| Standby] functions are turned on by | ||||||
|
|
|
| default in the factory. | ||||||
| 5 Select [System Audio Control] > [On], | |||||||||
|
|
| then press OK to start scanning devices. | |||||||
|
|
| » Once complete, audio input mapping | |||||||
|
|
|
| menu is displayed. |
|
|
|
| ||
|
|
|
|
|
|
|
|
| ||
|
|
| Audio Input Mapping |
|
|
|
| |||
|
|
|
|
|
|
| ||||
|
|
| Aux1 Input |
|
| [TV] |
| |||
|
|
| Aux2 Input |
|
| [DVD 3400] |
| |||
|
|
| Aux3 Input |
| ||||||
|
|
| Coaxial Input |
|
|
|
|
| ||
|
|
|
|
|
|
|
|
| ||
|
|
| Optical Input |
|
|
|
|
| ||
|
|
|
|
|
|
|
|
|
|
|
|
|
|
|
|
|
|
|
|
|
|
|
|
|
|
|
|
|
|
|
|
|
24EN