CHARACTER INPUT/PICTURE DRAWING
1 |
|
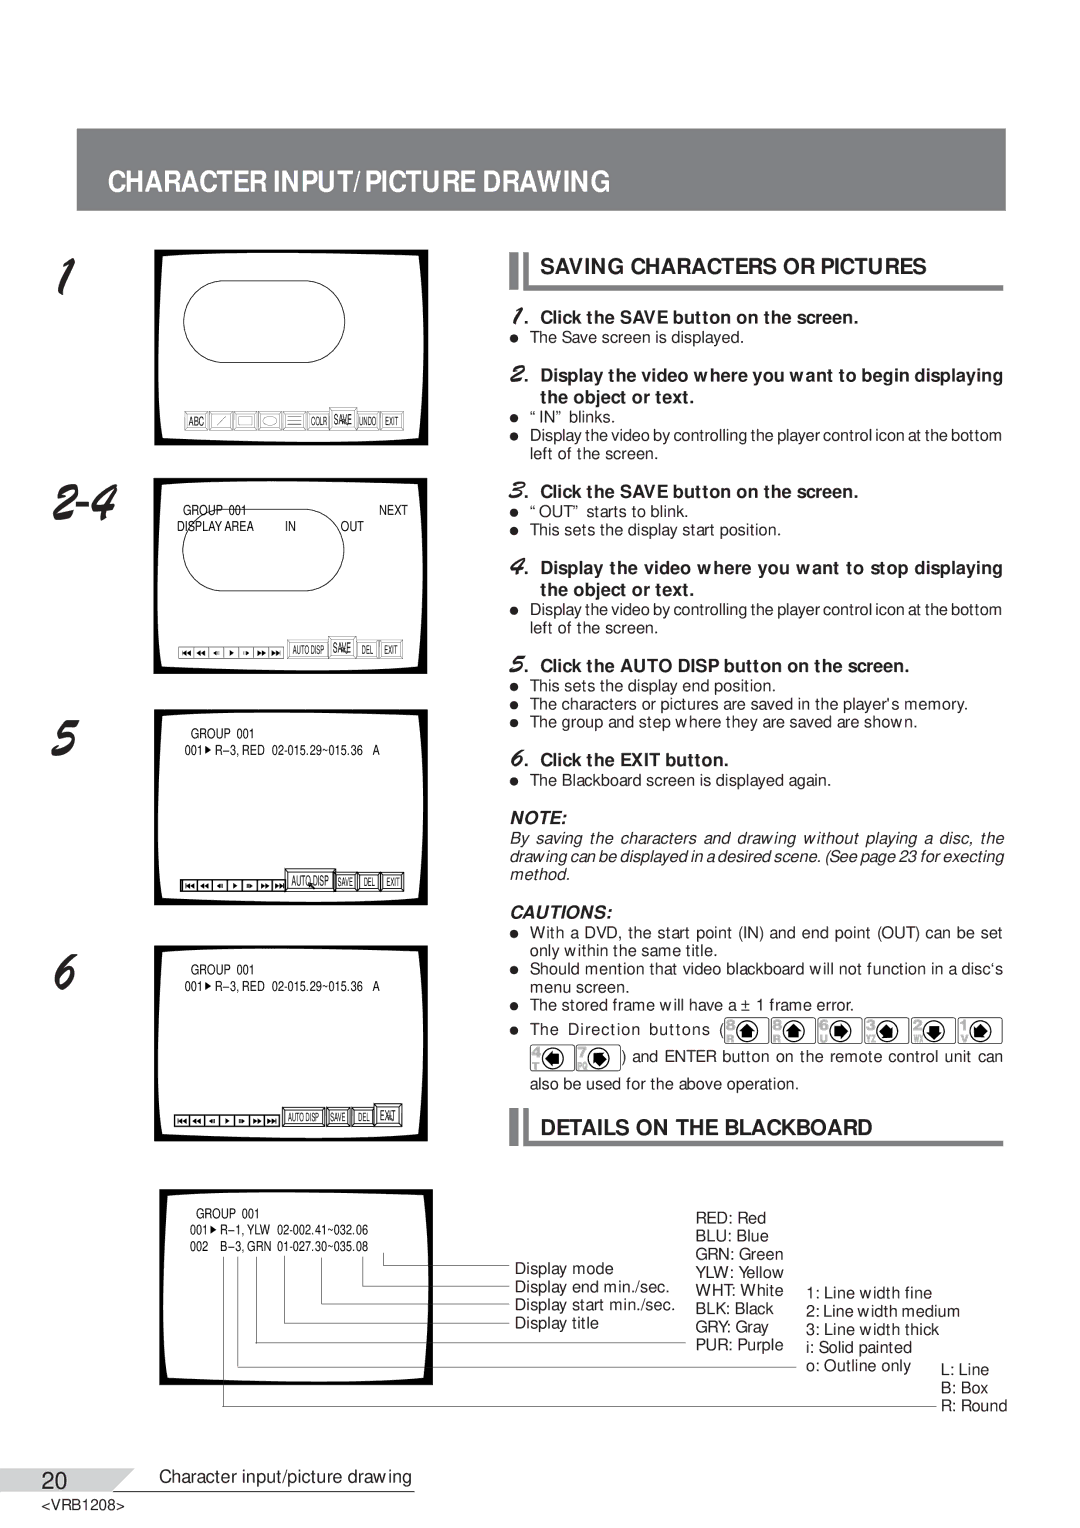
| SAVING CHARACTERS OR PICTURES |
|
|
| |
|
|
|
|
| 1. Click the SAVE button on the screen. | ||
ÖThe Save screen is displayed.
2. Display the video where you want to begin displaying the object or text.
ABC | COLR SAVE UNDO EXIT | Ö | “IN” blinks. |
|
| Ö | Display the video by controlling the player control icon at the bottom |
left of the screen.
5
6
GROUP 001 |
| NEXT |
DISPLAY AREA | IN | OUT |
AUTO DISP SAVE DEL | EXIT |
GROUP 001 |
|
001 | A |
![]()
![]()
![]()
![]()
![]()
![]()
![]()
![]()
![]()
![]()
![]()
![]()
![]()
![]()
![]()
![]()
![]()
![]()
![]() AUTO DISP
AUTO DISP ![]() SAVE DEL EXIT
SAVE DEL EXIT
GROUP 001
001
AUTO DISP SAVE | DEL EXIT |
GROUP 001
001
002
3. Click the SAVE button on the screen.
Ö“OUT” starts to blink.
ÖThis sets the display start position.
4. Display the video where you want to stop displaying the object or text.
ÖDisplay the video by controlling the player control icon at the bottom left of the screen.
5. Click the AUTO DISP button on the screen.
ÖThis sets the display end position.
ÖThe characters or pictures are saved in the player's memory.
ÖThe group and step where they are saved are shown.
6. Click the EXIT button.
ÖThe Blackboard screen is displayed again.
NOTE:
By saving the characters and drawing without playing a disc, the drawing can be displayed in a desired scene. (See page 23 for execting method.
CAUTIONS:
ÖWith a DVD, the start point (IN) and end point (OUT) can be set only within the same title.
ÖShould mention that video blackboard will not function in a disc‘s menu screen.
ÖThe stored frame will have a ± 1 frame error.
ÖThe Direction buttons (![]()
![]()
![]()
![]()
![]()
![]()
![]()
![]()
![]() ) and ENTER button on the remote control unit can also be used for the above operation.
) and ENTER button on the remote control unit can also be used for the above operation.

 DETAILS ON THE BLACKBOARD
| RED: Red |
|
|
| BLU: Blue |
|
|
Display mode | GRN: Green |
|
|
YLW: Yellow |
|
| |
Display end min./sec. | WHT: White | 1: Line width fine |
|
Display start min./sec. | BLK: Black | 2: Line width medium | |
Display title | GRY: Gray | 3: Line width thick |
|
| PUR: Purple | i: Solid painted |
|
|
| o: Outline only | L: Line |
|
|
| B: Box |
|
|
| R: Round |
20Character input/picture drawing
<VRB1208>