
MEP-7000 specifications
The Pioneer MEP-7000 is a cutting-edge digital DJ controller that has redefined the landscape of live performance and mixing. Designed with the professional DJ in mind, this unit combines innovative technologies and an intuitive user interface, making it a powerful tool for both live performances and studio sessions.One of the most prominent features of the MEP-7000 is its two-deck playback capability, allowing DJs to mix and manipulate two audio sources simultaneously. This dual functionality is complemented by its comprehensive array of onboard controls, including large jog wheels, faders, and multifunction buttons, making it easy to access various functions and effects on the fly. The device's built-in 24-bit sound card ensures high-quality audio output, providing crystal-clear sound to all connected systems.
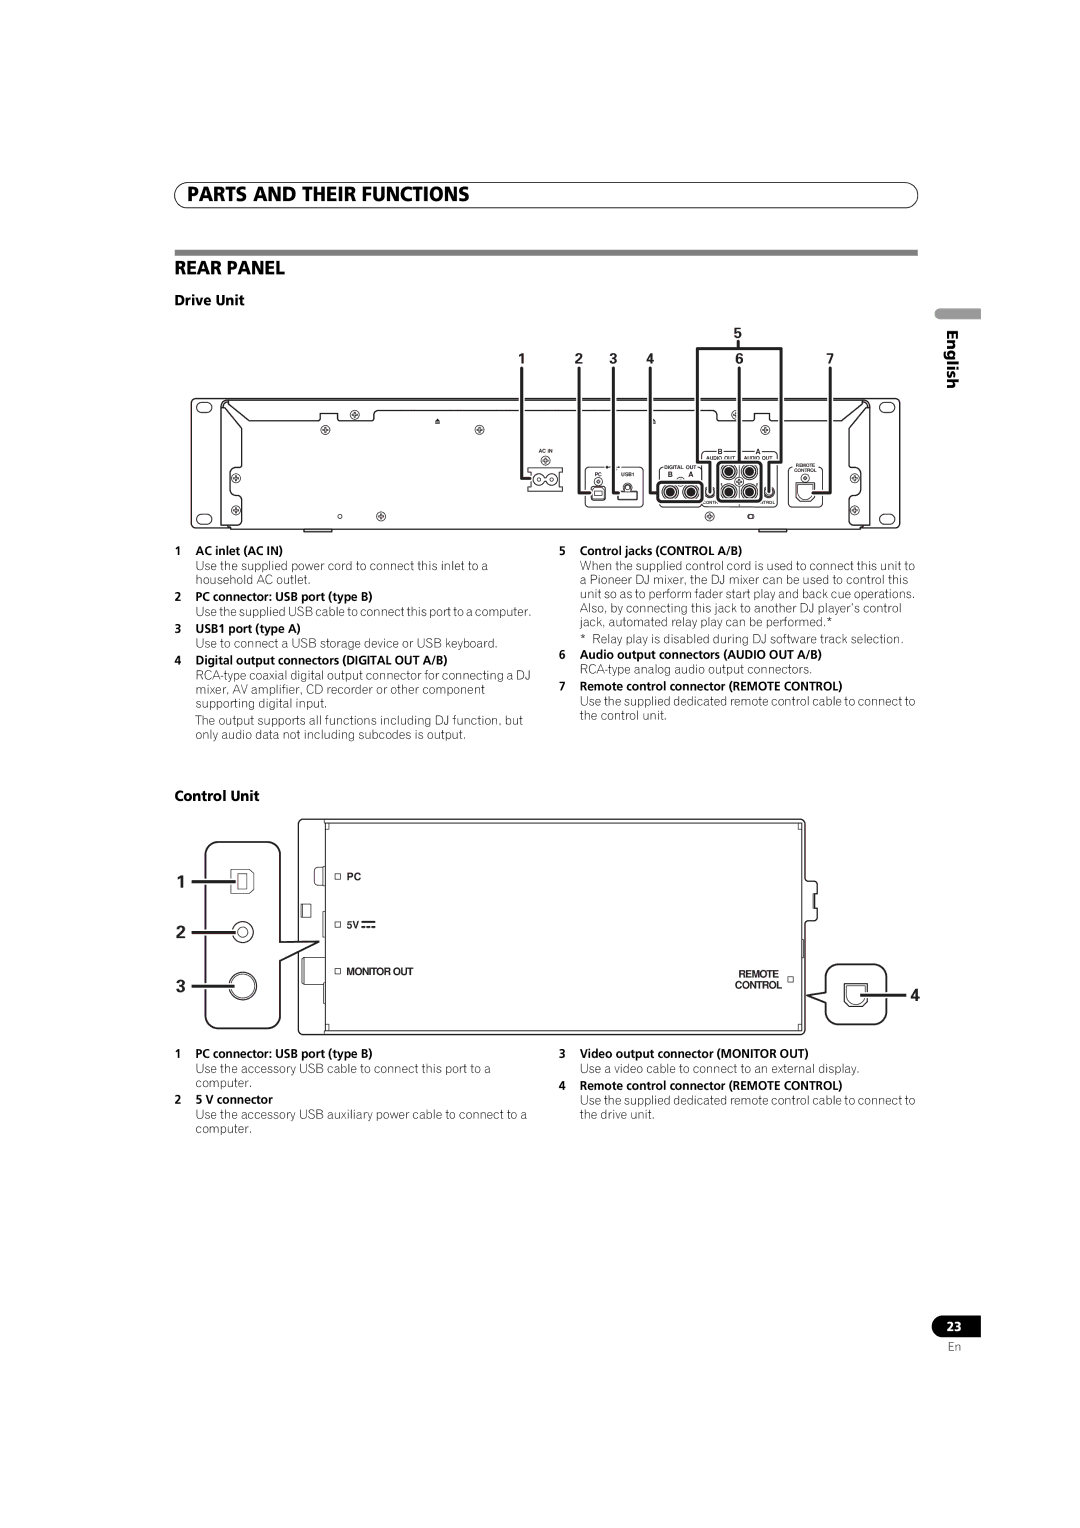
Another key technology integrated into the MEP-7000 is its compatibility with multiple media formats, including CD, USB drives, and even computer-based music libraries. This versatility allows DJs to seamlessly transition between different media types, adapting to any performance environment. The unit supports various audio file formats, ensuring that users can work with their preferred music without limitations.
The MEP-7000 also features an advanced display interface that provides real-time feedback on track information, waveforms, and settings. DJs can easily navigate through their libraries, adjust effects, and make crucial performance decisions quickly, without the need to glance away from the crowd.
In addition to its robust performance capabilities, the MEP-7000 incorporates various effects and sound manipulation tools, including echo, flanger, and reverb, which can be applied in real-time. This allows DJs to add their unique flair to mixes, enhancing the overall live experience for their audience.
User-friendliness is a hallmark of the MEP-7000, with its layout designed for efficiency and ease of use. The controller's ergonomic design facilitates comfortable operation during extended sets, while its durable build ensures reliability in high-energy environments.
Overall, the Pioneer MEP-7000 stands out as a versatile and powerful solution for today's professional DJs. With its combination of high-quality sound, multiple format compatibility, and intuitive controls, it remains an essential piece of equipment for any serious DJ who seeks to elevate their performance to new heights.