Using the Tuner
Naming Memorized Stations
8Press ENTER when you have got the charac- ters you want to enter.
You can input a name of up to four characters for each preset station in the receiver’s memory (see the previous page). This name can be anything you choose. For example, you could input "BBC1" for that station and when you listen to it the name, rather than the fre- quency number, will appear on your display.
1 |
|
|
| SLEEP |
DVD | TV/SAT | FRONT |
| |
|
|
| DIMMER | |
DVR/ VCR | FM / AM |
| SOUND | |
| AUTO | SURROUND ADVANCED | ||
| MODE | |||
| SETUP | TEST TONE | CH_SELECT | ROOM |
| SETUP | |||
ENTER
MUTE
MASTER
VOLUME
TOP MENU | DISPLAY | T.EDIT MENU | 4 | |
DTV MENU | TUNE |
|
| |
ST | TUNE |
| ST | 3,5,6,8 |
| ENTER |
|
| |
AUDIO |
|
| SUBTITLE |
|
|
|
| GUIDE |
|
CH RETURN | DTV ON /OFF | DTV INFO |
| |
2 | CLASS | MPX | D.ACCESS |
|
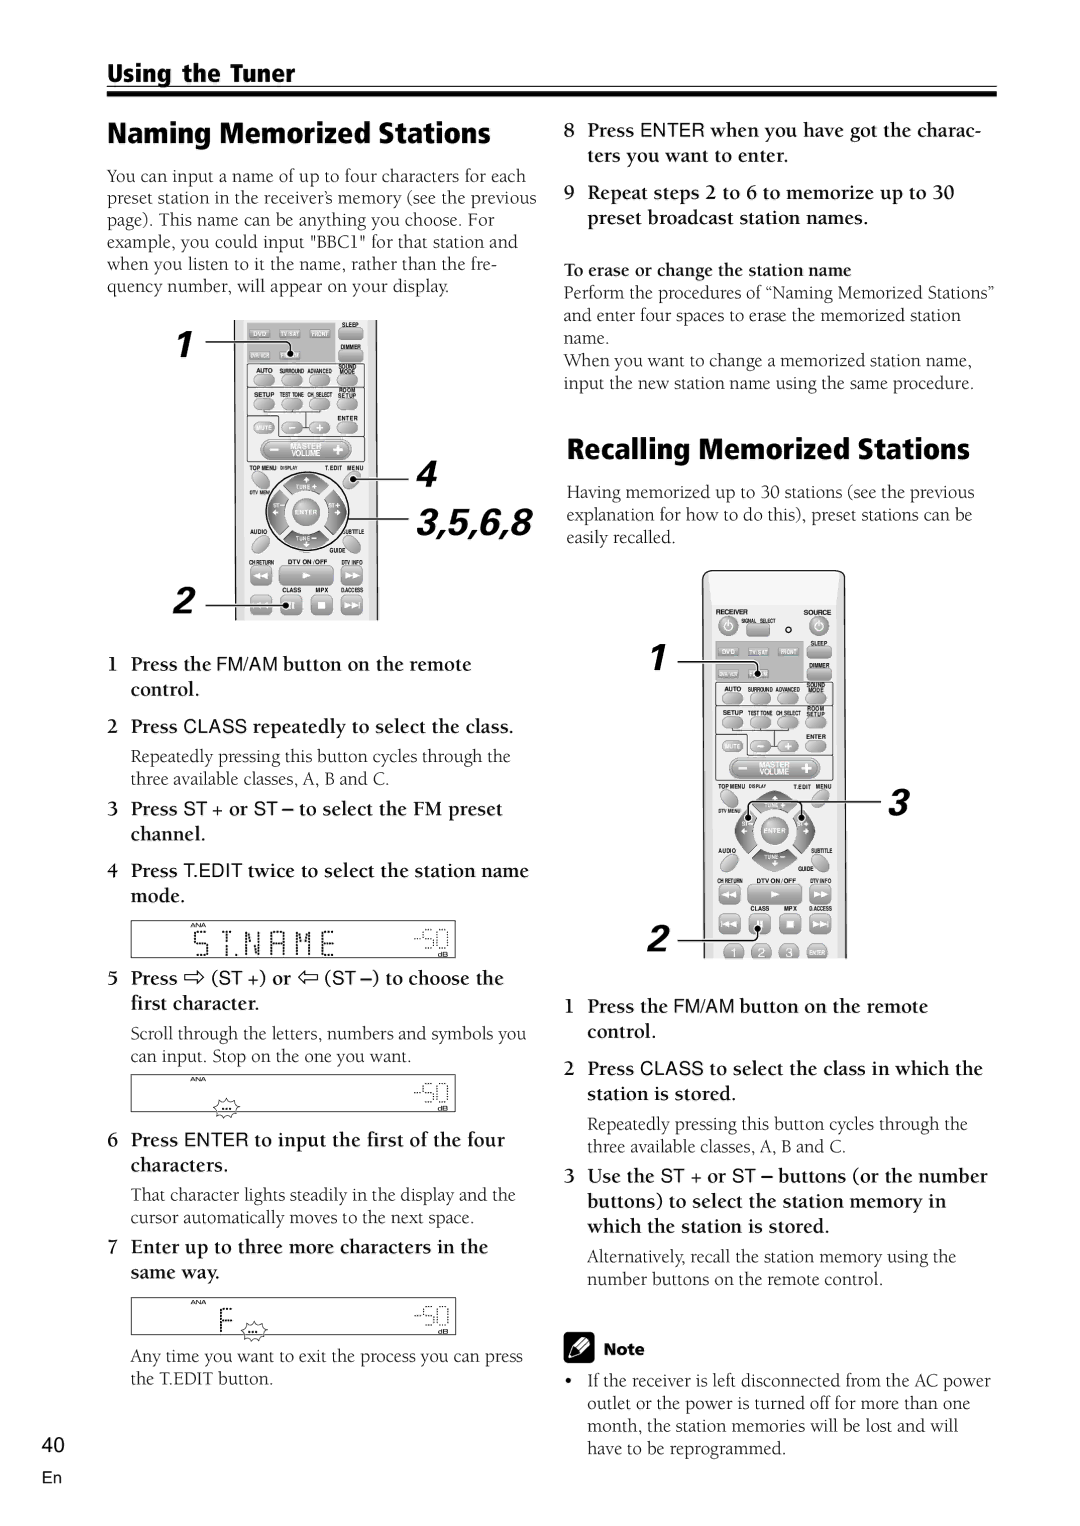
1Press the FM/AM button on the remote control.
2Press CLASS repeatedly to select the class.
Repeatedly pressing this button cycles through the three available classes, A, B and C.
3Press ST + or ST – to select the FM preset channel.
4Press T.EDIT twice to select the station name mode.
5Press ] (ST +) or } (ST
Scroll through the letters, numbers and symbols you can input. Stop on the one you want.
6Press ENTER to input the first of the four characters.
That character lights steadily in the display and the cursor automatically moves to the next space.
7Enter up to three more characters in the same way.
Any time you want to exit the process you can press the T.EDIT button.
40
9Repeat steps 2 to 6 to memorize up to 30 preset broadcast station names.
To erase or change the station name
Perform the procedures of “Naming Memorized Stations” and enter four spaces to erase the memorized station name.
When you want to change a memorized station name, input the new station name using the same procedure.
Recalling Memorized Stations
Having memorized up to 30 stations (see the previous explanation for how to do this), preset stations can be easily recalled.
| RECEIVER |
|
| SOURCE |
|
| SIGNAL SELECT |
|
|
| |
1 |
|
|
| SLEEP |
|
DVD | TV/SAT | FRONT |
|
| |
|
|
| DIMMER |
| |
DVR/ VCR | FM / AM |
|
|
| |
| AUTO | SURROUND ADVANCED | SOUND |
| |
| MODE |
| |||
| SETUP | TEST TONE | CH_SELECT | ROOM |
|
| SETUP |
| |||
|
|
|
| ENTER |
|
| MUTE |
|
|
|
|
|
| MASTER |
|
| |
|
| VOLUME |
|
| |
| TOP MENU | DISPLAY | T.EDIT MENU | 3 | |
| DTV MENU | TUNE |
| ||
|
|
|
|
| |
| ST |
| ST |
|
|
|
| ENTER |
|
| |
AUDIO | TUNE |
| SUBTITLE |
|
|
| |
|
|
| GUIDE |
CH RETURN | DTV ON /OFF | DTV INFO | |
| CLASS | MPX | D.ACCESS |
2 ![]()
ENTER
1Press the FM/AM button on the remote control.
2Press CLASS to select the class in which the station is stored.
Repeatedly pressing this button cycles through the three available classes, A, B and C.
3Use the ST + or ST – buttons (or the number buttons) to select the station memory in which the station is stored.
Alternatively, recall the station memory using the number buttons on the remote control.
•If the receiver is left disconnected from the AC power outlet or the power is turned off for more than one month, the station memories will be lost and will have to be reprogrammed.
En
