Polycom Digital Signage Server Getting Started Guide | Rack Installation |
|
|
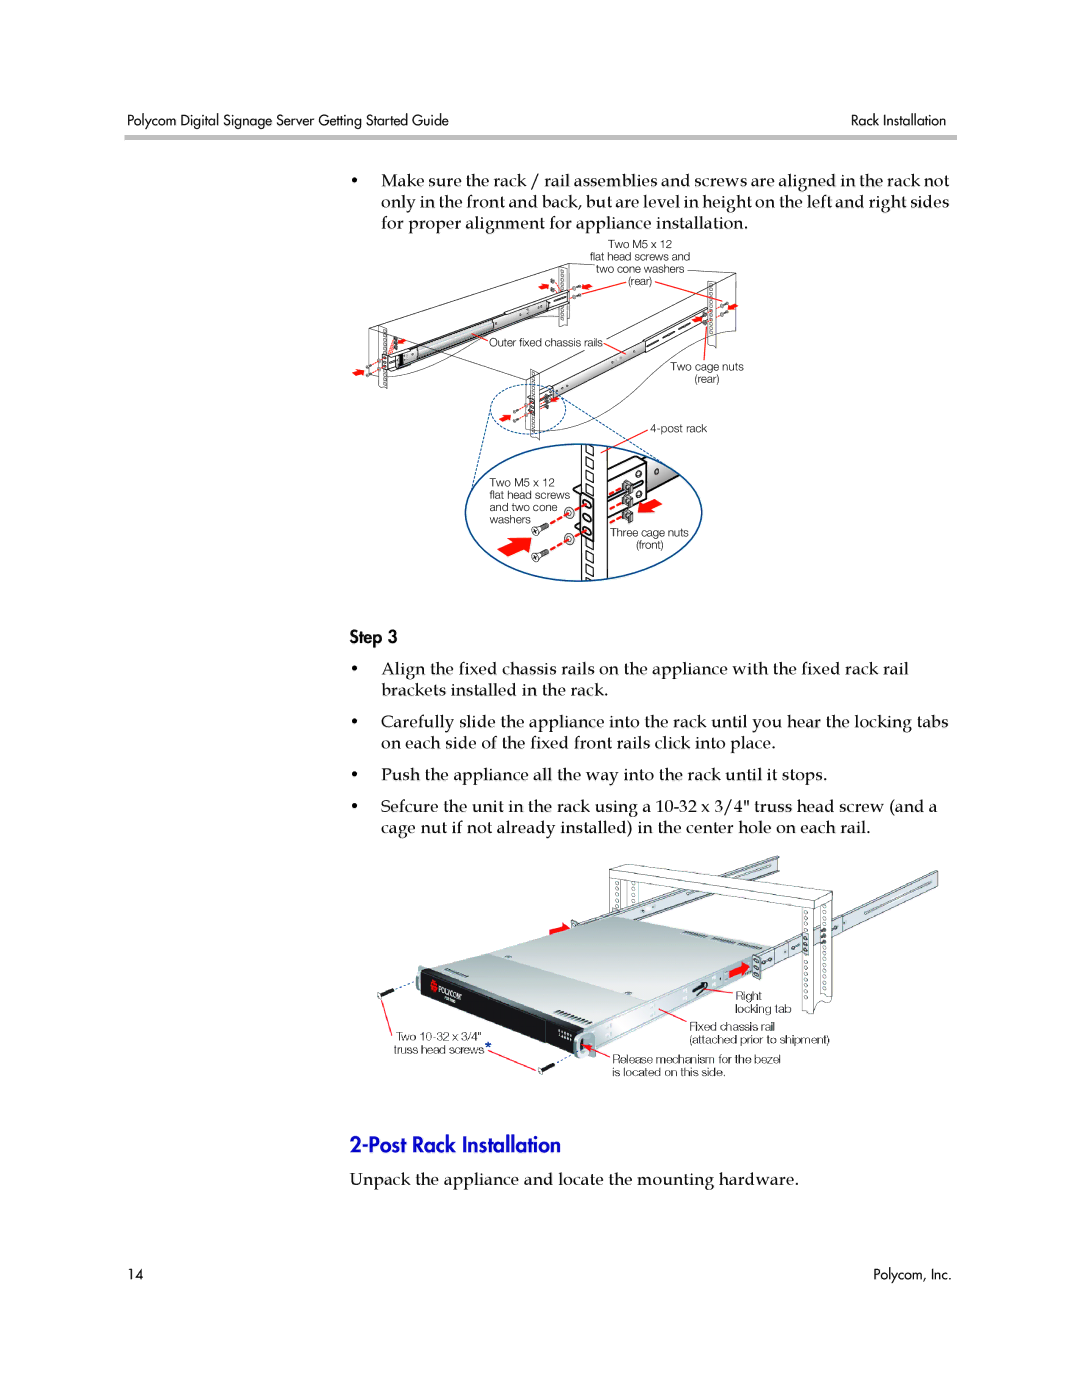
•Make sure the rack / rail assemblies and screws are aligned in the rack not only in the front and back, but are level in height on the left and right sides
for proper alignment for appliance installation.
Two M5 x 12
flat head screws and
two cone washers
(rear)
Outer fixed chassis rails
Two cage nuts
(rear)
Two M5 x 12 ![]() flat head screws and two cone
flat head screws and two cone ![]() washers
washers ![]()
![]()
Three cage nuts (front)
Step 3
•Align the fixed chassis rails on the appliance with the fixed rack rail brackets installed in the rack.
•Carefully slide the appliance into the rack until you hear the locking tabs on each side of the fixed front rails click into place.
•Push the appliance all the way into the rack until it stops.
•Sefcure the unit in the rack using a
2-Post Rack Installation
Unpack the appliance and locate the mounting hardware.
14 | Polycom, Inc. |