Rack Installation | Polycom Digital Signage Server Hardware Setup |
|
|
NOTE: The following installation procedures for are for use with the rails and hardware provided in your ship kit. If different style rails are being used, or if your rack requires different hardware, refer to the instructions provided with your rail or rack ship kit.
NOTE: When removing the appliance from the
Step 1
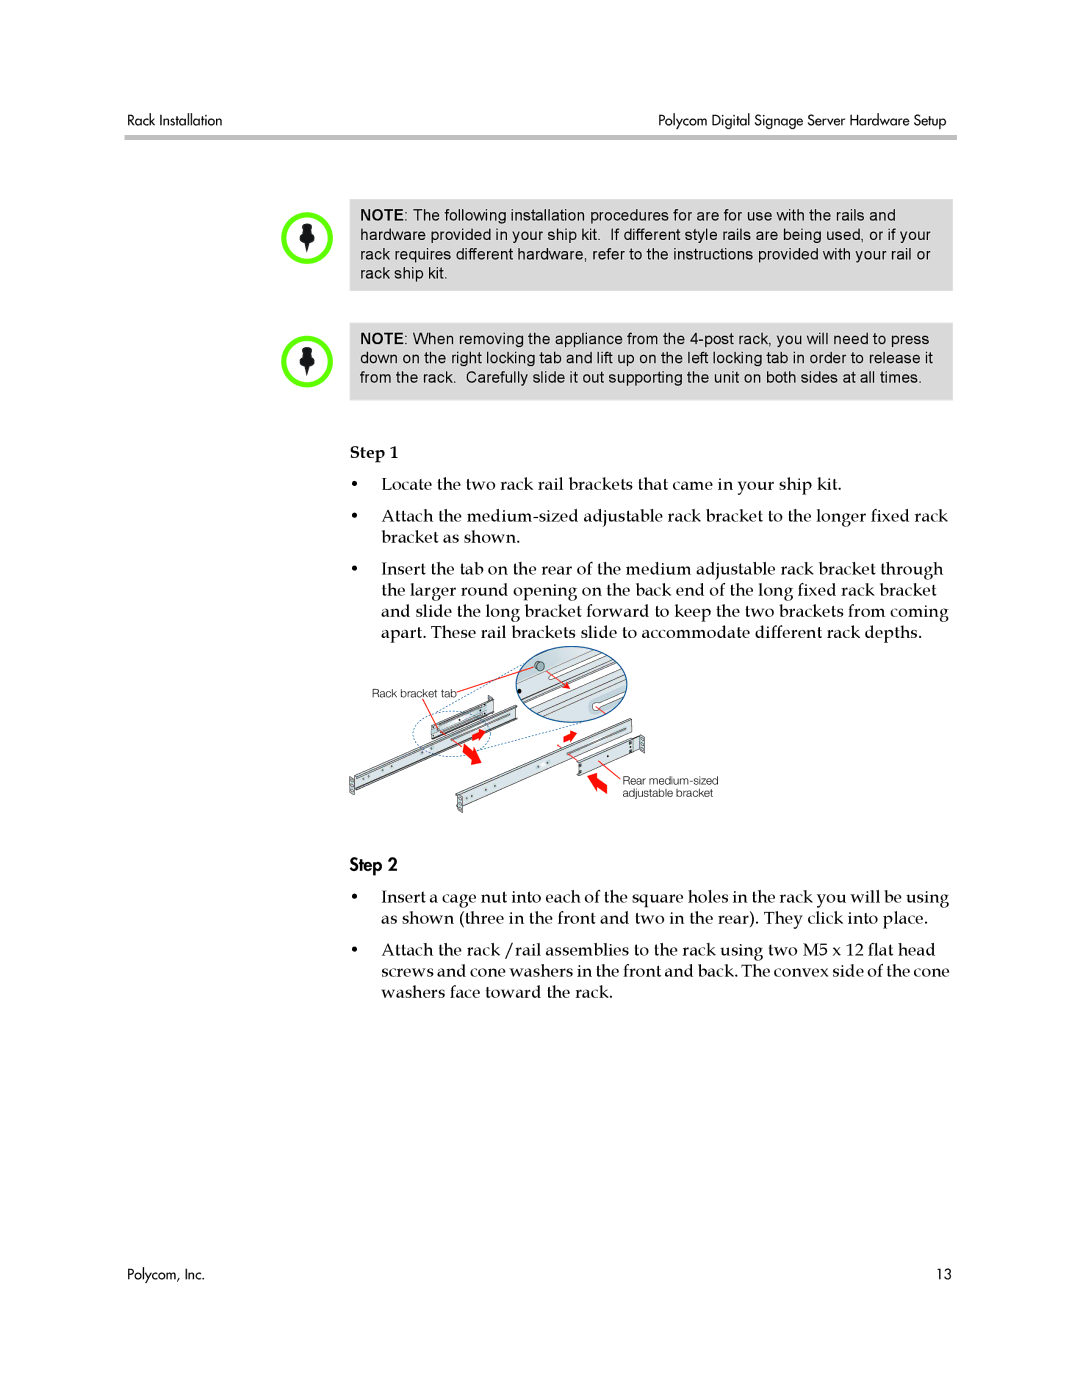
•Locate the two rack rail brackets that came in your ship kit.
•Attach the
•Insert the tab on the rear of the medium adjustable rack bracket through the larger round opening on the back end of the long fixed rack bracket and slide the long bracket forward to keep the two brackets from coming apart. These rail brackets slide to accommodate different rack depths.
Rack bracket tab
Rear
Step 2
•Insert a cage nut into each of the square holes in the rack you will be using as shown (three in the front and two in the rear). They click into place.
•Attach the rack /rail assemblies to the rack using two M5 x 12 flat head screws and cone washers in the front and back. The convex side of the cone washers face toward the rack.
Polycom, Inc. | 13 |