Installing SoundStation IP 3000
Preparing for Installation
If you are installing the SoundStation IP yourself, first:
Verify that your system administrator has prepared the network and IP telephony infrastructure for the SoundStation IP 3000.
Caution: Be sure to read the Release Notes (online at www.polycom.com) and both the Parts List and the Safety Notices sections in this guide before you set up and use this product.
Installing and Connecting to the Network
Instructions and User’s Guide
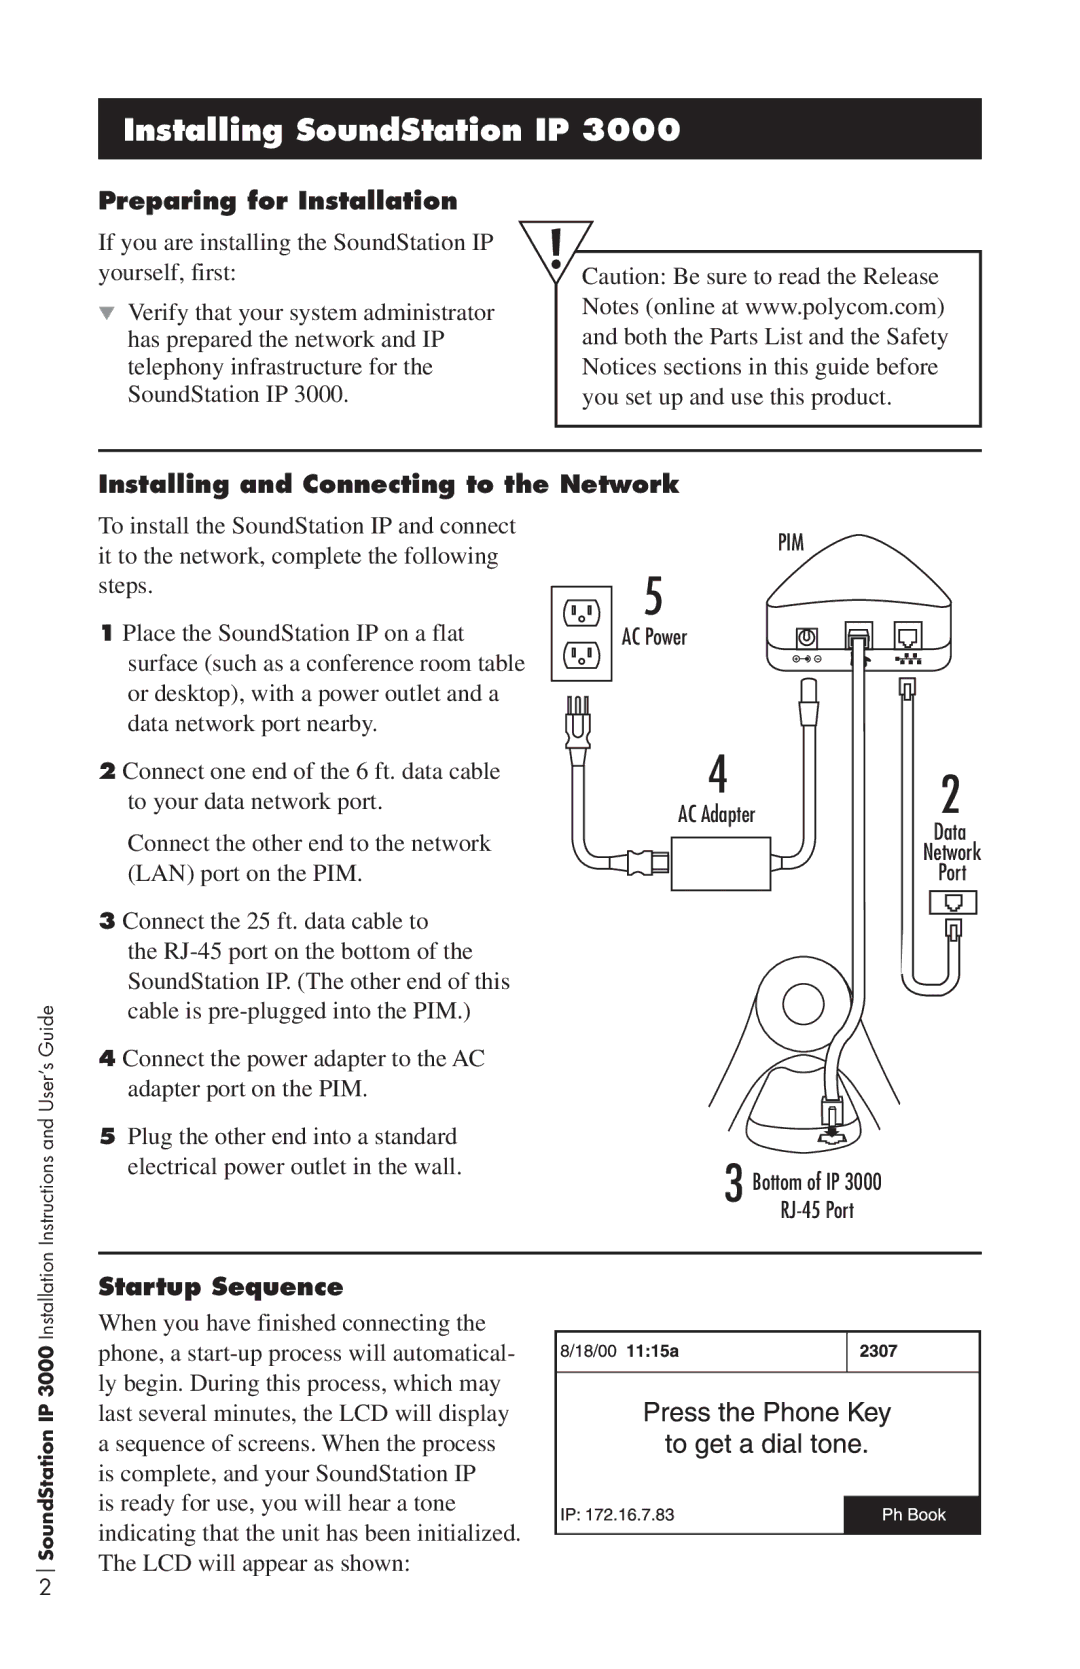
To install the SoundStation IP and connect it to the network, complete the following steps.
1 Place the SoundStation IP on a flat surface (such as a conference room table or desktop), with a power outlet and a data network port nearby.
2 Connect one end of the 6 ft. data cable to your data network port.
Connect the other end to the network (LAN) port on the PIM.
3 Connect the 25 ft. data cable to the
4 Connect the power adapter to the AC adapter port on the PIM.
5Plug the other end into a standard electrical power outlet in the wall.
PIM
5
AC Power
4 | 2 |
AC Adapter | |
| Data |
| Network |
| Port |
3Bottom of IP 3000
SoundStation IP 3000 Installation
Startup Sequence
When you have finished connecting the phone, a
is ready for use, you will hear a tone indicating that the unit has been initialized. The LCD will appear as shown:
2
