as in left picture. Put the battery in at the other end first and remount the bracket with its tongue matching under a bridge in the wall of base box from the right as arrowed in above left picture then apply the fixing screw. Please pay particular attention to the environment requirements for UPS battery in next chapter “USING THE TOUCH POS”.
WALL MOUNTING
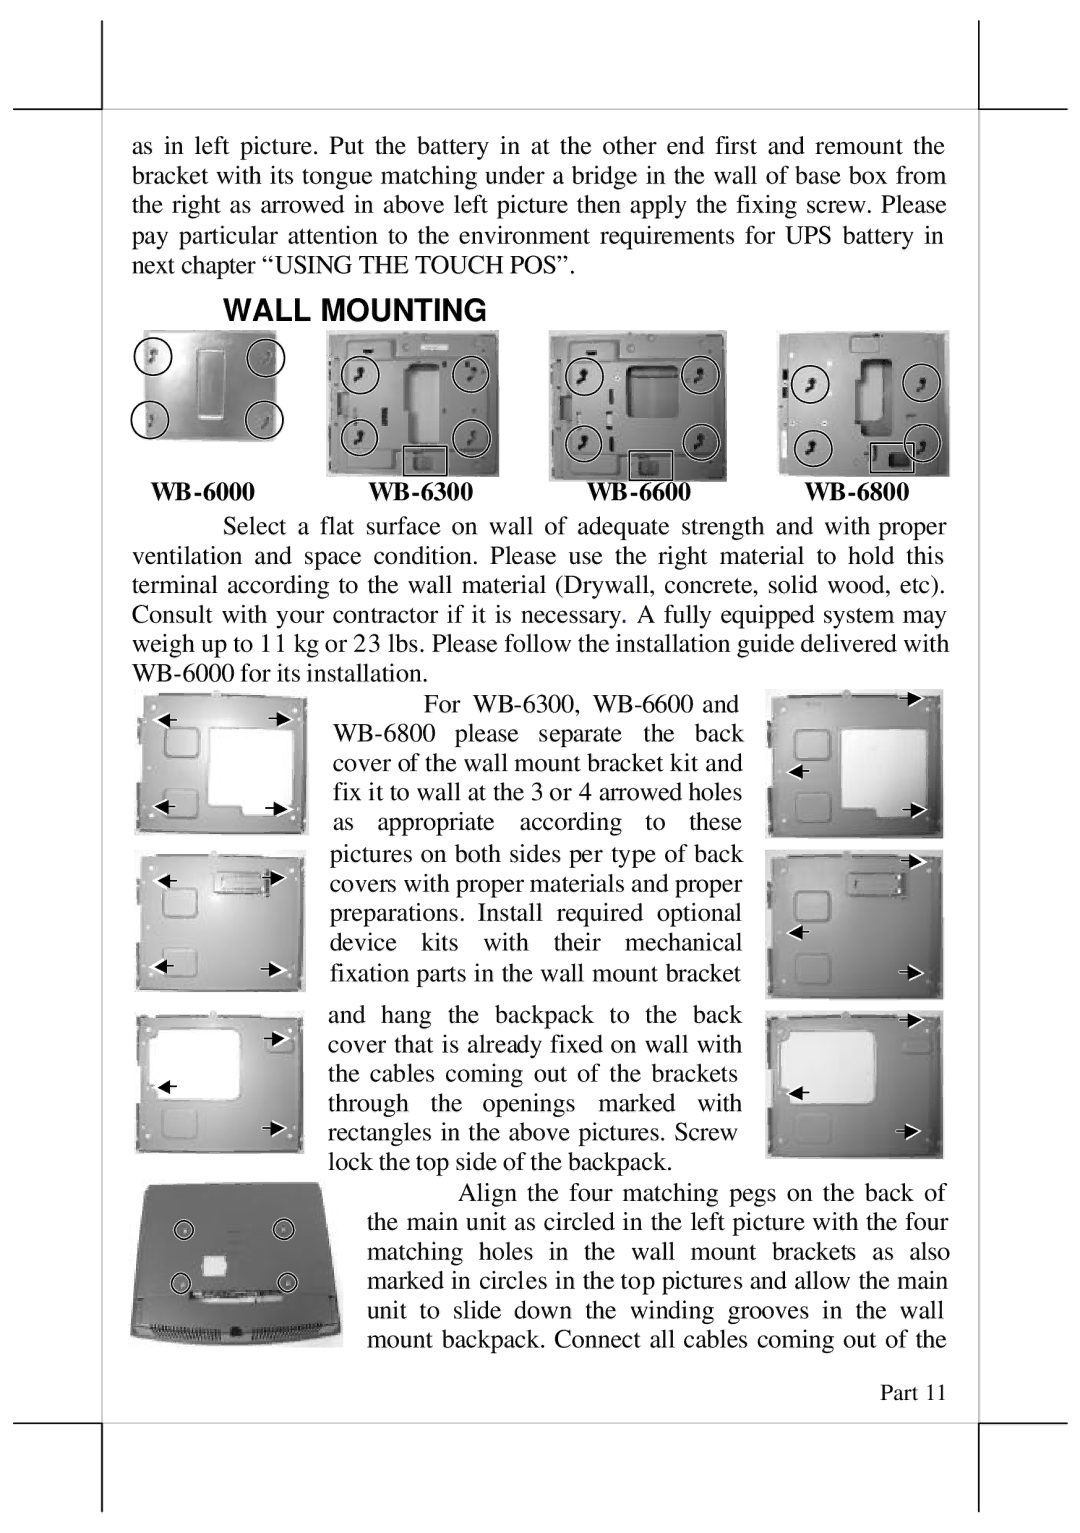
ventilation and space condition. Please use the right material to hold this terminal according to the wall material (Drywall, concrete, solid wood, etc). Consult with your contractor if it is necessary. A fully equipped system may weigh up to 11 kg or 23 lbs. Please follow the installation guide delivered with
For
cover of the wall mount bracket kit and fix it to wall at the 3 or 4 arrowed holes
as appropriate according to these pictures on both sides per type of back
covers with proper materials and proper preparations. Install required optional device kits with their mechanical fixation parts in the wall mount bracket
and hang the backpack to the back cover that is already fixed on wall with
the cables coming out of the brackets through the openings marked with rectangles in the above pictures. Screw lock the top side of the backpack.
Align the four matching pegs on the back of the main unit as circled in the left picture with the four matching holes in the wall mount brackets as also marked in circles in the top pictures and allow the main unit to slide down the winding grooves in the wall mount backpack. Connect all cables coming out of the
