Nevertheless, except Posiflex peripheral device, do not connect any other device to this port before the power in this port is disabled.
CAUTION: Please turn off the system power first! Then hold the base and move the terminal carefully.
Connecting Cables
To have the terminal ready for operation, please connect all required cables to the appropriate connectors. Please make sure that each connector is connected to the correct port with the correct orientation. Damages due to incorrect connection or orientation are not covered by product warranty!
Some connectors like the LAN or CR connector have to be gently inserted until a click is heard. It is recommended that connectors such as the COM port and VGA connector be screwed into place once seated. Please make sure that each connector has to be connected to the right device in the right way.
CAUTION: On doing any insertion or extraction of any connector, please always hold the connector head itself instead of pulling on the cable wire. Failure to do this could damage the cable and jack that is considered as an artificial destruction and is not covered by the warranty.
Preparing the Main Unit
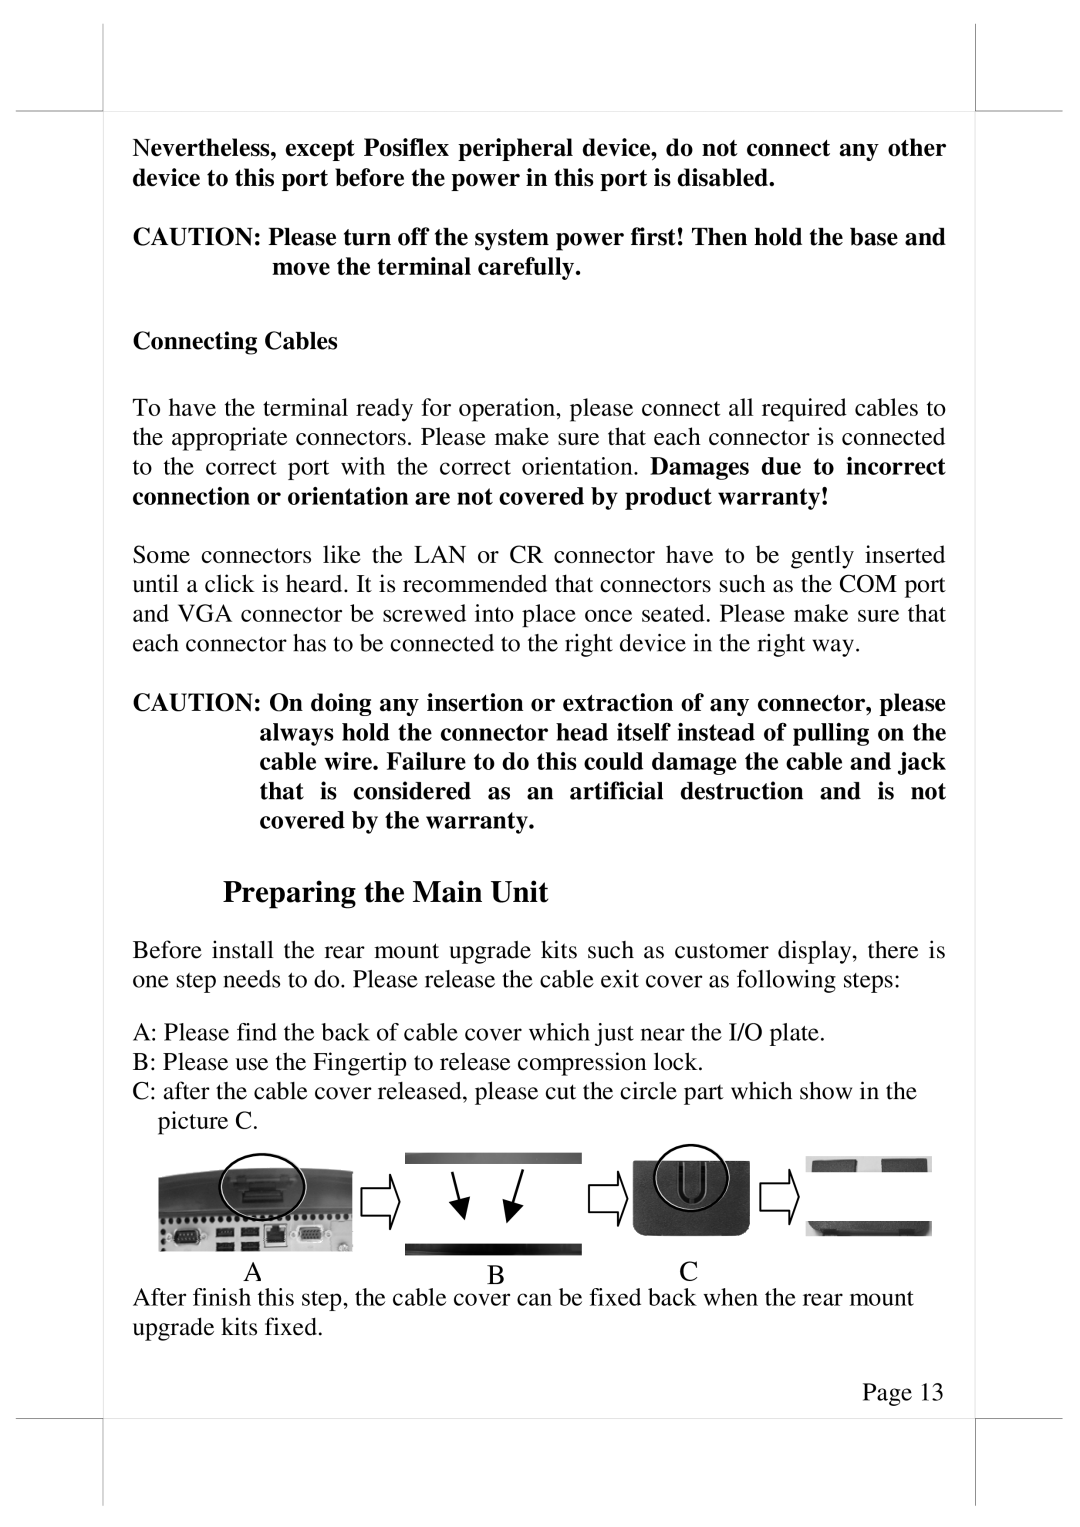
Before install the rear mount upgrade kits such as customer display, there is one step needs to do. Please release the cable exit cover as following steps:
A:Please find the back of cable cover which just near the I/O plate.
B:Please use the Fingertip to release compression lock.
C:after the cable cover released, please cut the circle part which show in the picture C.
ABC
After finish this step, the cable cover can be fixed back when the rear mount upgrade kits fixed.
Page 13