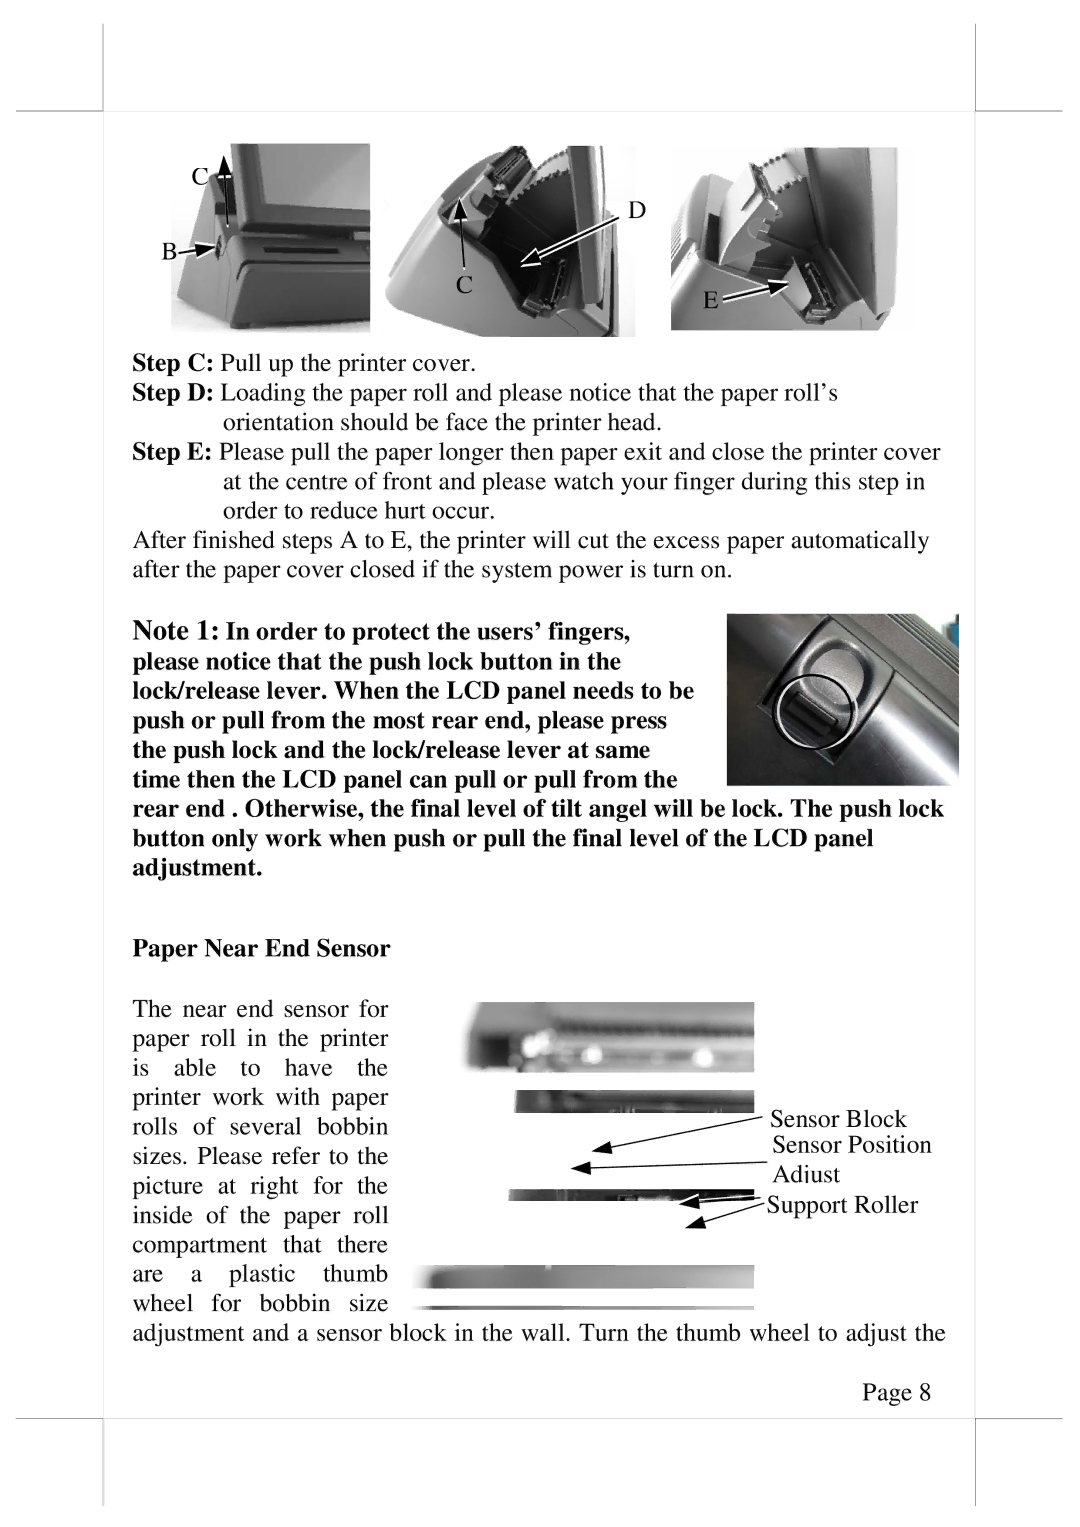
C
D
B![]()
C
E
Step C: Pull up the printer cover.
Step D: Loading the paper roll and please notice that the paper roll’s orientation should be face the printer head.
Step E: Please pull the paper longer then paper exit and close the printer cover at the centre of front and please watch your finger during this step in order to reduce hurt occur.
After finished steps A to E, the printer will cut the excess paper automatically after the paper cover closed if the system power is turn on.
Note 1: In order to protect the users’ fingers, please notice that the push lock button in the lock/release lever. When the LCD panel needs to be push or pull from the most rear end, please press the push lock and the lock/release lever at same time then the LCD panel can pull or pull from the
rear end . Otherwise, the final level of tilt angel will be lock. The push lock button only work when push or pull the final level of the LCD panel adjustment.
Paper Near End Sensor |
| ||||
The near end sensor for |
| ||||
paper roll in the printer |
| ||||
is able to have the |
| ||||
printer work with paper | Sensor Block | ||||
rolls | of several | bobbin | |||
Sensor Position | |||||
sizes. Please refer to the | |||||
Adjust | |||||
picture | at right for the | ||||
Support Roller | |||||
inside of the paper roll | |||||
| |||||
compartment that there |
| ||||
are | a | plastic | thumb |
| |
wheel | for bobbin size |
| |||
adjustment and a sensor block in the wall. Turn the thumb wheel to adjust the Page 8