Adjustments
![]() Disconnect machine from power source before making adjustments.
Disconnect machine from power source before making adjustments.
Tools required for adjustments:
8mm & 12mm wrenches 4mm hex wrench
machinist's protractor or adjustable square steel straight edge
Cutter Guard
Removing Guard:
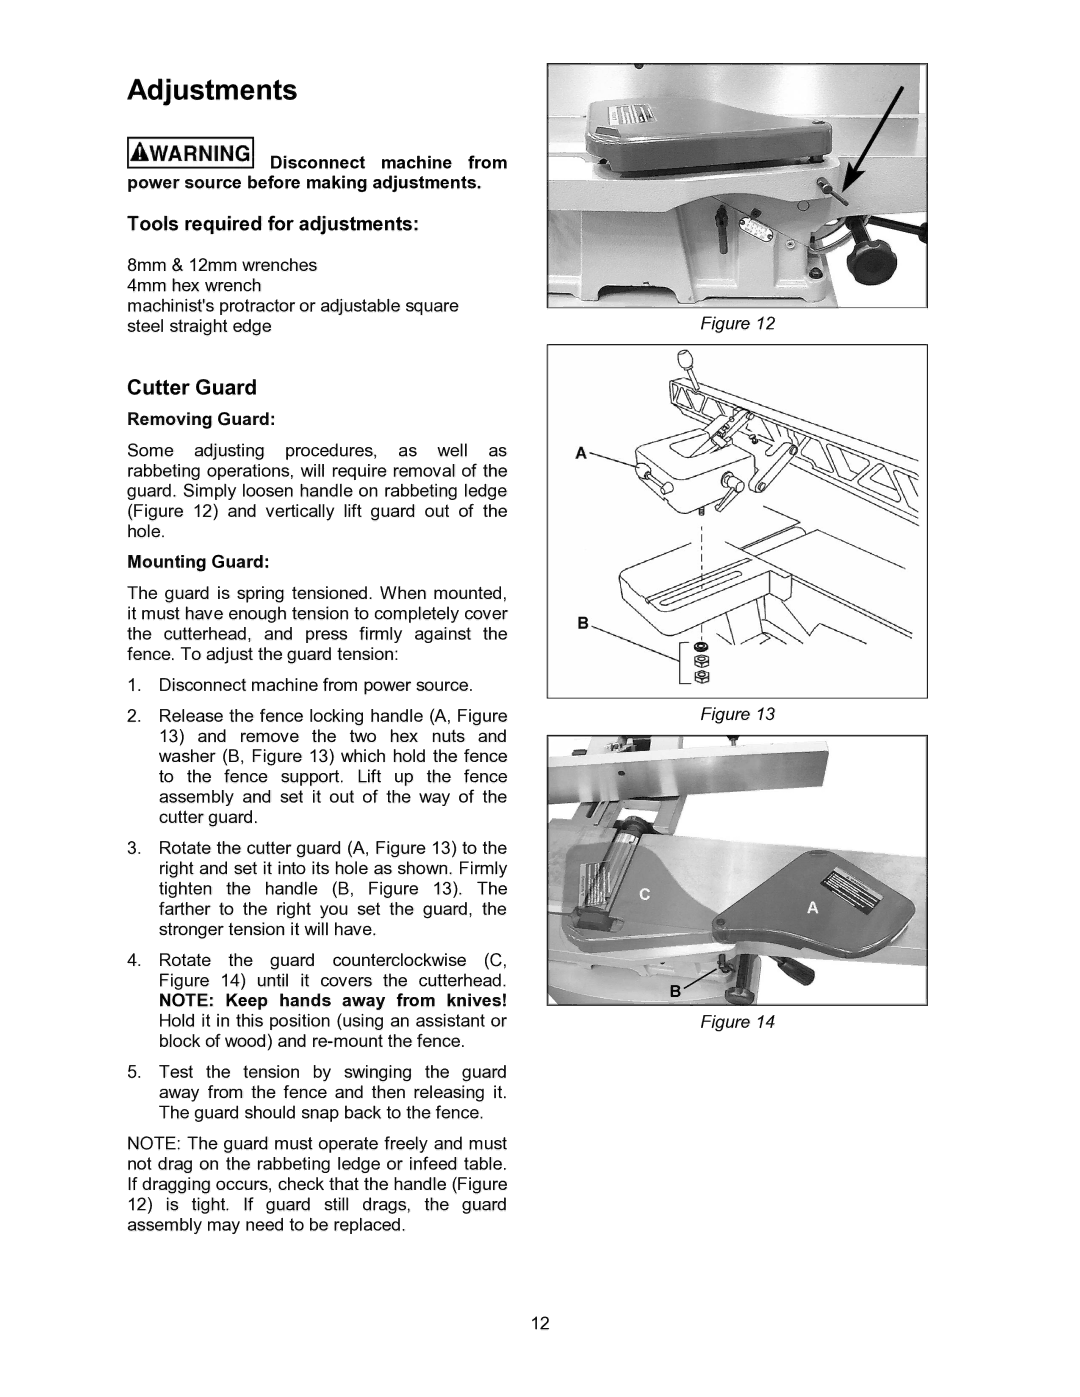
Some adjusting procedures, as well as rabbeting operations, will require removal of the guard. Simply loosen handle on rabbeting ledge (Figure 12) and vertically lift guard out of the hole.
Mounting Guard:
The guard is spring tensioned. When mounted, it must have enough tension to completely cover the cutterhead, and press firmly against the fence. To adjust the guard tension:
1.Disconnect machine from power source.
2.Release the fence locking handle (A, Figure
13)and remove the two hex nuts and washer (B, Figure 13) which hold the fence to the fence support. Lift up the fence assembly and set it out of the way of the cutter guard.
3.Rotate the cutter guard (A, Figure 13) to the right and set it into its hole as shown. Firmly tighten the handle (B, Figure 13). The farther to the right you set the guard, the stronger tension it will have.
4.Rotate the guard counterclockwise (C, Figure 14) until it covers the cutterhead.
NOTE: Keep hands away from knives! Hold it in this position (using an assistant or block of wood) and
5.Test the tension by swinging the guard away from the fence and then releasing it. The guard should snap back to the fence.
NOTE: The guard must operate freely and must not drag on the rabbeting ledge or infeed table. If dragging occurs, check that the handle (Figure
12)is tight. If guard still drags, the guard assembly may need to be replaced.
Figure 12
Figure 13
Figure 14
12