45 degree forward stop:
1.The 45 degree forward stop is controlled by the screw (E, Figure 25).
2.Loosen the locking handle (B, Figure 25) and the hex nut on the screw (E, Figure 25).
3.Set the 45 degree protractor on the table and against the fence, and tilt the fence until it is flush against the 45 degree angle.
4.Rotate the screw (E, Figure 25) until it contacts the casting below it.
5.Tighten hex nut (E, Figure 25) and locking handle (B, Figure 25).
45 degree back stop:
1.Flip the stop block (C, Figure 25) out of the way.
2.The 45 degree back stop is controlled by the screw (F, Figure 25).
3.Loosen the locking handle (B, Figure 25) and the hex nut on the screw (F, Figure 25).
4.Use a protractor set at 45 degrees beyond the right angle (a total of 135 degrees) and place it on the table and against the fence. Tilt the fence until it is flush with the protractor.
5.Rotate the screw (F, Figure 25) to the proper height.
6.Tighten hex nut (F, Figure 25) and locking handle (B, Figure 25).
Basic Jointer Operation
NOTE: If you are inexperienced at jointing, use scrap pieces of lumber to check settings and get the feel of operations before attempting regular work.
This section briefly discusses general rules as well as some of the basic cuts using a jointer, such as surfacing, edging, beveling, skewing, rabbeting and taper cuts.
![]() Always use cutterhead guard (except during rabbeting) and keep hands away from cutterhead.
Always use cutterhead guard (except during rabbeting) and keep hands away from cutterhead.
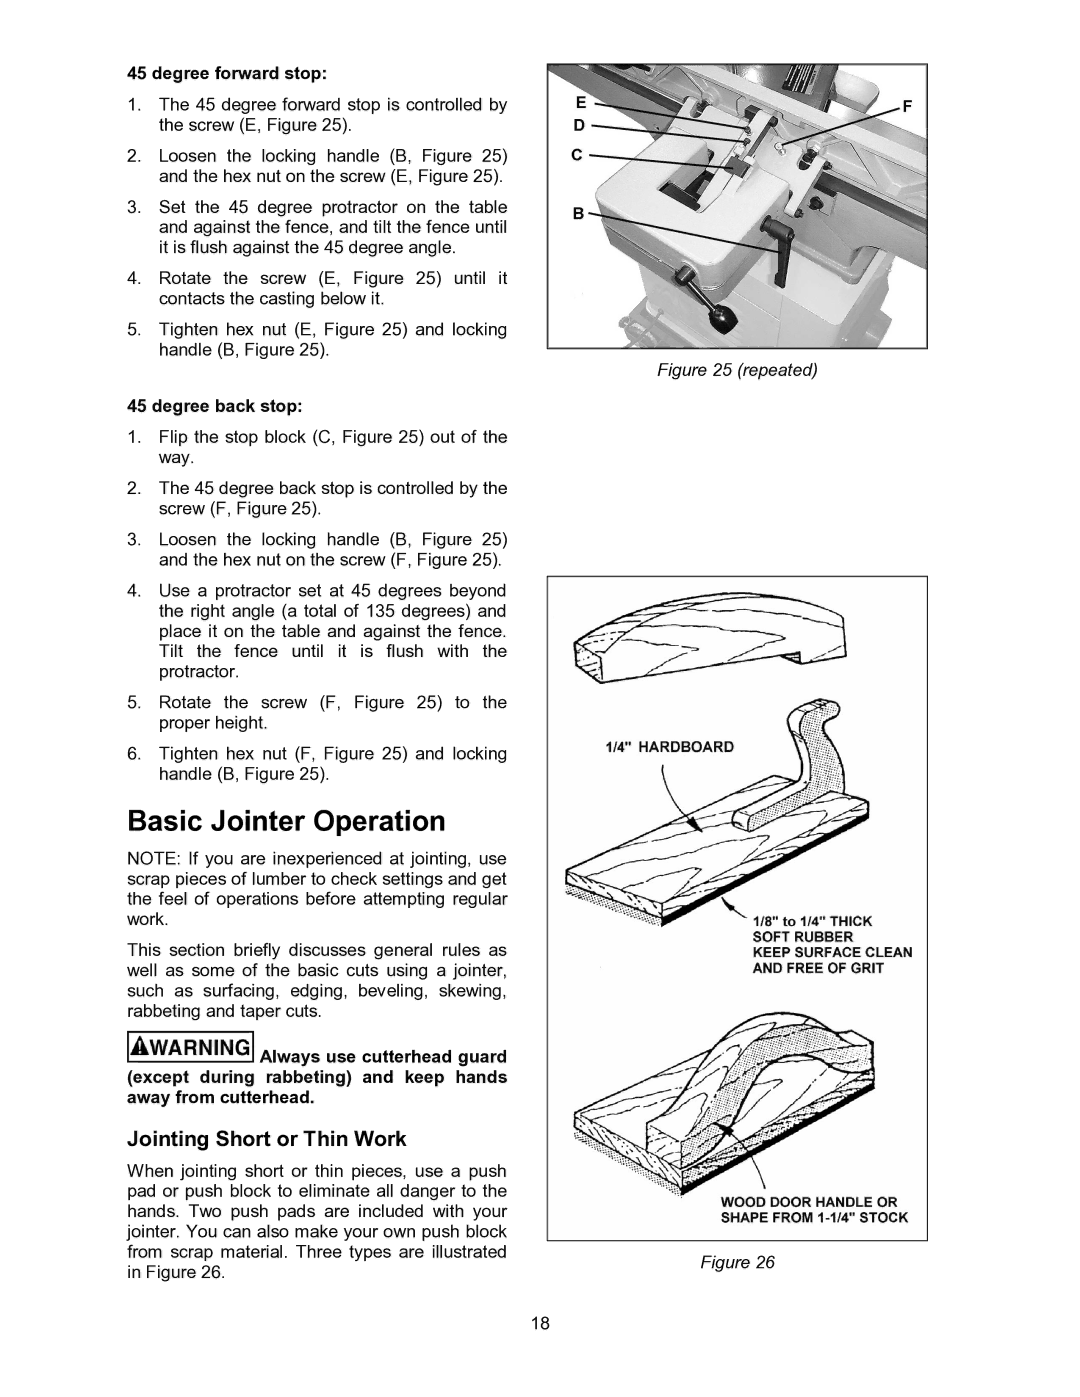
Jointing Short or Thin Work
When jointing short or thin pieces, use a push pad or push block to eliminate all danger to the hands. Two push pads are included with your jointer. You can also make your own push block from scrap material. Three types are illustrated in Figure 26.
Figure 25 (repeated)
Figure 26
18