Receiving
Open both shipping crates and check for shipping damage. Report any damage immediately to your distributor and shipping agent. Before operating your jointer, read this instruction manual thoroughly for assembly, maintenance and safety instructions.
Crate #1 contents
1jointer stand with motor
1door
1dust chute
Crate #2 contents
1table and fence assembly
1drive belt
1belt guard
1cutterhead guard
2push pads
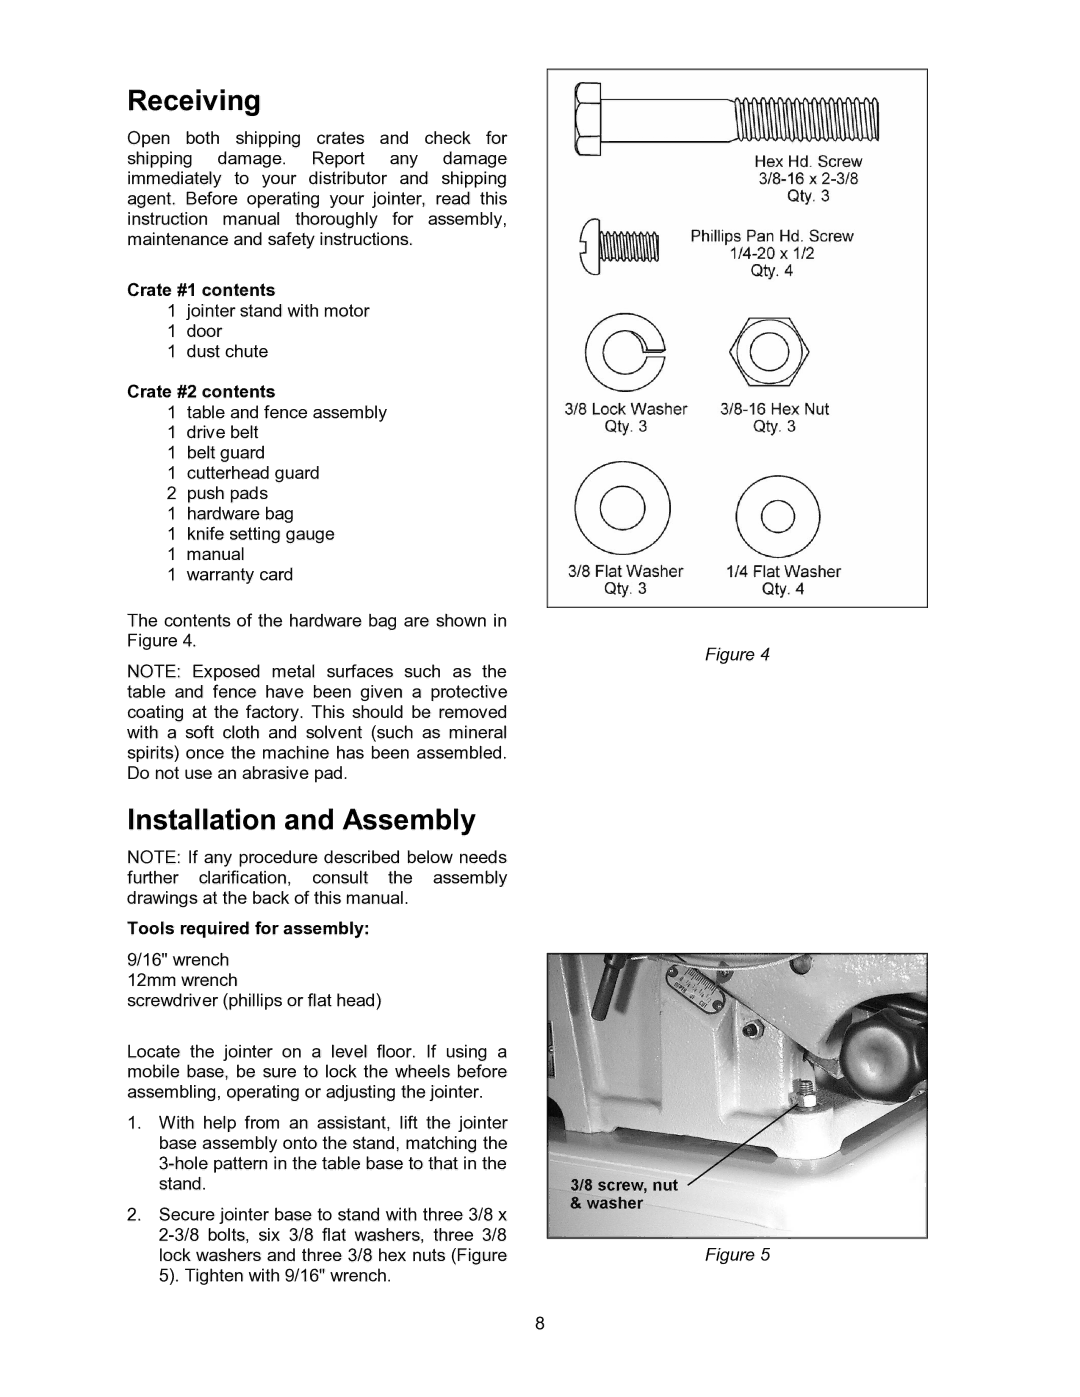
1 hardware bag
1knife setting gauge
1manual
1warranty card
The contents of the hardware bag are shown in
Figure 4.
Figure 4
NOTE: Exposed metal surfaces such as the table and fence have been given a protective coating at the factory. This should be removed with a soft cloth and solvent (such as mineral spirits) once the machine has been assembled. Do not use an abrasive pad.
Installation and Assembly
NOTE: If any procedure described below needs further clarification, consult the assembly drawings at the back of this manual.
Tools required for assembly:
9/16" wrench 12mm wrench
screwdriver (phillips or flat head)
Locate the jointer on a level floor. If using a mobile base, be sure to lock the wheels before assembling, operating or adjusting the jointer.
1.With help from an assistant, lift the jointer base assembly onto the stand, matching the
2.Secure jointer base to stand with three 3/8 x
lock washers and three 3/8 hex nuts (Figure | Figure 5 |
5). Tighten with 9/16" wrench. |
|
| 8 |
