Direction of Grain
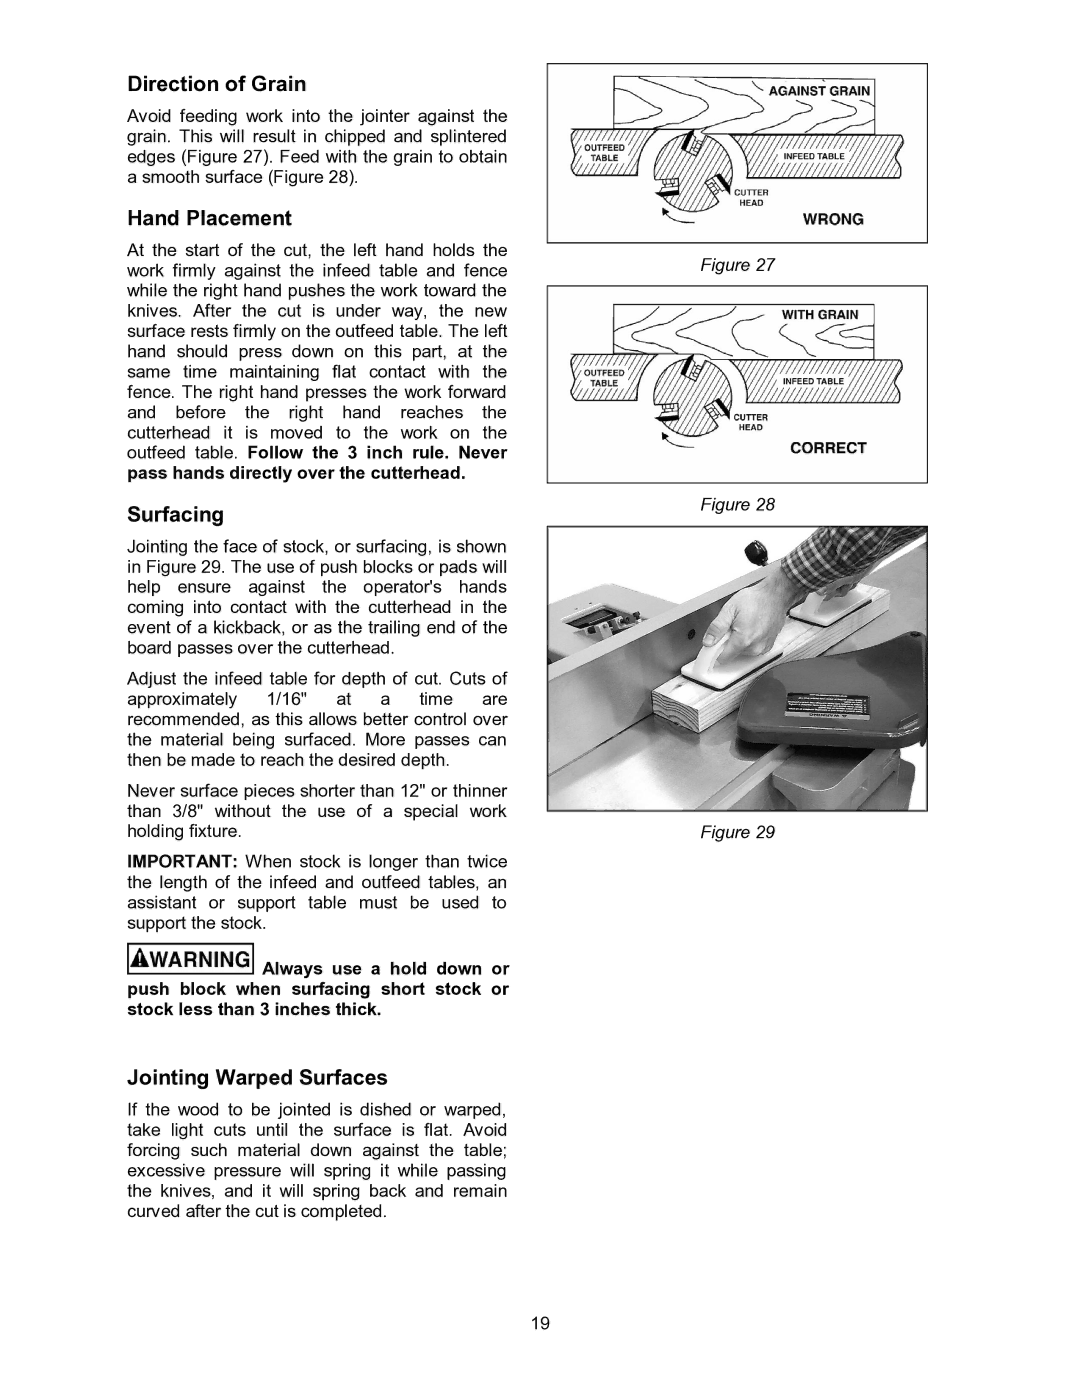
Avoid feeding work into the jointer against the grain. This will result in chipped and splintered edges (Figure 27). Feed with the grain to obtain a smooth surface (Figure 28).
Hand Placement
At the start of the cut, the left hand holds the work firmly against the infeed table and fence while the right hand pushes the work toward the knives. After the cut is under way, the new surface rests firmly on the outfeed table. The left hand should press down on this part, at the same time maintaining flat contact with the fence. The right hand presses the work forward and before the right hand reaches the cutterhead it is moved to the work on the outfeed table. Follow the 3 inch rule. Never pass hands directly over the cutterhead.
Surfacing
Jointing the face of stock, or surfacing, is shown in Figure 29. The use of push blocks or pads will help ensure against the operator's hands coming into contact with the cutterhead in the event of a kickback, or as the trailing end of the board passes over the cutterhead.
Adjust the infeed table for depth of cut. Cuts of approximately 1/16" at a time are recommended, as this allows better control over the material being surfaced. More passes can then be made to reach the desired depth.
Never surface pieces shorter than 12" or thinner than 3/8" without the use of a special work holding fixture.
IMPORTANT: When stock is longer than twice the length of the infeed and outfeed tables, an assistant or support table must be used to support the stock.
![]() Always use a hold down or push block when surfacing short stock or stock less than 3 inches thick.
Always use a hold down or push block when surfacing short stock or stock less than 3 inches thick.
Jointing Warped Surfaces
If the wood to be jointed is dished or warped, take light cuts until the surface is flat. Avoid forcing such material down against the table; excessive pressure will spring it while passing the knives, and it will spring back and remain curved after the cut is completed.
Figure 27
Figure 28
Figure 29
19