NOTE: Make sure locking handles (A & B, Figure 19) will not interfere with the headstock during operation.
5.Continue to check the spacing by sliding the headstock across, until the dovetail cuts will be distributed evenly across the width of the workpiece. NOTE: This is an approximate method of determining by eye where to place the workpiece. A scale in inches and millimeters is mounted to both horizontal and vertical tables, if you need more precise measurements for the location of the dovetail cuts.
6.Again, make sure the locking handles on the horizontal fence (A & B, Figure 19) are tightened. The position of the horizontal fence will now be used as the basis for locating the vertical fence.
7.Loosen the locking handle on the vertical fence.
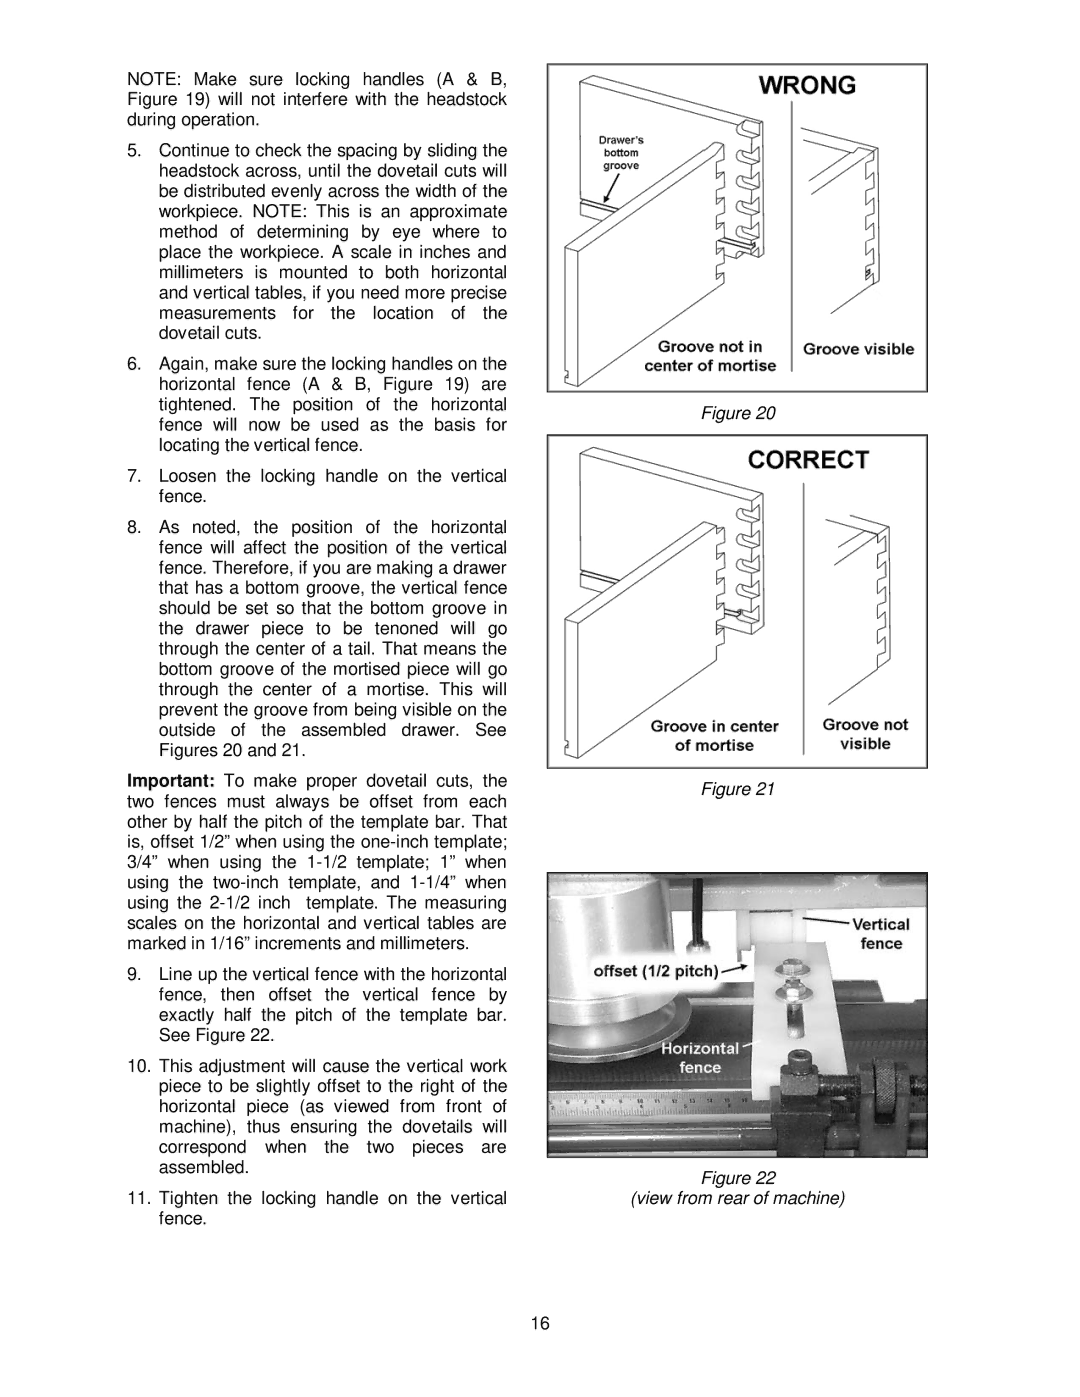
8.As noted, the position of the horizontal fence will affect the position of the vertical fence. Therefore, if you are making a drawer that has a bottom groove, the vertical fence should be set so that the bottom groove in the drawer piece to be tenoned will go through the center of a tail. That means the bottom groove of the mortised piece will go through the center of a mortise. This will prevent the groove from being visible on the outside of the assembled drawer. See Figures 20 and 21.
Important: To make proper dovetail cuts, the two fences must always be offset from each other by half the pitch of the template bar. That is, offset 1/2” when using the
9.Line up the vertical fence with the horizontal fence, then offset the vertical fence by exactly half the pitch of the template bar. See Figure 22.
10.This adjustment will cause the vertical work piece to be slightly offset to the right of the horizontal piece (as viewed from front of machine), thus ensuring the dovetails will correspond when the two pieces are assembled.
11.Tighten the locking handle on the vertical fence.
Figure 20
Figure 21
Figure 22
(view from rear of machine)
16