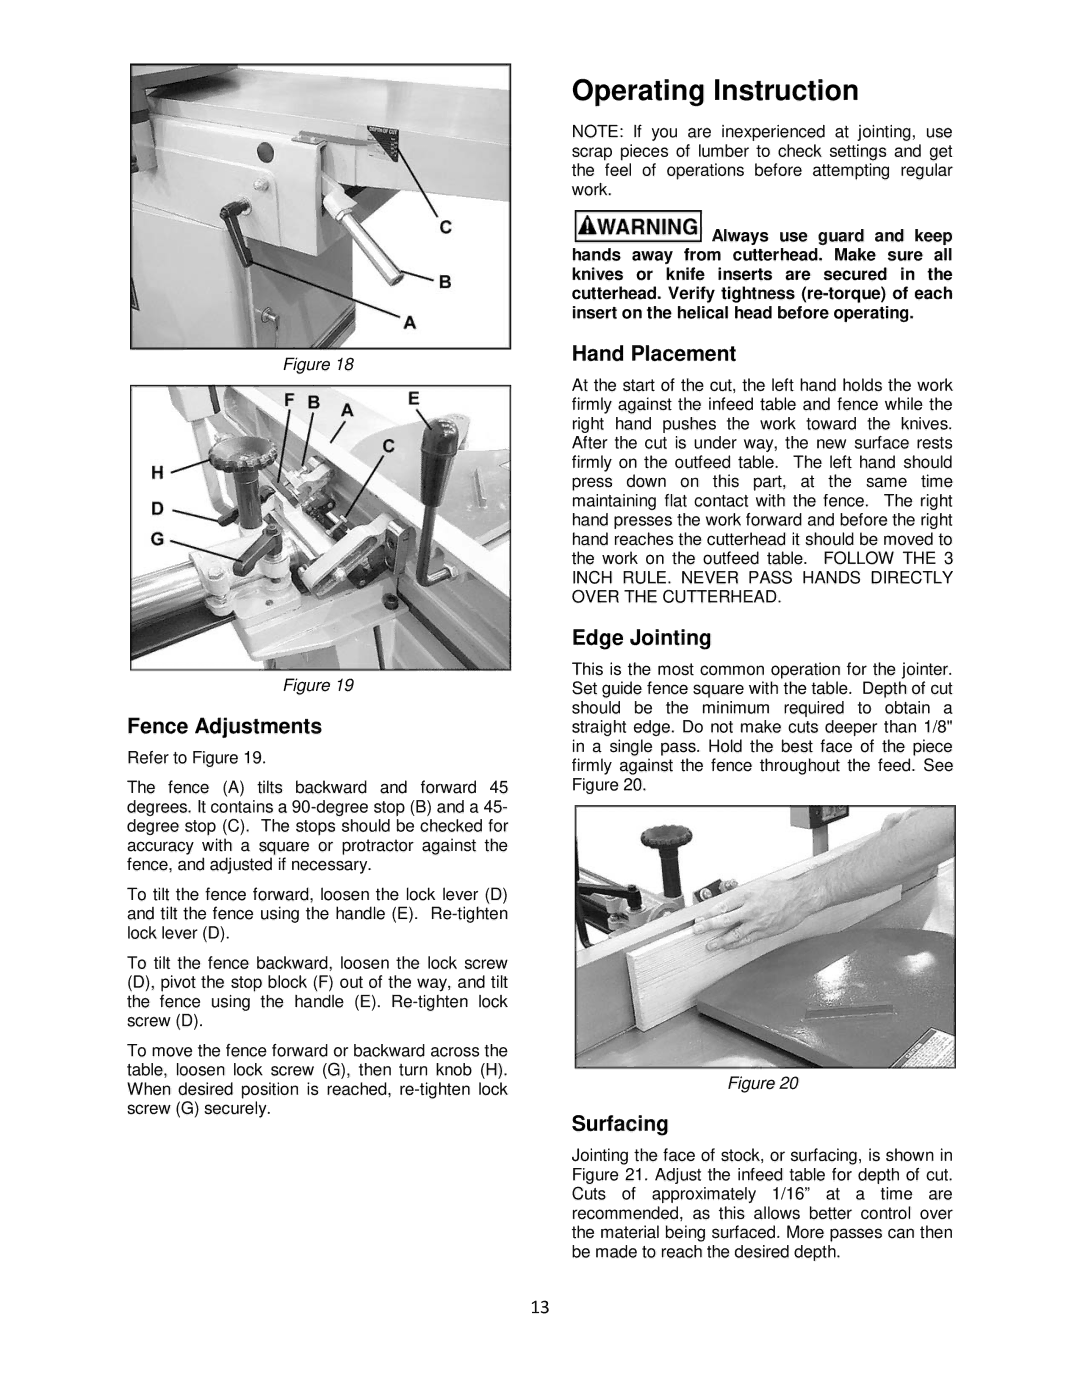
Figure 18
Figure 19
Fence Adjustments
Refer to Figure 19.
The fence (A) tilts backward and forward 45 degrees. It contains a
To tilt the fence forward, loosen the lock lever (D) and tilt the fence using the handle (E).
To tilt the fence backward, loosen the lock screw (D), pivot the stop block (F) out of the way, and tilt the fence using the handle (E).
To move the fence forward or backward across the table, loosen lock screw (G), then turn knob (H). When desired position is reached,
Operating Instruction
NOTE: If you are inexperienced at jointing, use scrap pieces of lumber to check settings and get the feel of operations before attempting regular work.
![]() Always use guard and keep hands away from cutterhead. Make sure all knives or knife inserts are secured in the cutterhead. Verify tightness
Always use guard and keep hands away from cutterhead. Make sure all knives or knife inserts are secured in the cutterhead. Verify tightness
Hand Placement
At the start of the cut, the left hand holds the work firmly against the infeed table and fence while the right hand pushes the work toward the knives. After the cut is under way, the new surface rests firmly on the outfeed table. The left hand should press down on this part, at the same time maintaining flat contact with the fence. The right hand presses the work forward and before the right hand reaches the cutterhead it should be moved to the work on the outfeed table. FOLLOW THE 3 INCH RULE. NEVER PASS HANDS DIRECTLY OVER THE CUTTERHEAD.
Edge Jointing
This is the most common operation for the jointer. Set guide fence square with the table. Depth of cut should be the minimum required to obtain a straight edge. Do not make cuts deeper than 1/8" in a single pass. Hold the best face of the piece firmly against the fence throughout the feed. See Figure 20.
Figure 20
Surfacing
Jointing the face of stock, or surfacing, is shown in Figure 21. Adjust the infeed table for depth of cut. Cuts of approximately 1/16” at a time are recommended, as this allows better control over the material being surfaced. More passes can then be made to reach the desired depth.
13