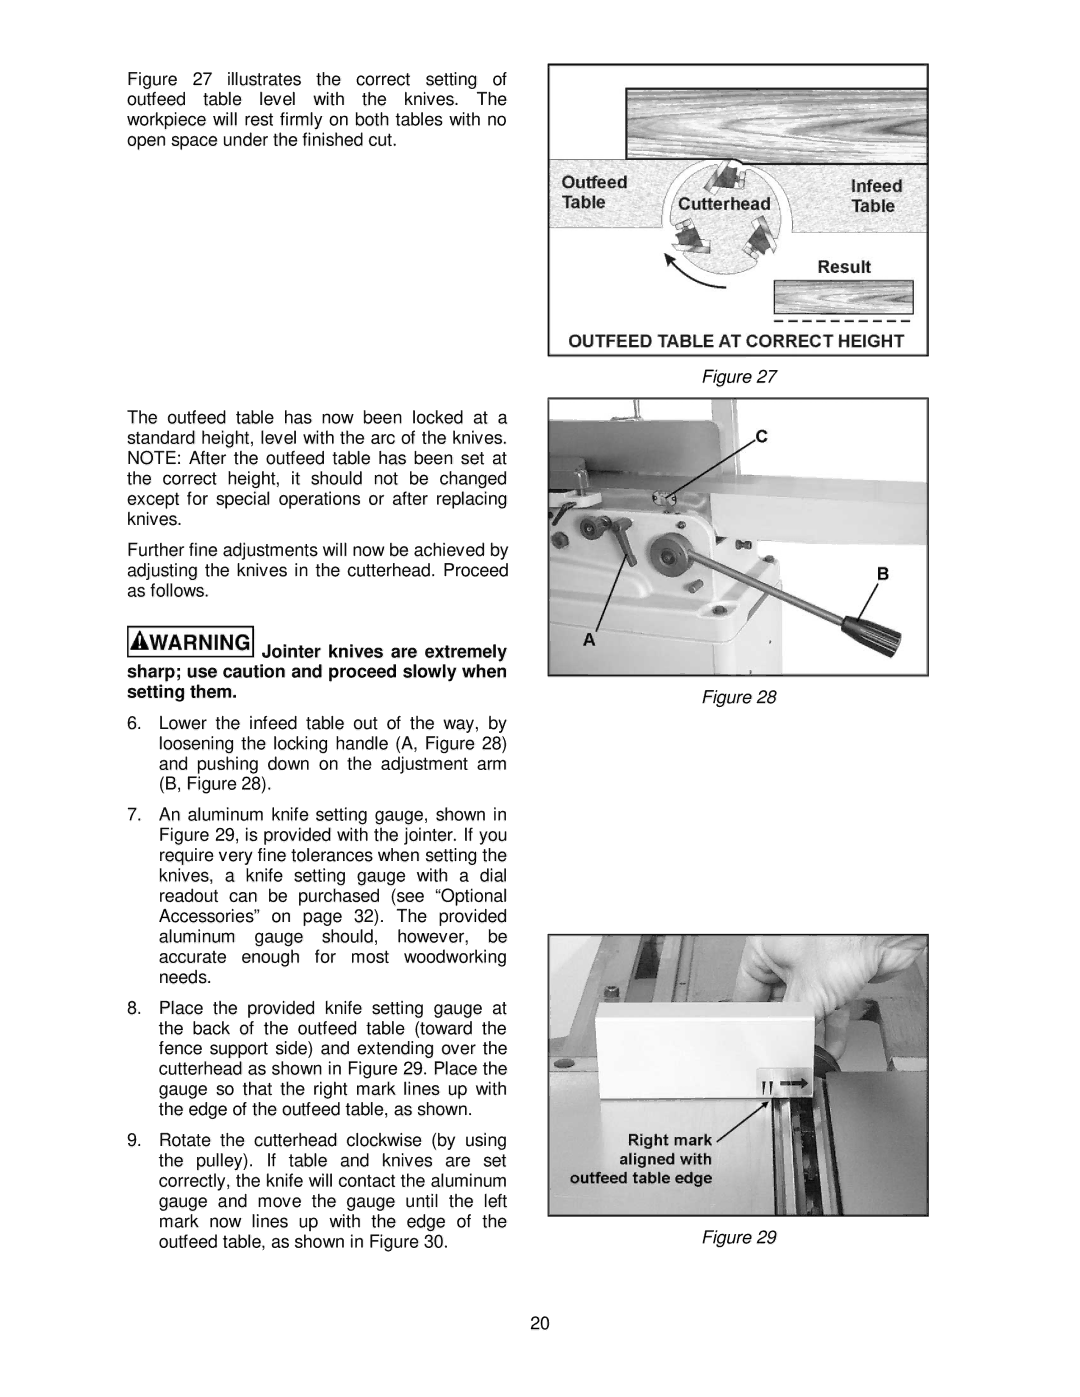
Figure 27 illustrates the correct setting of outfeed table level with the knives. The workpiece will rest firmly on both tables with no open space under the finished cut.
The outfeed table has now been locked at a standard height, level with the arc of the knives. NOTE: After the outfeed table has been set at the correct height, it should not be changed except for special operations or after replacing knives.
Further fine adjustments will now be achieved by adjusting the knives in the cutterhead. Proceed as follows.
![]() Jointer knives are extremely sharp; use caution and proceed slowly when setting them.
Jointer knives are extremely sharp; use caution and proceed slowly when setting them.
6.Lower the infeed table out of the way, by loosening the locking handle (A, Figure 28) and pushing down on the adjustment arm (B, Figure 28).
7.An aluminum knife setting gauge, shown in Figure 29, is provided with the jointer. If you require very fine tolerances when setting the knives, a knife setting gauge with a dial readout can be purchased (see “Optional Accessories” on page 32). The provided aluminum gauge should, however, be accurate enough for most woodworking needs.
8.Place the provided knife setting gauge at the back of the outfeed table (toward the fence support side) and extending over the cutterhead as shown in Figure 29. Place the gauge so that the right mark lines up with the edge of the outfeed table, as shown.
9.Rotate the cutterhead clockwise (by using the pulley). If table and knives are set correctly, the knife will contact the aluminum gauge and move the gauge until the left mark now lines up with the edge of the outfeed table, as shown in Figure 30.
Figure 27
Figure 28
Figure 29
20