Installing Switch Arm
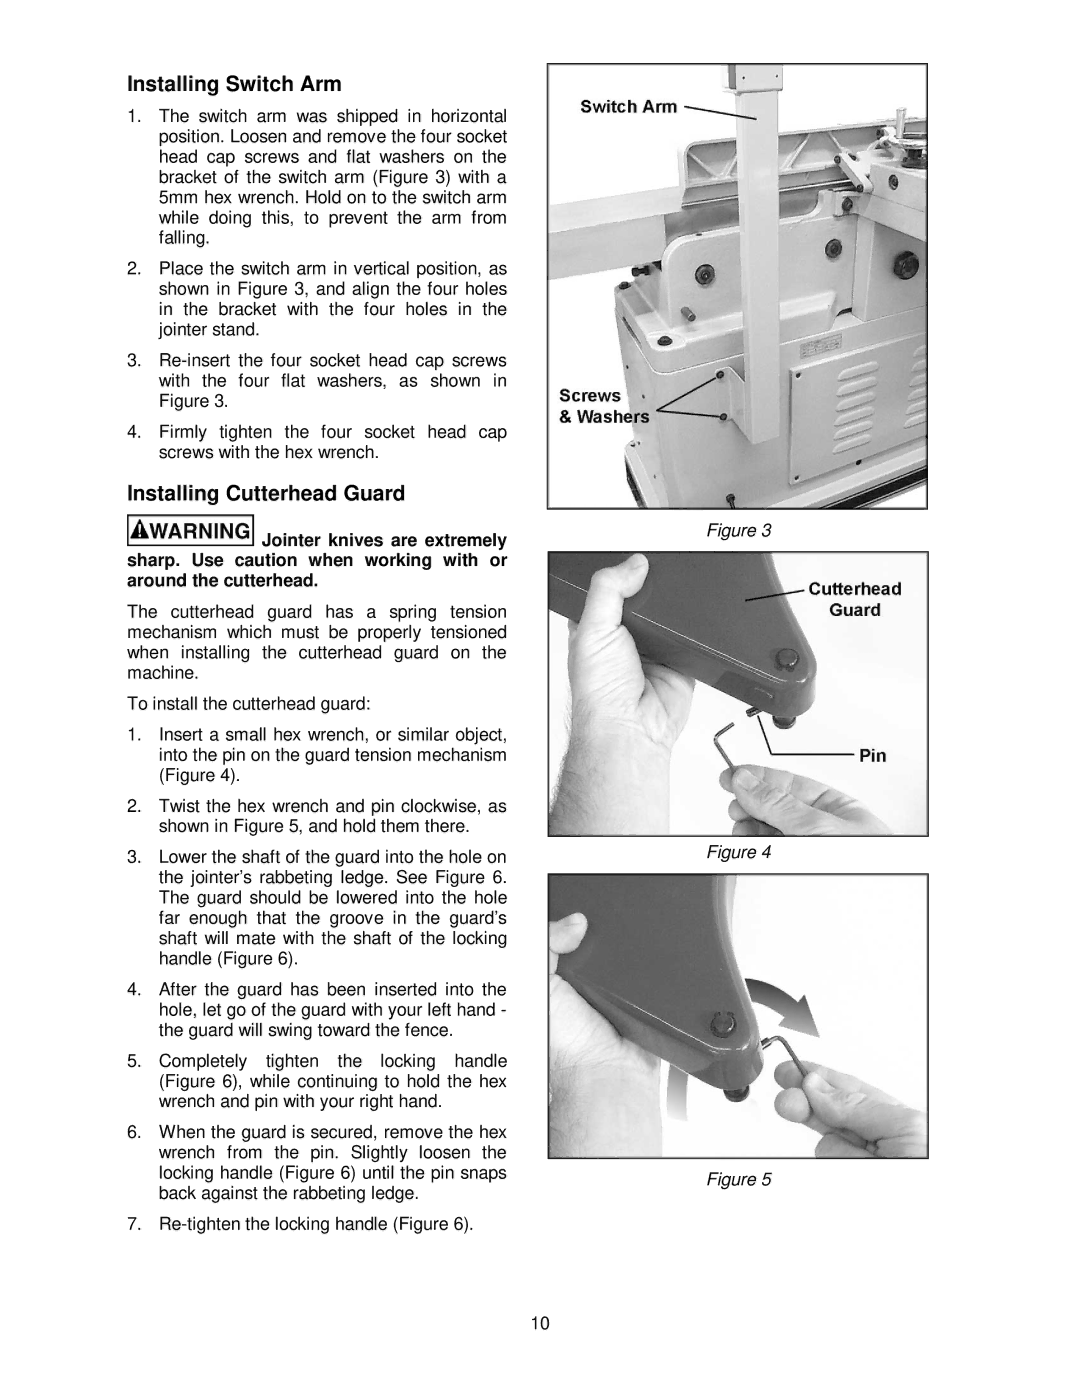
1.The switch arm was shipped in horizontal position. Loosen and remove the four socket head cap screws and flat washers on the bracket of the switch arm (Figure 3) with a 5mm hex wrench. Hold on to the switch arm while doing this, to prevent the arm from falling.
2.Place the switch arm in vertical position, as shown in Figure 3, and align the four holes in the bracket with the four holes in the jointer stand.
3.
4.Firmly tighten the four socket head cap screws with the hex wrench.
Installing Cutterhead Guard
![]() Jointer knives are extremely sharp. Use caution when working with or around the cutterhead.
Jointer knives are extremely sharp. Use caution when working with or around the cutterhead.
The cutterhead guard has a spring tension mechanism which must be properly tensioned when installing the cutterhead guard on the machine.
To install the cutterhead guard:
1.Insert a small hex wrench, or similar object, into the pin on the guard tension mechanism (Figure 4).
2.Twist the hex wrench and pin clockwise, as shown in Figure 5, and hold them there.
3.Lower the shaft of the guard into the hole on the jointer’s rabbeting ledge. See Figure 6. The guard should be lowered into the hole far enough that the groove in the guard’s shaft will mate with the shaft of the locking handle (Figure 6).
4.After the guard has been inserted into the hole, let go of the guard with your left hand - the guard will swing toward the fence.
5.Completely tighten the locking handle (Figure 6), while continuing to hold the hex wrench and pin with your right hand.
6.When the guard is secured, remove the hex wrench from the pin. Slightly loosen the locking handle (Figure 6) until the pin snaps back against the rabbeting ledge.
7.
Figure 3
Figure 4
Figure 5
10