Figure 9
NOTE: If while lowering blade, the points on the
7.12Installing and removing blade
A blade is not provided with the PM1000.
![]() Use care when working with or
Use care when working with or
around sharp saw blades to prevent injury.
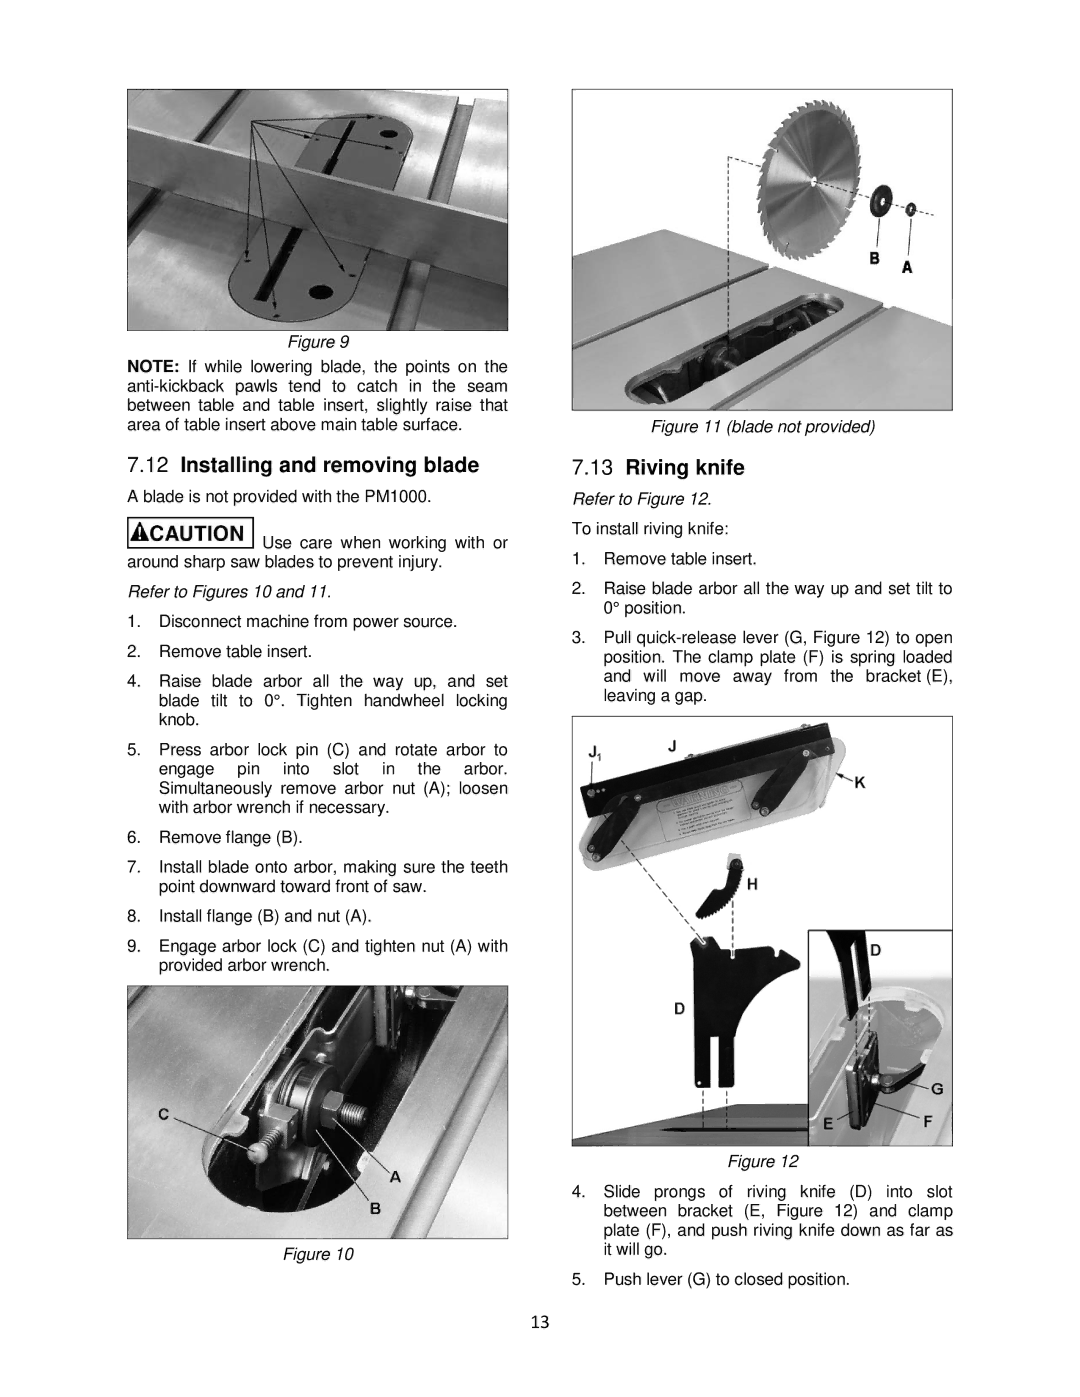
Refer to Figures 10 and 11.
1.Disconnect machine from power source.
2.Remove table insert.
4.Raise blade arbor all the way up, and set blade tilt to 0°. Tighten handwheel locking knob.
5.Press arbor lock pin (C) and rotate arbor to engage pin into slot in the arbor. Simultaneously remove arbor nut (A); loosen with arbor wrench if necessary.
6.Remove flange (B).
7.Install blade onto arbor, making sure the teeth point downward toward front of saw.
8.Install flange (B) and nut (A).
9.Engage arbor lock (C) and tighten nut (A) with provided arbor wrench.
Figure 10
Figure 11 (blade not provided)
7.13Riving knife
Refer to Figure 12.
To install riving knife:
1.Remove table insert.
2.Raise blade arbor all the way up and set tilt to 0° position.
3.Pull
Figure 12
4.Slide prongs of riving knife (D) into slot between bracket (E, Figure 12) and clamp plate (F), and push riving knife down as far as it will go.
5.Push lever (G) to closed position.
13