Depth of Cut
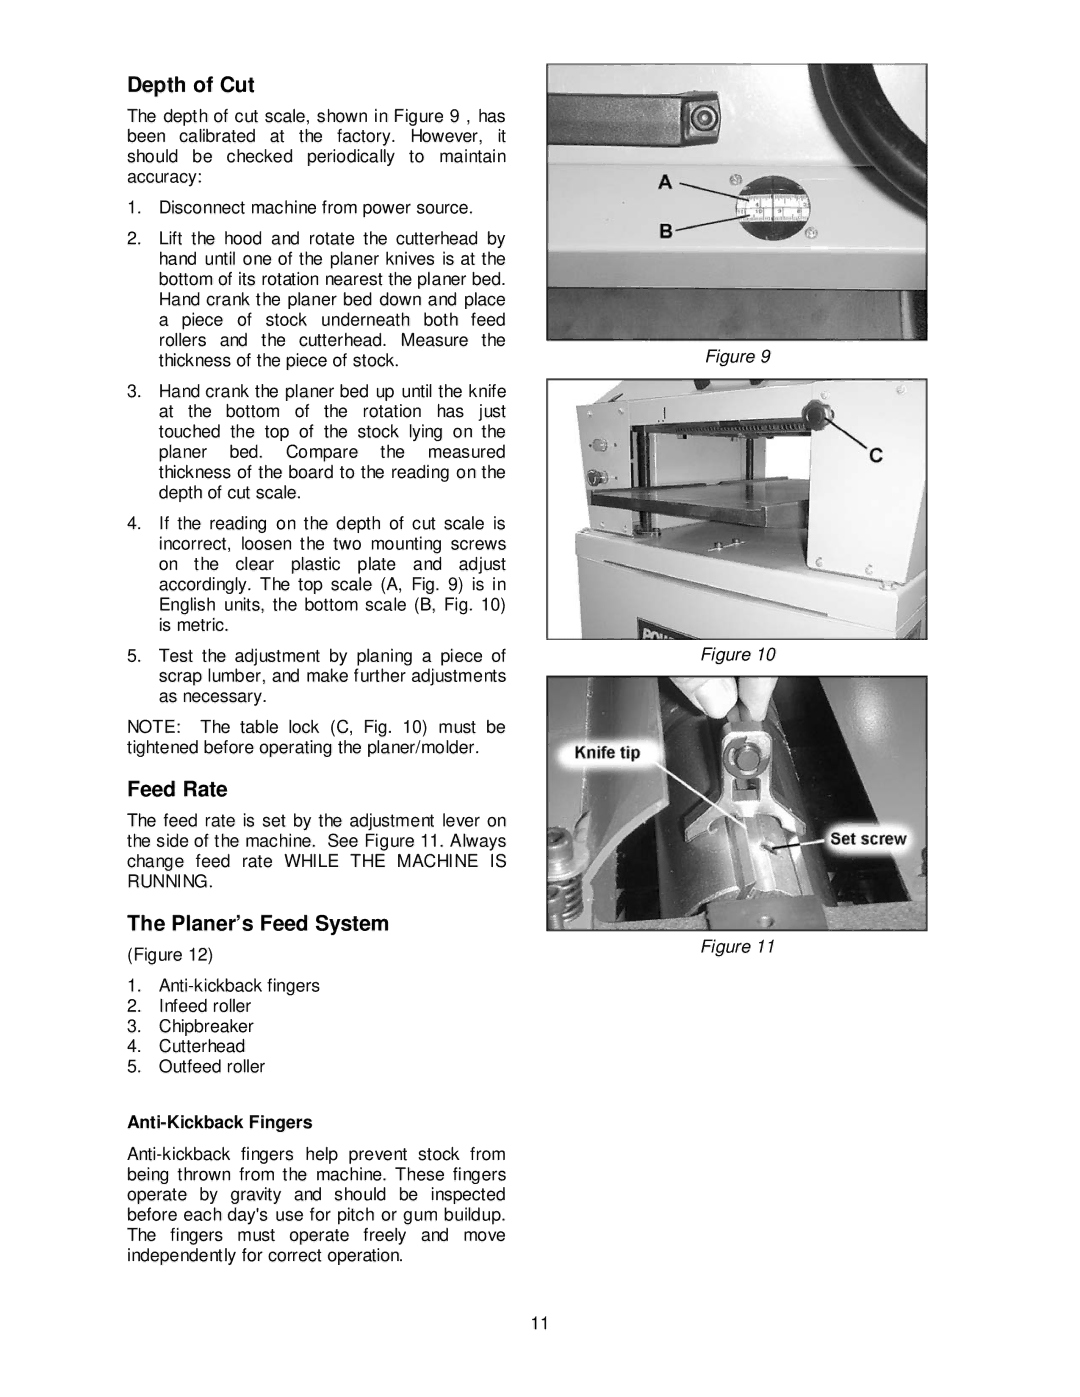
The depth of cut scale, shown in Figure 9 , has been calibrated at the factory. However, it should be checked periodically to maintain accuracy:
1.Disconnect machine from power source.
2.Lift the hood and rotate the cutterhead by hand until one of the planer knives is at the bottom of its rotation nearest the planer bed. Hand crank the planer bed down and place a piece of stock underneath both feed rollers and the cutterhead. Measure the thickness of the piece of stock.
3.Hand crank the planer bed up until the knife at the bottom of the rotation has just touched the top of the stock lying on the planer bed. Compare the measured thickness of the board to the reading on the depth of cut scale.
4.If the reading on the depth of cut scale is incorrect, loosen the two mounting screws on the clear plastic plate and adjust accordingly. The top scale (A, Fig. 9) is in English units, the bottom scale (B, Fig. 10) is metric.
5.Test the adjustment by planing a piece of scrap lumber, and make further adjustments as necessary.
NOTE: The table lock (C, Fig. 10) must be tightened before operating the planer/molder.
Feed Rate
The feed rate is set by the adjustment lever on the side of the machine. See Figure 11. Always change feed rate WHILE THE MACHINE IS RUNNING.
The Planer’s Feed System
(Figure 12)
1.
2.Infeed roller
3.Chipbreaker
4.Cutterhead
5.Outfeed roller
Anti-Kickback Fingers
Figure 9
Figure 10
Figure 11
11