Fence Assembly
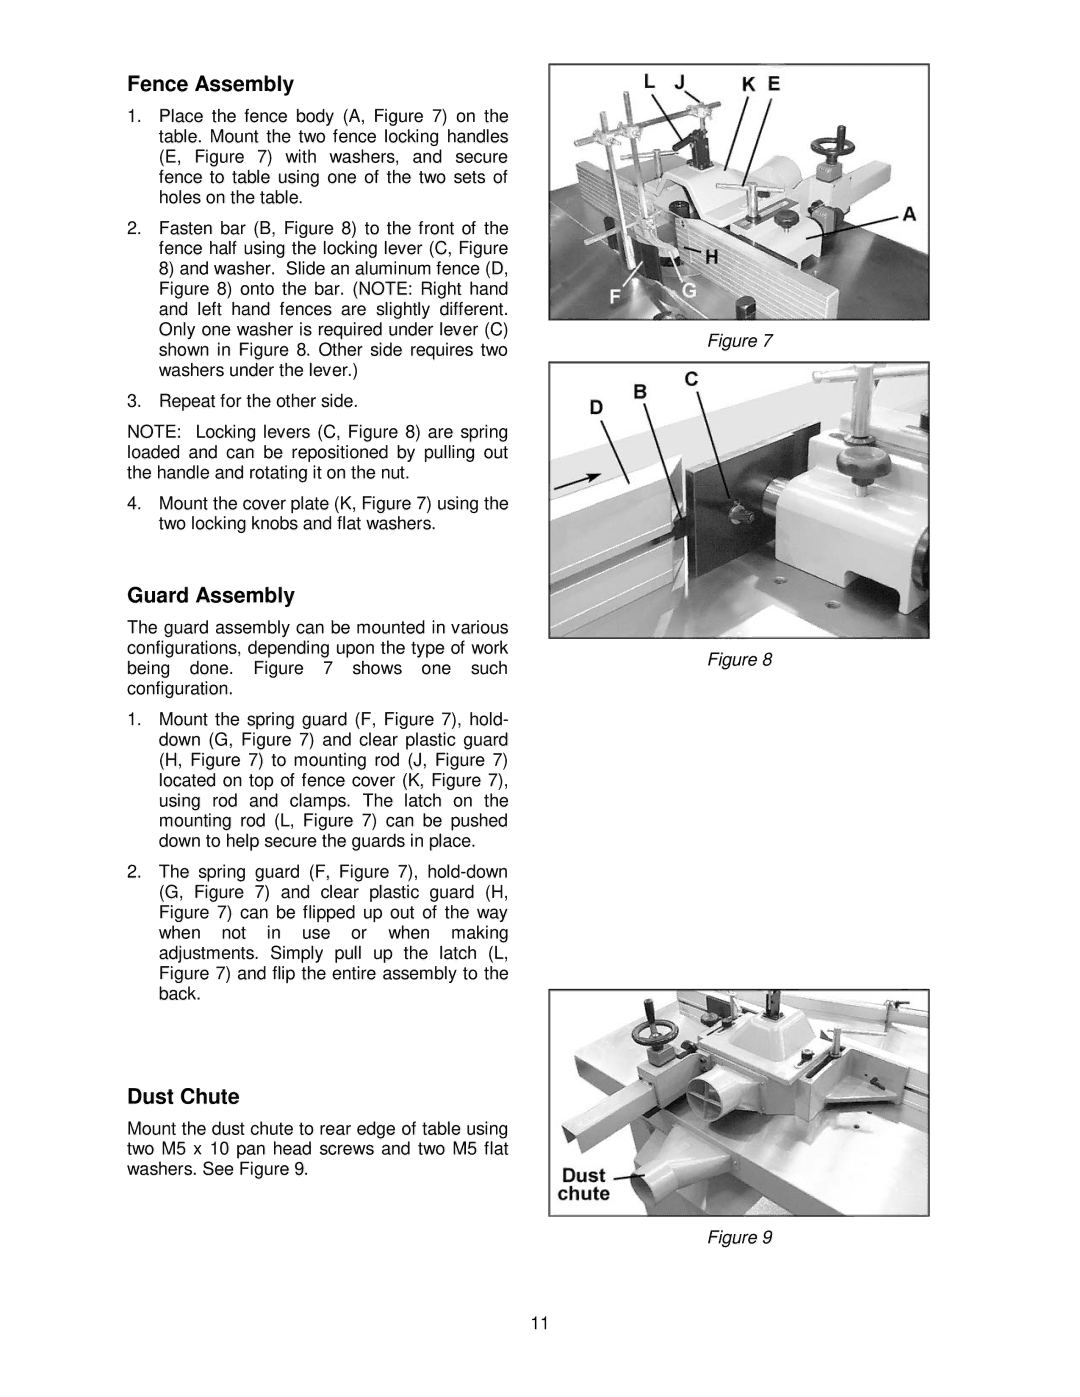
1.Place the fence body (A, Figure 7) on the table. Mount the two fence locking handles (E, Figure 7) with washers, and secure fence to table using one of the two sets of holes on the table.
2.Fasten bar (B, Figure 8) to the front of the fence half using the locking lever (C, Figure 8) and washer. Slide an aluminum fence (D, Figure 8) onto the bar. (NOTE: Right hand and left hand fences are slightly different. Only one washer is required under lever (C) shown in Figure 8. Other side requires two washers under the lever.)
3.Repeat for the other side.
NOTE: Locking levers (C, Figure 8) are spring loaded and can be repositioned by pulling out the handle and rotating it on the nut.
4.Mount the cover plate (K, Figure 7) using the two locking knobs and flat washers.
Guard Assembly
The guard assembly can be mounted in various configurations, depending upon the type of work being done. Figure 7 shows one such configuration.
1.Mount the spring guard (F, Figure 7), hold- down (G, Figure 7) and clear plastic guard (H, Figure 7) to mounting rod (J, Figure 7) located on top of fence cover (K, Figure 7), using rod and clamps. The latch on the mounting rod (L, Figure 7) can be pushed down to help secure the guards in place.
2.The spring guard (F, Figure 7),
Dust Chute
Mount the dust chute to rear edge of table using two M5 x 10 pan head screws and two M5 flat washers. See Figure 9.
Figure 7
Figure 8
Figure 9
11