from the machine.
Adjustments
Speed Change
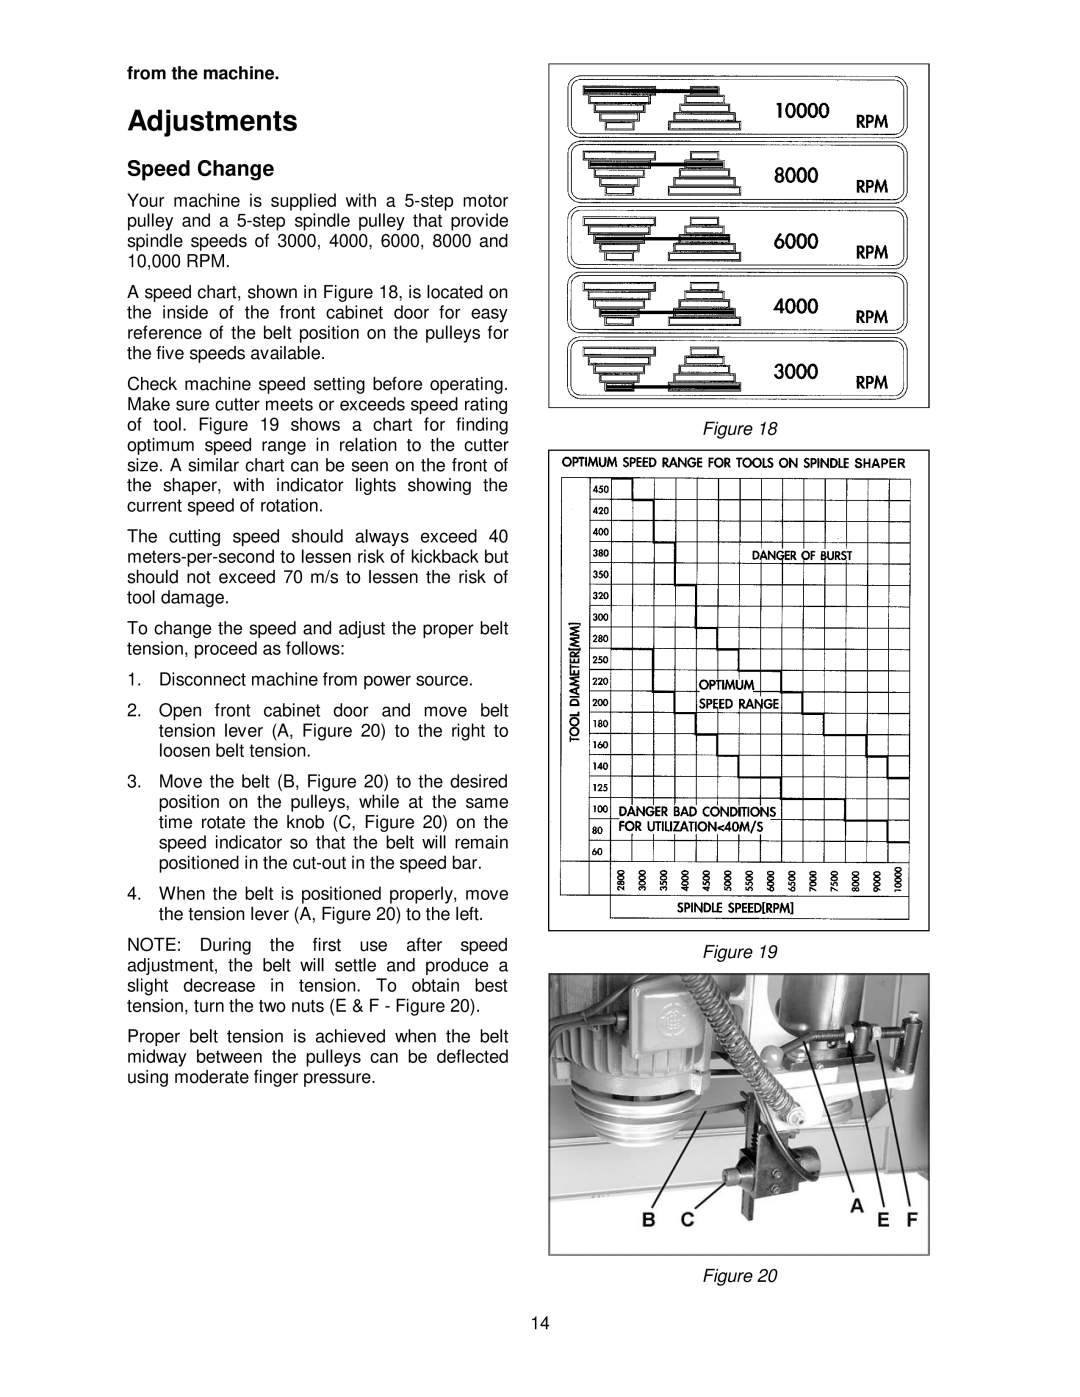
Your machine is supplied with a
A speed chart, shown in Figure 18, is located on the inside of the front cabinet door for easy reference of the belt position on the pulleys for the five speeds available.
Check machine speed setting before operating. Make sure cutter meets or exceeds speed rating of tool. Figure 19 shows a chart for finding optimum speed range in relation to the cutter size. A similar chart can be seen on the front of the shaper, with indicator lights showing the current speed of rotation.
The cutting speed should always exceed 40
To change the speed and adjust the proper belt tension, proceed as follows:
1.Disconnect machine from power source.
2.Open front cabinet door and move belt tension lever (A, Figure 20) to the right to loosen belt tension.
3.Move the belt (B, Figure 20) to the desired position on the pulleys, while at the same time rotate the knob (C, Figure 20) on the speed indicator so that the belt will remain positioned in the
4.When the belt is positioned properly, move the tension lever (A, Figure 20) to the left.
NOTE: During the first use after speed adjustment, the belt will settle and produce a slight decrease in tension. To obtain best tension, turn the two nuts (E & F - Figure 20).
Proper belt tension is achieved when the belt midway between the pulleys can be deflected using moderate finger pressure.
Figure 18
Figure 19
Figure 20
14
