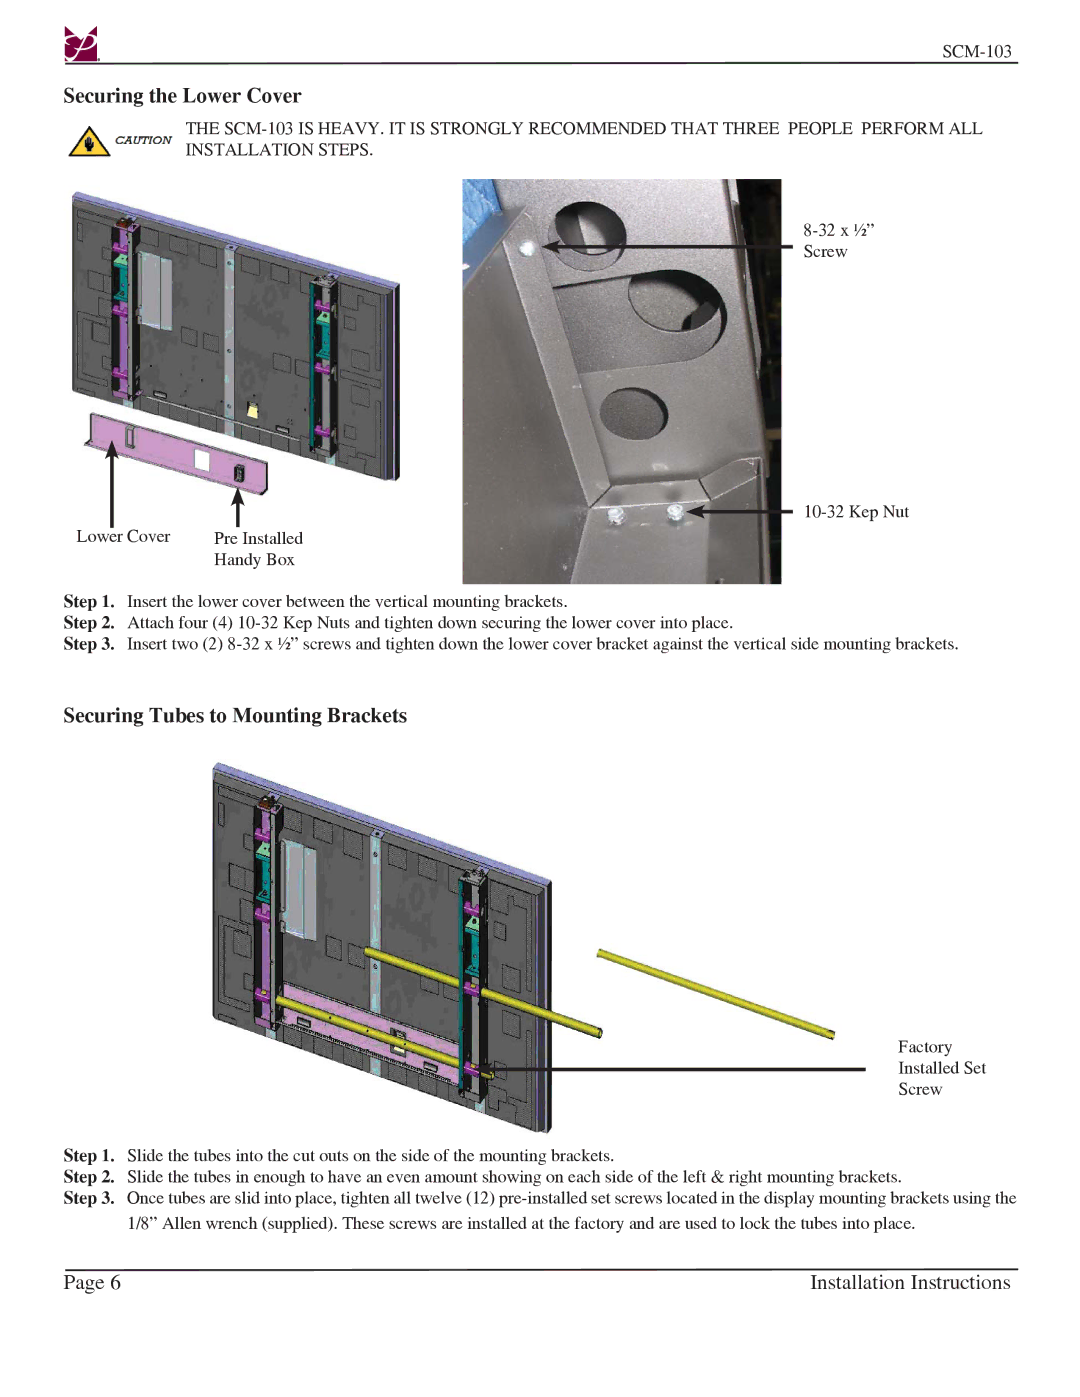
Securing the Lower Cover
THE
|
|
|
|
|
| |
|
|
|
|
|
| |
|
|
|
|
|
| |
|
|
|
| |||
Lower | Cover | Pre Installed | ||||
|
|
| Handy Box | |||
Step 1. | Insert the lower cover between the vertical mounting brackets. | |||||
Step 2. | Attach four (4) | |||||
Step 3. | Insert two (2) | |||||
Securing Tubes to Mounting Brackets
Factory
Installed Set
Screw
Step 1. Slide the tubes into the cut outs on the side of the mounting brackets.
Step 2. Slide the tubes in enough to have an even amount showing on each side of the left & right mounting brackets.
Step 3. Once tubes are slid into place, tighten all twelve (12)
Page 6 | Installation Instructions |