| V . C O M F O R T A D J U S T M E N T S | ||
NOTE: If the lever will not rotate to the fully closed |
|
| |
position, then turn the nut counterclockwise |
|
| |
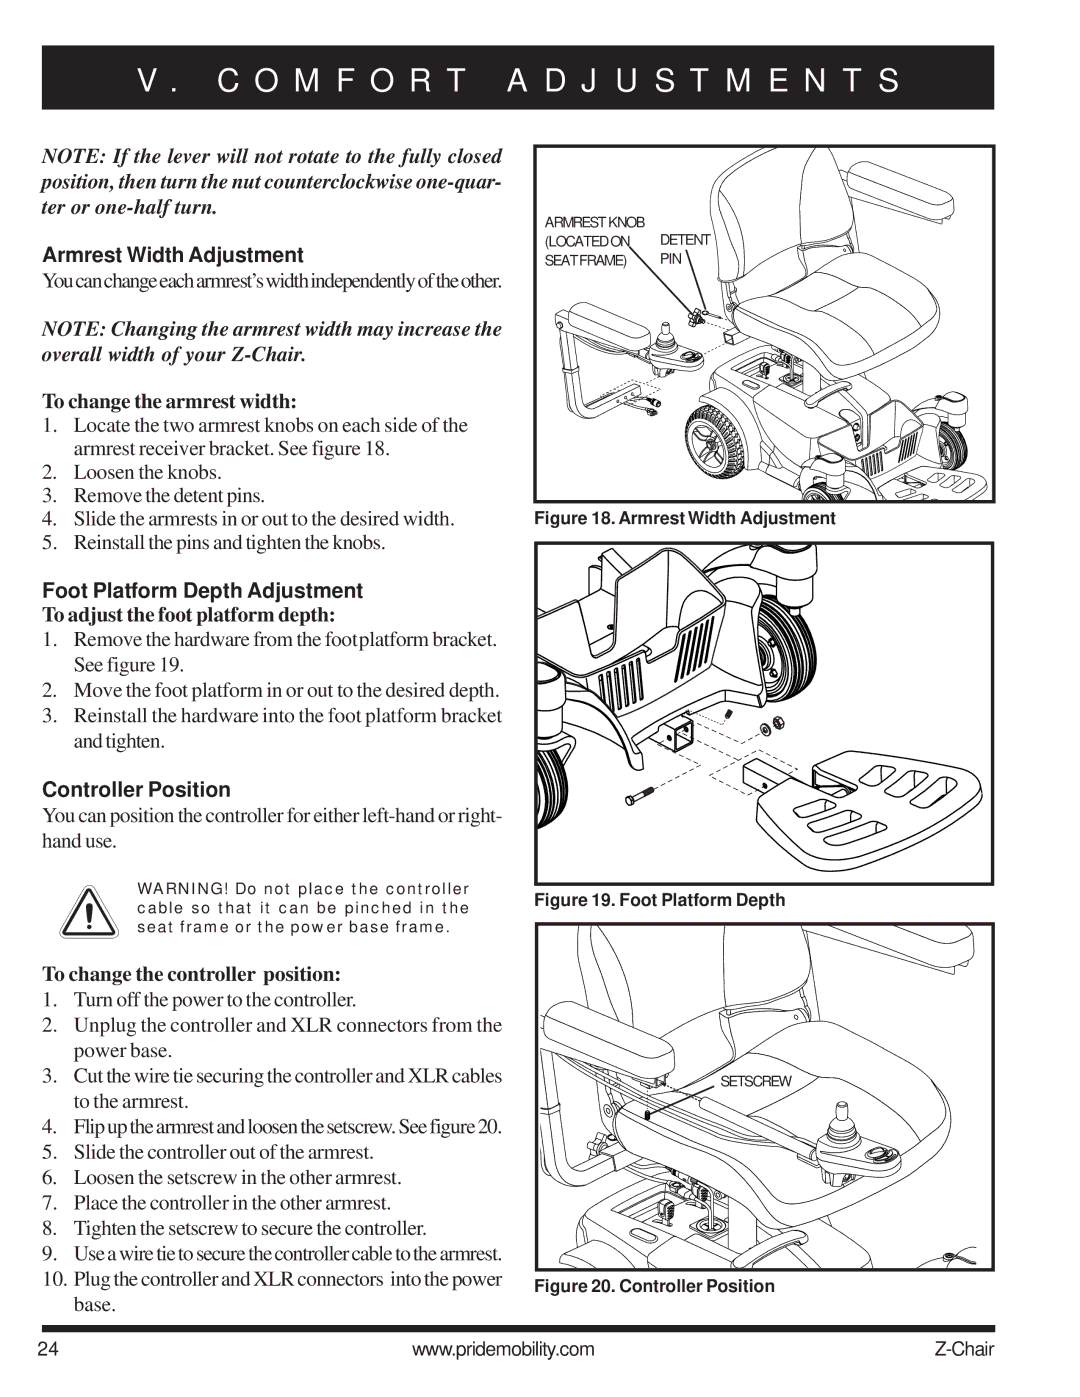
ter or | ARMREST KNOB |
| |
|
| DETENT | |
Armrest Width Adjustment | (LOCATED ON | ||
SEAT FRAME) | PIN | ||
Youcanchangeeacharmrest’swidthindependentlyoftheother. |
|
| |
NOTE: Changing the armrest width may increase the |
|
| |
overall width of your |
|
| |
To change the armrest width: |
|
| |
1. | Locate the two armrest knobs on each side of the |
|
|
| armrest receiver bracket. See figure 18. |
|
|
2. | Loosen the knobs. |
|
|
3. | Remove the detent pins. |
|
|
4. | Slide the armrests in or out to the desired width. | Figure 18. Armrest Width Adjustment | |
5. | Reinstall the pins and tighten the knobs. |
|
|
Foot Platform Depth Adjustment
To adjust the foot platform depth:
1. Remove the hardware from the footplatform bracket. See figure 19.
2. Move the foot platform in or out to the desired depth. 3. Reinstall the hardware into the foot platform bracket
and tighten.
Controller Position
You can position the controller for either
WARNING! Do not place the controller cable so that it can be pinched in the seat frame or the power base frame.
To change the controller position:
1.Turn off the power to the controller.
2.Unplug the controller and XLR connectors from the power base.
3.Cut the wire tie securing the controller and XLR cables to the armrest.
4.Flipupthearmrestandloosenthesetscrew.Seefigure20.
5.Slide the controller out of the armrest.
6.Loosen the setscrew in the other armrest.
7.Place the controller in the other armrest.
8.Tighten the setscrew to secure the controller.
9.Use a wire tie to secure the controller cable to the armrest.
10.Plug the controller and XLR connectors into the power base.
Figure 19. Foot Platform Depth
SETSCREW |
Figure 20. Controller Position
24 | www.pridemobility.com |
