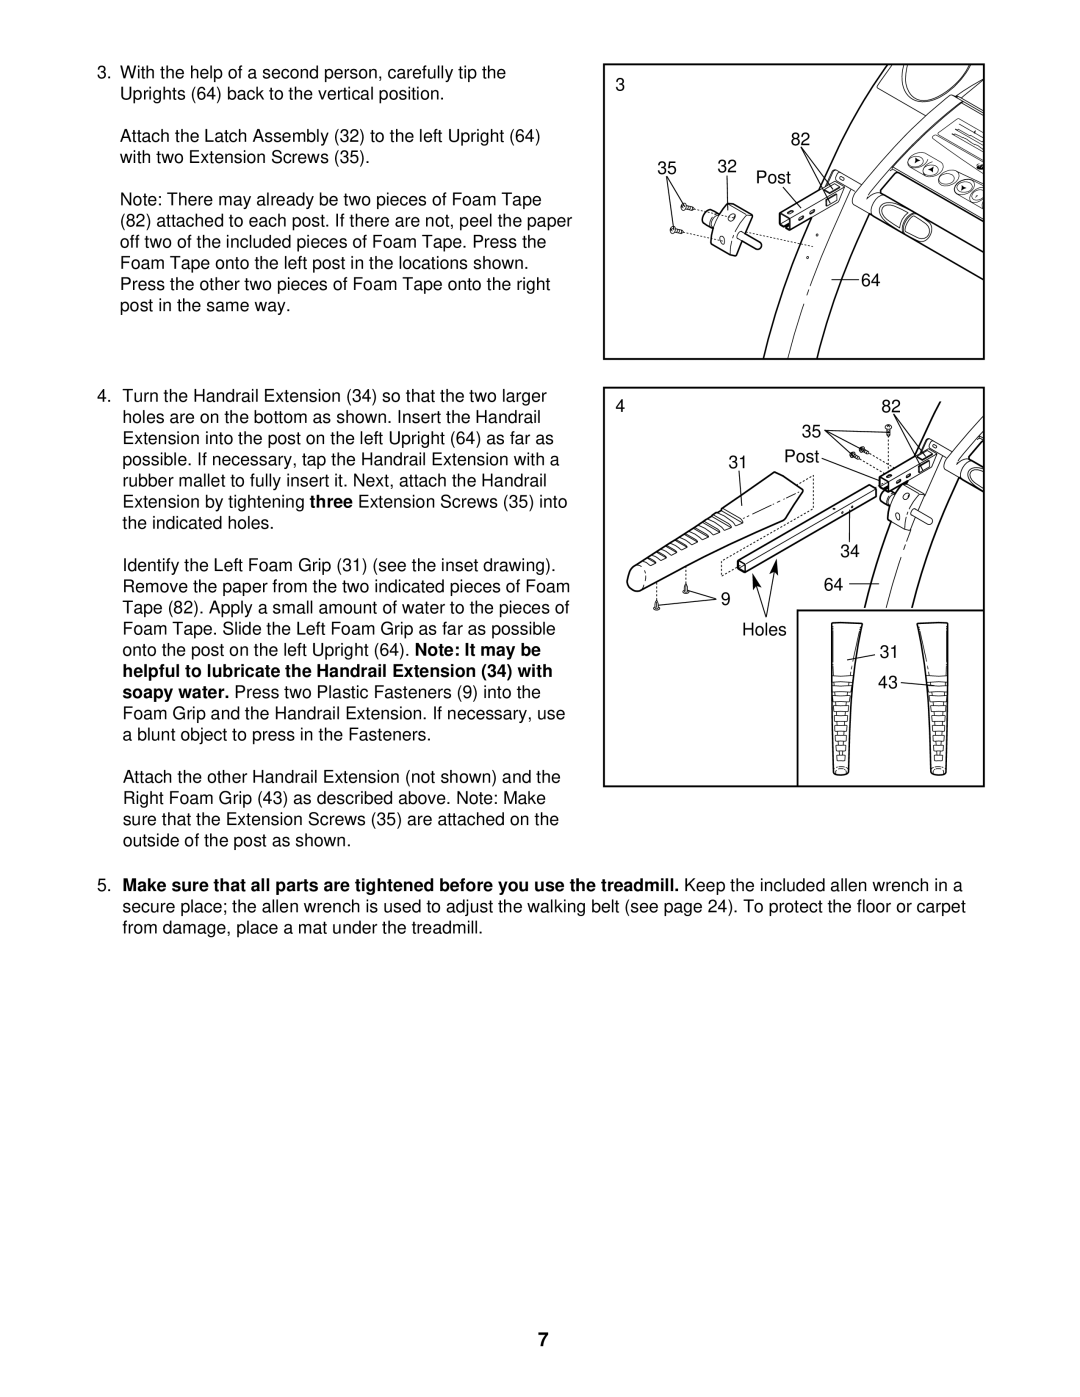
3. With the help of a second person, carefully tip the |
Uprights (64) back to the vertical position. |
Attach the Latch Assembly (32) to the left Upright (64) |
with two Extension Screws (35). |
Note: There may already be two pieces of Foam Tape |
(82) attached to each post. If there are not, peel the paper |
off two of the included pieces of Foam Tape. Press the |
Foam Tape onto the left post in the locations shown. |
Press the other two pieces of Foam Tape onto the right |
post in the same way. |
4. Turn the Handrail Extension (34) so that the two larger |
holes are on the bottom as shown. Insert the Handrail |
Extension into the post on the left Upright (64) as far as |
possible. If necessary, tap the Handrail Extension with a |
rubber mallet to fully insert it. Next, attach the Handrail |
Extension by tightening three Extension Screws (35) into |
the indicated holes. |
3 |
|
|
|
| 82 |
35 | 32 | Post |
|
| 64 |
4 |
| 82 |
|
| 35 |
31 | Post |
|
Identify the Left Foam Grip (31) (see the inset drawing). |
Remove the paper from the two indicated pieces of Foam |
Tape (82). Apply a small amount of water to the pieces of |
Foam Tape. Slide the Left Foam Grip as far as possible |
onto the post on the left Upright (64). Note: It may be |
helpful to lubricate the Handrail Extension (34) with |
soapy water. Press two Plastic Fasteners (9) into the |
Foam Grip and the Handrail Extension. If necessary, use |
a blunt object to press in the Fasteners. |
Attach the other Handrail Extension (not shown) and the |
Right Foam Grip (43) as described above. Note: Make |
sure that the Extension Screws (35) are attached on the |
outside of the post as shown. |
![]() 9
9 ![]() Holes
Holes
34
64
![]() 31
31
43 ![]()
5.Make sure that all parts are tightened before you use the treadmill. Keep the included allen wrench in a secure place; the allen wrench is used to adjust the walking belt (see page 24). To protect the floor or carpet from damage, place a mat under the treadmill.
7
