SANbox 9000™ Series Chassis Replacement Guide | A | |
Remove Power Supply |
| |
Blades |
| |
WARNING!! |
| |
The Power Supply blade faceplate and |
| |
internal surfaces can become very hot. | 1 | |
Handle with care. | ||
| ||
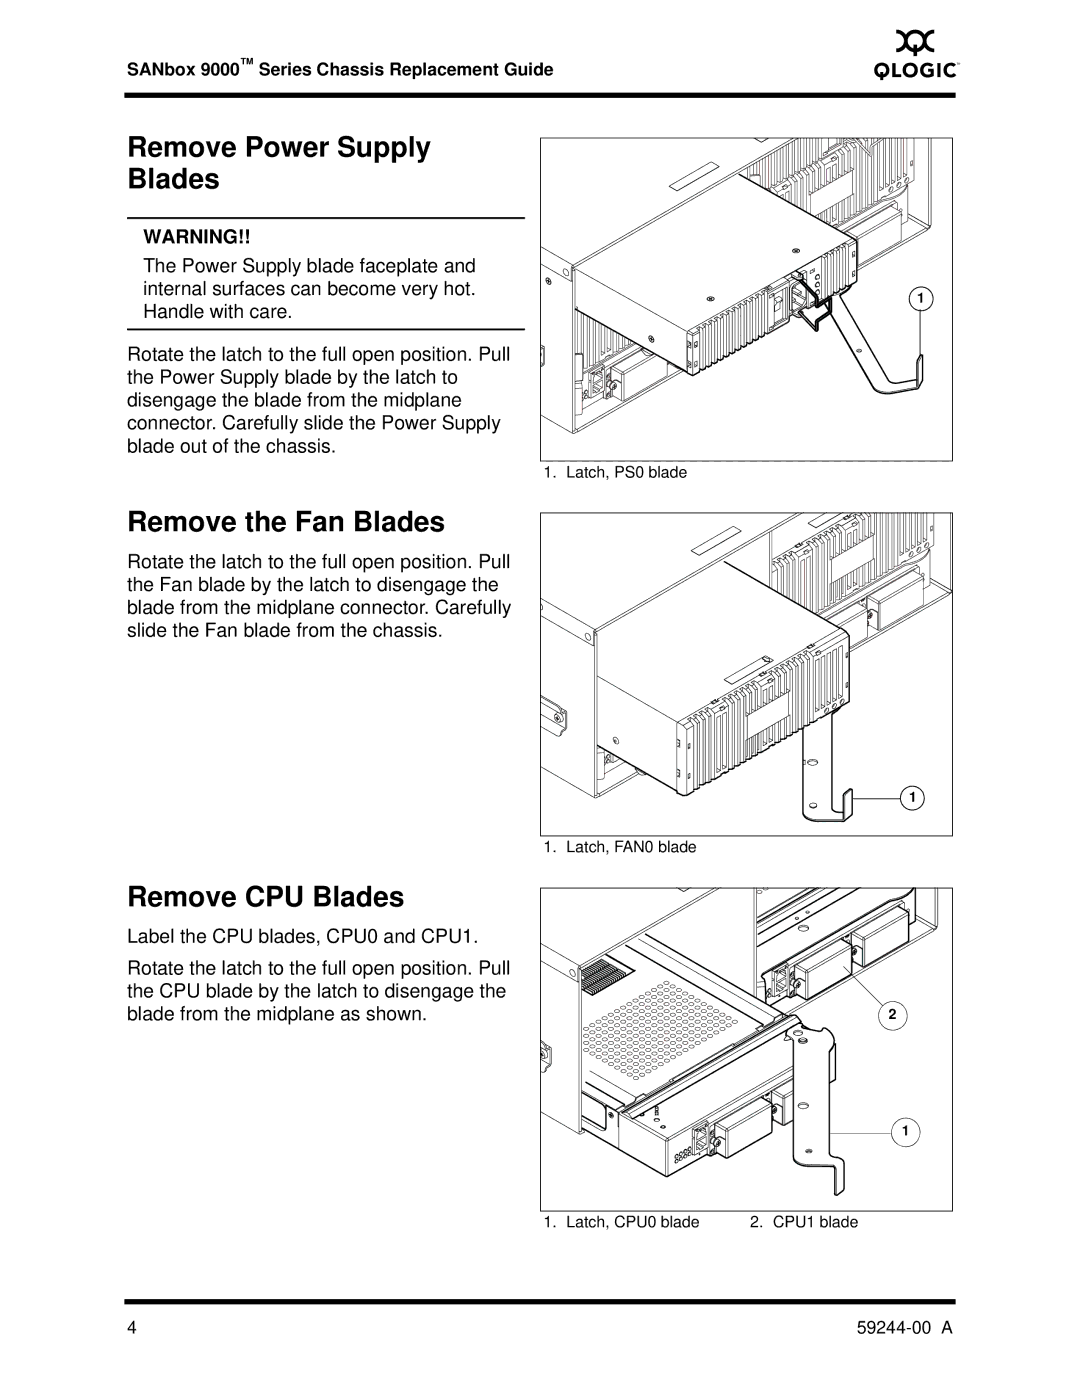
Rotate the latch to the full open position. Pull |
| |
the Power Supply blade by the latch to |
| |
disengage the blade from the midplane |
| |
connector. Carefully slide the Power Supply |
| |
blade out of the chassis. |
|
1. Latch, PS0 blade
Remove the Fan Blades
Rotate the latch to the full open position. Pull the Fan blade by the latch to disengage the blade from the midplane connector. Carefully slide the Fan blade from the chassis.
1 |
1. Latch, FAN0 blade
Remove CPU Blades |
|
|
|
Label the CPU blades, CPU0 and CPU1. |
|
|
|
Rotate the latch to the full open position. Pull |
|
|
|
the CPU blade by the latch to disengage the |
|
|
|
blade from the midplane as shown. |
|
| 2 |
|
|
| 1 |
1. | Latch, CPU0 blade | 2. | CPU1 blade |
4 |
|
|
