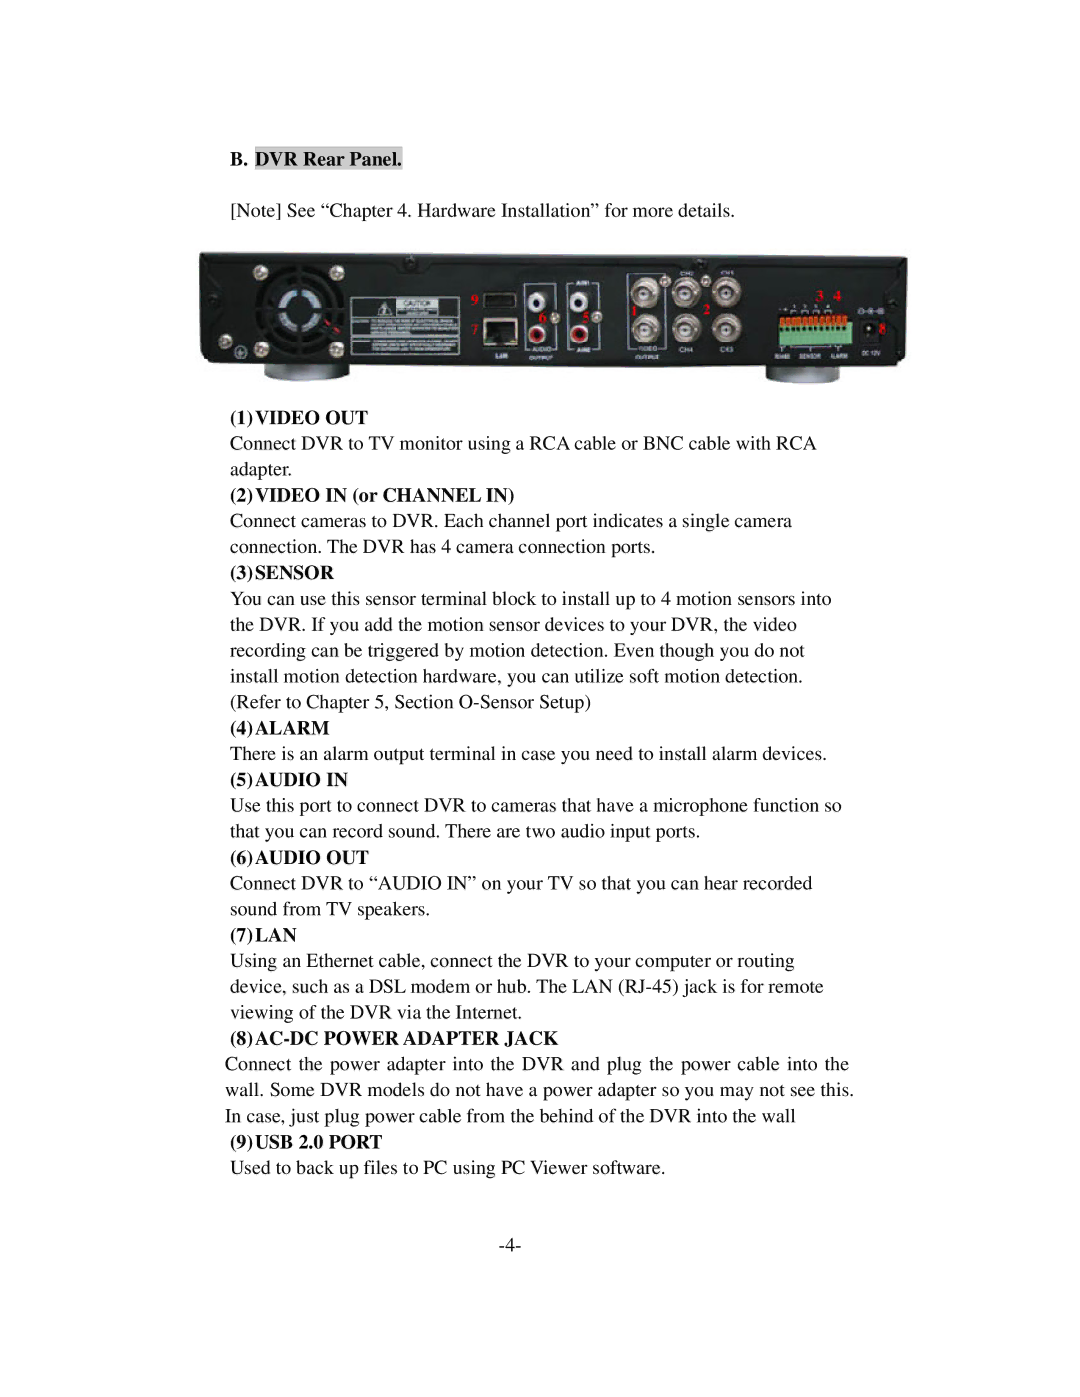
B. DVR Rear Panel.
[Note] See “Chapter 4. Hardware Installation” for more details.
(1) VIDEO OUT
Connect DVR to TV monitor using a RCA cable or BNC cable with RCA adapter.
(2) VIDEO IN (or CHANNEL IN)
Connect cameras to DVR. Each channel port indicates a single camera connection. The DVR has 4 camera connection ports.
(3) SENSOR
You can use this sensor terminal block to install up to 4 motion sensors into the DVR. If you add the motion sensor devices to your DVR, the video recording can be triggered by motion detection. Even though you do not install motion detection hardware, you can utilize soft motion detection. (Refer to Chapter 5, Section
(4) ALARM
There is an alarm output terminal in case you need to install alarm devices.
(5) AUDIO IN
Use this port to connect DVR to cameras that have a microphone function so that you can record sound. There are two audio input ports.
(6) AUDIO OUT
Connect DVR to “AUDIO IN” on your TV so that you can hear recorded sound from TV speakers.
(7) LAN
Using an Ethernet cable, connect the DVR to your computer or routing device, such as a DSL modem or hub. The LAN
(8) AC-DC POWER ADAPTER JACK
Connect the power adapter into the DVR and plug the power cable into the wall. Some DVR models do not have a power adapter so you may not see this. In case, just plug power cable from the behind of the DVR into the wall
(9) USB 2.0 PORT
Used to back up files to PC using PC Viewer software.