PX502 Tape Library Quick Start Guide
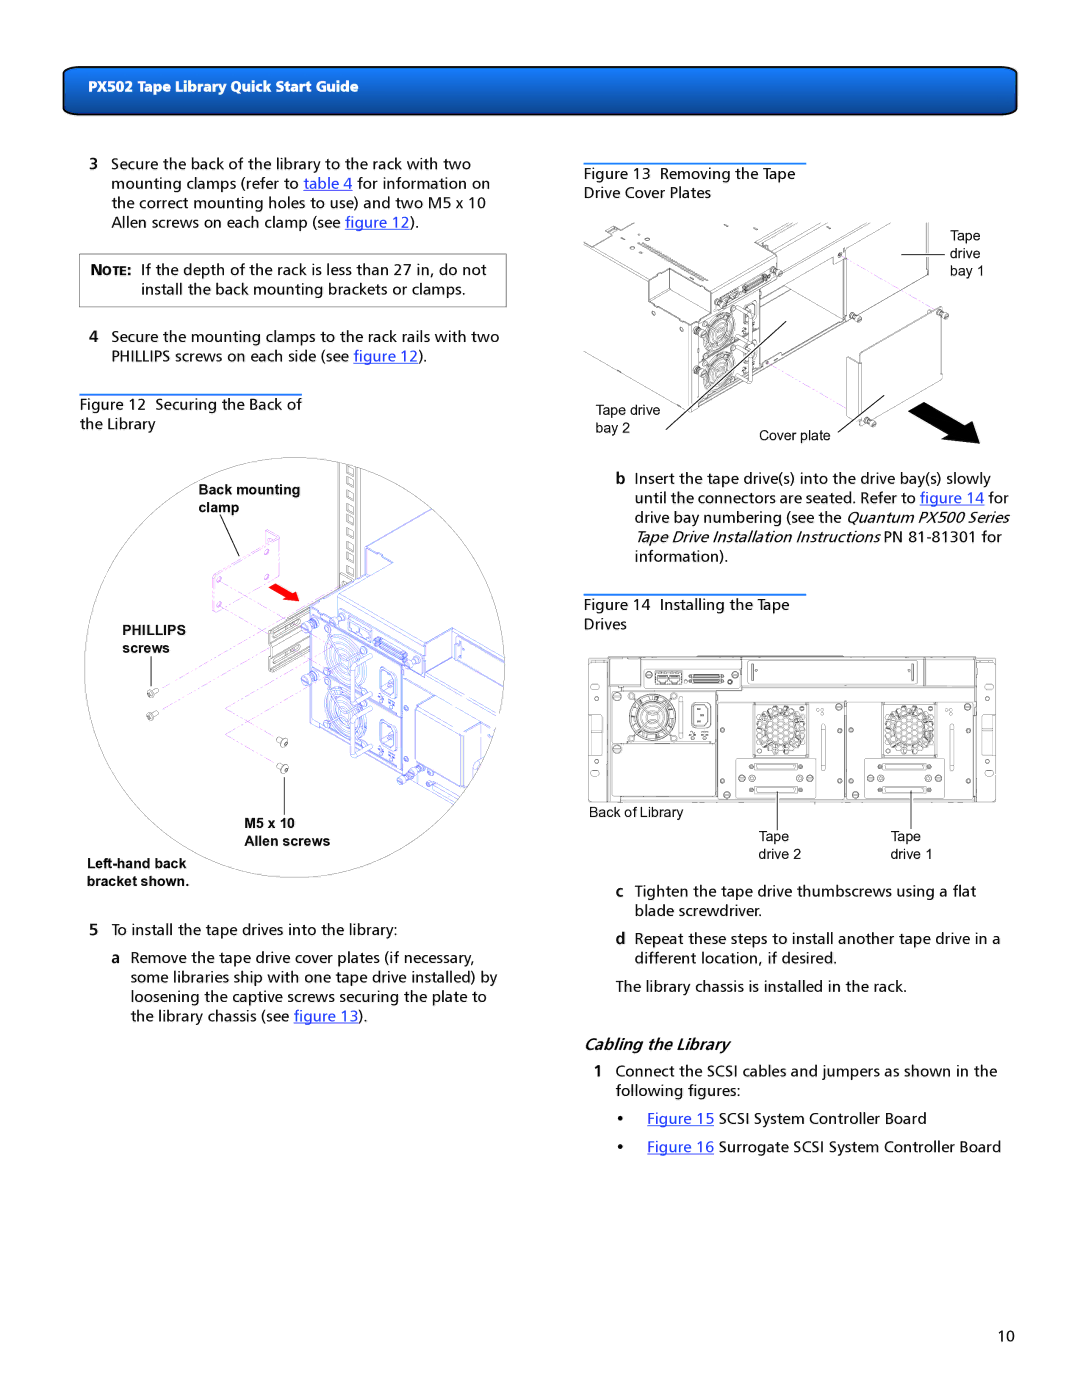
3Secure the back of the library to the rack with two mounting clamps (refer to table 4 for information on the correct mounting holes to use) and two M5 x 10 Allen screws on each clamp (see figure 12).
NOTE: If the depth of the rack is less than 27 in, do not install the back mounting brackets or clamps.
4Secure the mounting clamps to the rack rails with two PHILLIPS screws on each side (see figure 12).
Figure 12 Securing the Back of
the Library
Back mounting clamp
PHILLIPS screws
M5 x 10 Allen screws
5To install the tape drives into the library:
a Remove the tape drive cover plates (if necessary, some libraries ship with one tape drive installed) by loosening the captive screws securing the plate to the library chassis (see figure 13).
Figure 13 Removing the Tape
Drive Cover Plates
Tape drive bay 1
Tape drive |
|
bay 2 | Cover plate |
|
bInsert the tape drive(s) into the drive bay(s) slowly until the connectors are seated. Refer to figure 14 for drive bay numbering (see the Quantum PX500 Series Tape Drive Installation Instructions PN
Figure 14 Installing the Tape
Drives
Back of Library |
|
Tape | Tape |
drive 2 | drive 1 |
cTighten the tape drive thumbscrews using a flat blade screwdriver.
dRepeat these steps to install another tape drive in a different location, if desired.
The library chassis is installed in the rack.
Cabling the Library
1Connect the SCSI cables and jumpers as shown in the following figures:
•Figure 15 SCSI System Controller Board
•Figure 16 Surrogate SCSI System Controller Board
10