PX502 Tape Library Quick Start Guide
By following these instructions, you help ensure that the system will continue to be safeguarded after it arrives at the installation site.
NOTE: Unpack the library as close to the installation location as possible.
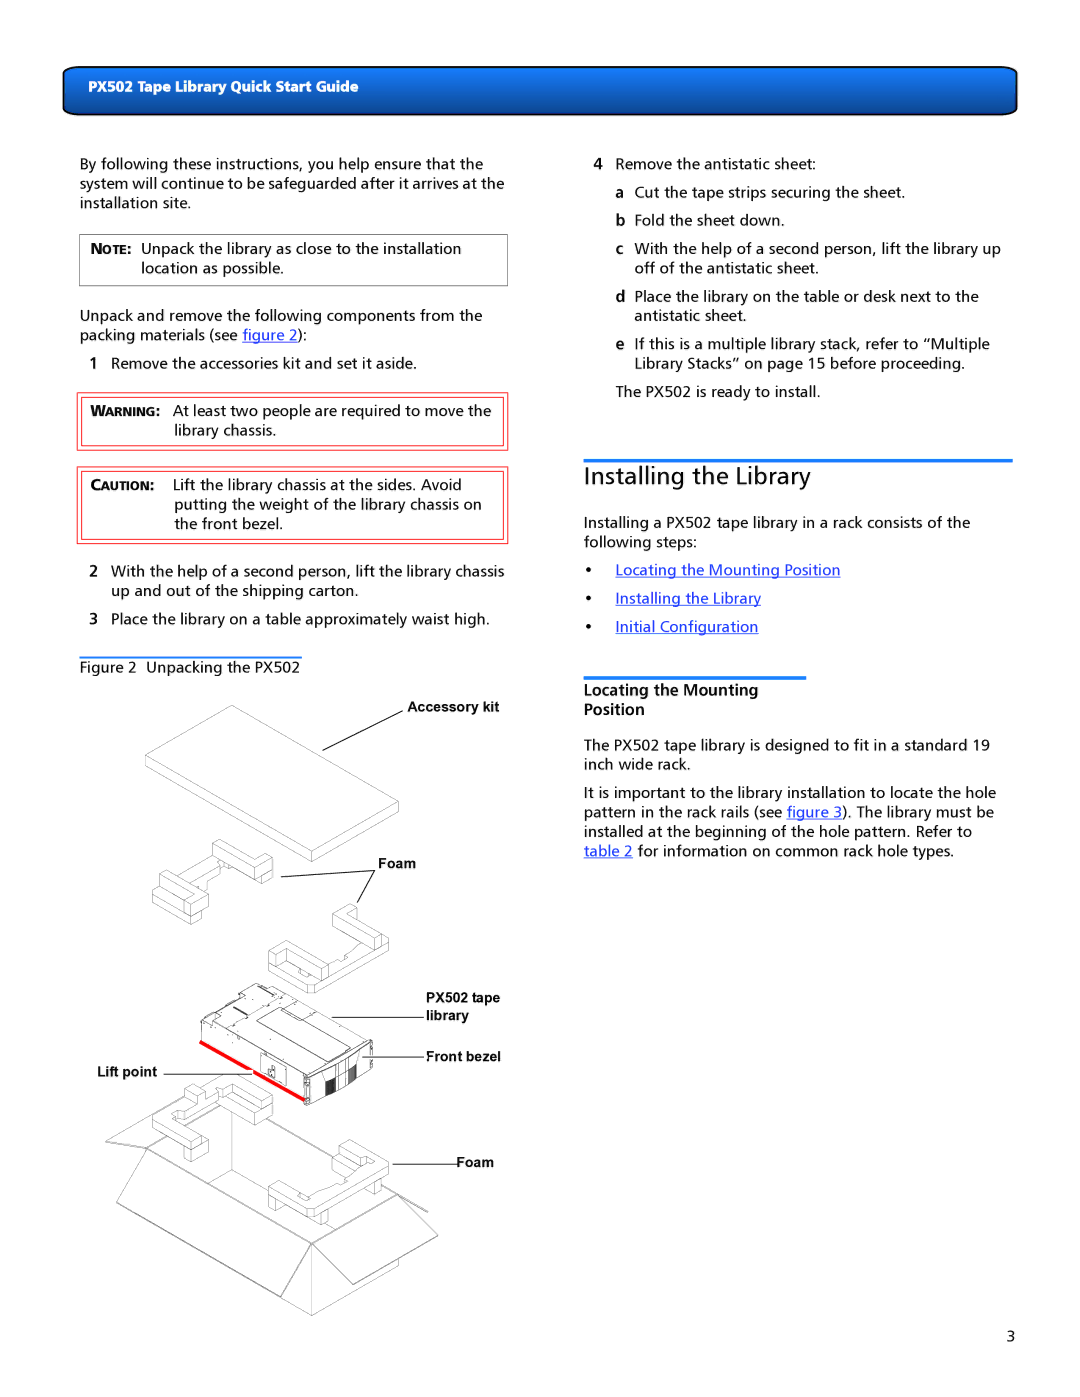
Unpack and remove the following components from the packing materials (see figure 2):
1Remove the accessories kit and set it aside.
WARNING: At least two people are required to move the library chassis.
CAUTION: Lift the library chassis at the sides. Avoid putting the weight of the library chassis on the front bezel.
2With the help of a second person, lift the library chassis up and out of the shipping carton.
3Place the library on a table approximately waist high.
Figure 2 Unpacking the PX502
Accessory kit
Foam
PX502 tape
library
![]()
![]()
![]()
![]()
![]() Front bezel
Front bezel
Lift point ![]()
![]()
![]()
![]()
![]()
Foam
4Remove the antistatic sheet:
a Cut the tape strips securing the sheet. b Fold the sheet down.
c With the help of a second person, lift the library up off of the antistatic sheet.
d Place the library on the table or desk next to the antistatic sheet.
e If this is a multiple library stack, refer to “Multiple Library Stacks” on page 15 before proceeding.
The PX502 is ready to install.
Installing the Library
Installing a PX502 tape library in a rack consists of the following steps:
•Locating the Mounting Position
•Installing the Library
•Initial Configuration
Locating the Mounting
Position0
The PX502 tape library is designed to fit in a standard 19 inch wide rack.
It is important to the library installation to locate the hole pattern in the rack rails (see figure 3). The library must be installed at the beginning of the hole pattern. Refer to table 2 for information on common rack hole types.
3
