scanner's sensitivity to these signals. If you want to listen to a weak or distant station, turn SQUELCH counterclock- wise.
•If SQUELCH is adjusted so you always hear a hissing sound, the scanner will not scan properly.
•To ensure the scanner operates properly while in the trunking mode, we suggest you set SQUELCH using the steps listed above.
STORING KNOWN
FREQUENCIES INTO
CHANNELS
Good references for active frequencies are RadioShack's Police Call, Aeronautical Fre- quency Directory, and Maritime Frequency Directory. We update these directories every year, so be sure to get a current copy. Also see the supplied Trunking Guide.
Note: If you are storing frequencies for an EDACS system, you must store them in logi- cal channel number order, with the first fre- quency in channel 1 for the current bank.
Follow these steps to store frequencies into channels.
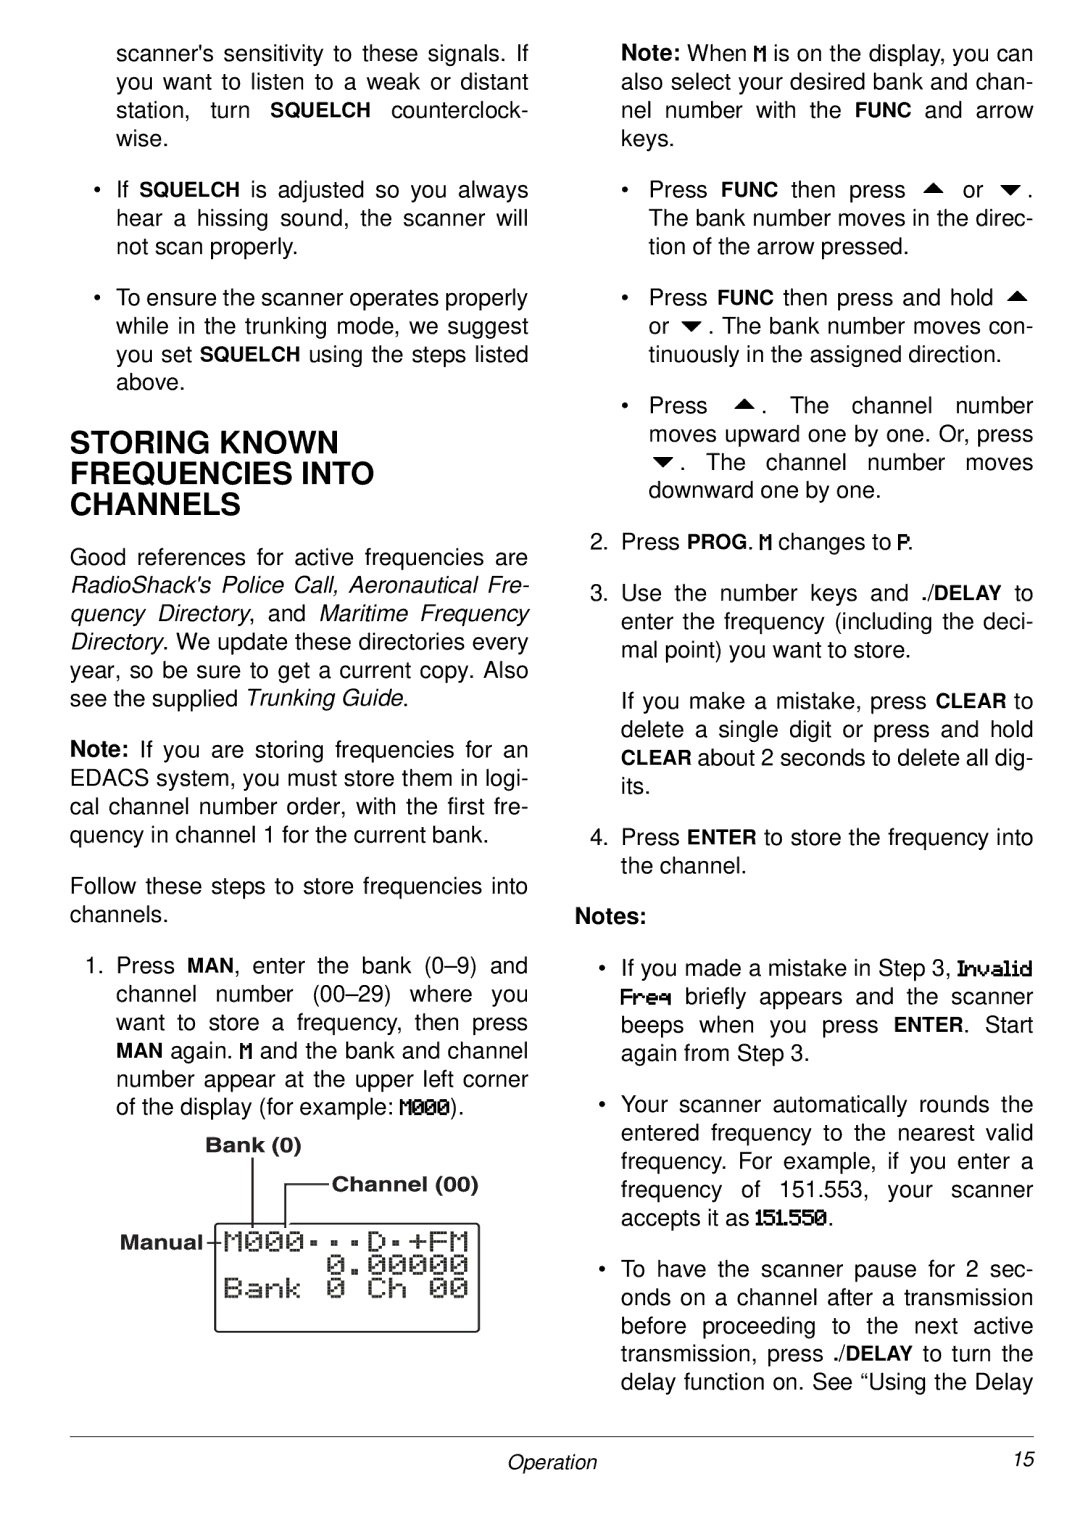
1.Press MAN, enter the bank
Note: When ) is on the display, you can also select your desired bank and chan- nel number with the FUNC and arrow keys.
•Press FUNC then press 8 or 9. The bank number moves in the direc- tion of the arrow pressed.
•Press FUNC then press and hold 8 or 9. The bank number moves con- tinuously in the assigned direction.
•Press 8. The channel number
moves upward one by one. Or, press 9. The channel number moves downward one by one.
2.Press PROG. ) changes to ,.
3.Use the number keys and ./DELAY to enter the frequency (including the deci- mal point) you want to store.
If you make a mistake, press CLEAR to delete a single digit or press and hold CLEAR about 2 seconds to delete all dig- its.
4.Press ENTER to store the frequency into the channel.
Notes:
•If you made a mistake in Step 3, %EM8C@; "I<H briefly appears and the scanner beeps when you press ENTER. Start again from Step 3.
•Your scanner automatically rounds the entered frequency to the nearest valid frequency. For example, if you enter a frequency of 151.553, your scanner accepts it as ñíñôííò.
•To have the scanner pause for 2 sec- onds on a channel after a transmission before proceeding to the next active transmission, press ./DELAY to turn the delay function on. See “Using the Delay
Operation | 15 |
