20. Install C9, a 470pF ceramic capacitor (marked 470 or 471).
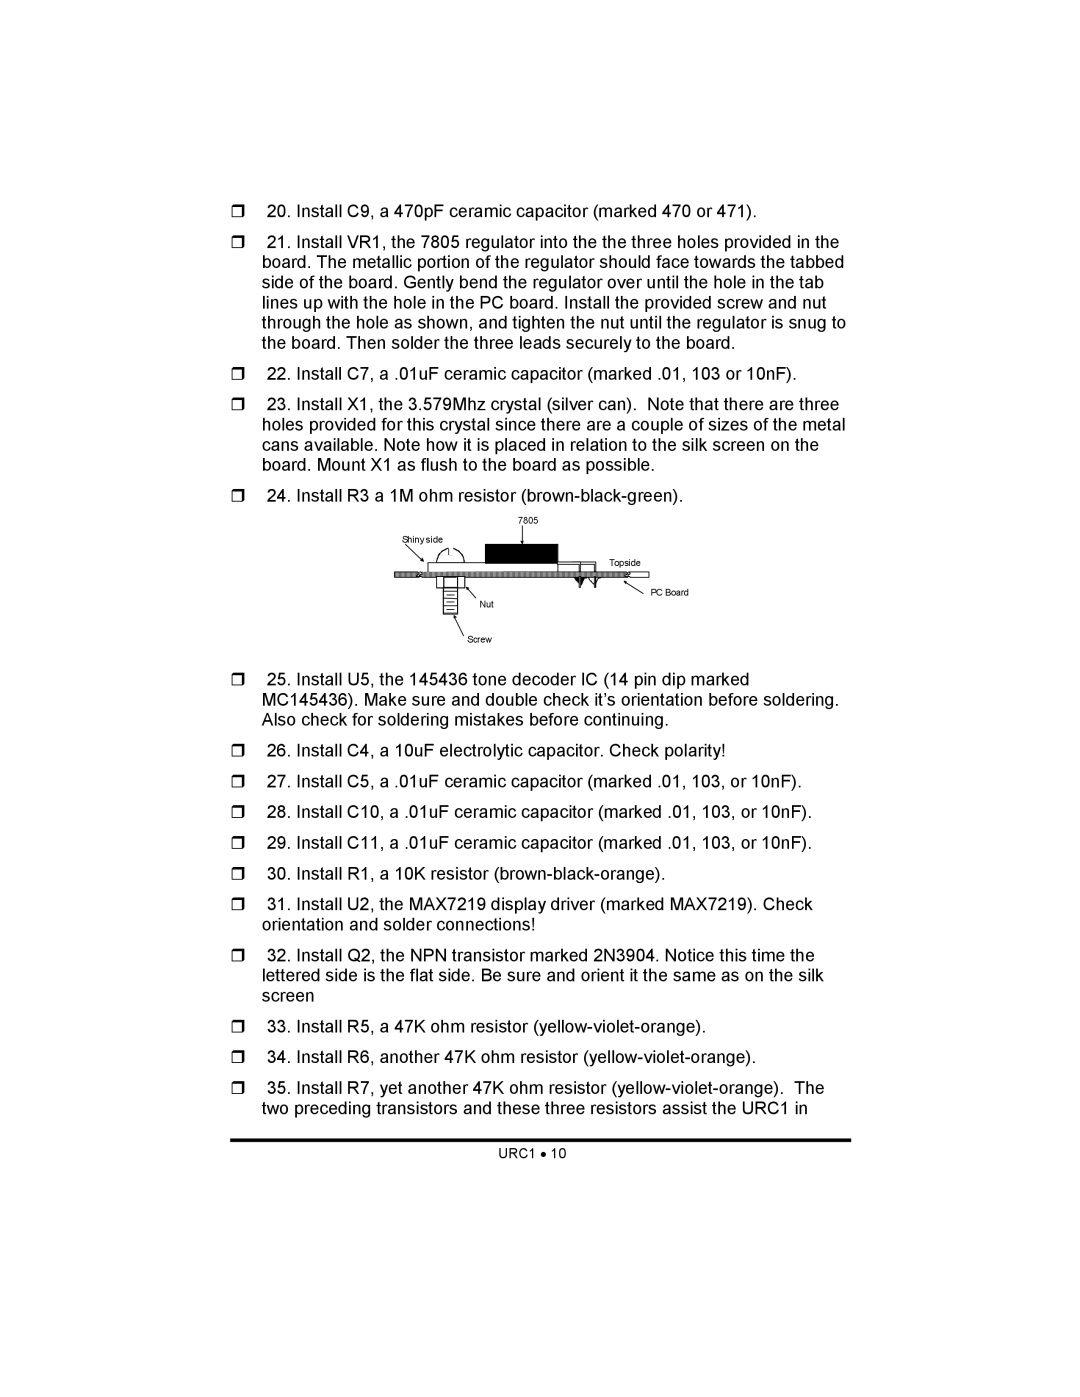
21. Install VR1, the 7805 regulator into the the three holes provided in the board. The metallic portion of the regulator should face towards the tabbed side of the board. Gently bend the regulator over until the hole in the tab lines up with the hole in the PC board. Install the provided screw and nut through the hole as shown, and tighten the nut until the regulator is snug to the board. Then solder the three leads securely to the board.
22. Install C7, a .01uF ceramic capacitor (marked .01, 103 or 10nF).
23. Install X1, the 3.579Mhz crystal (silver can). Note that there are three holes provided for this crystal since there are a couple of sizes of the metal cans available. Note how it is placed in relation to the silk screen on the board. Mount X1 as flush to the board as possible.
24. Install R3 a 1M ohm resistor
7805
Shiny side
Topside
PC Board
Nut
Screw
25. Install U5, the 145436 tone decoder IC (14 pin dip marked MC145436). Make sure and double check it’s orientation before soldering. Also check for soldering mistakes before continuing.
26. Install C4, a 10uF electrolytic capacitor. Check polarity!
27. Install C5, a .01uF ceramic capacitor (marked .01, 103, or 10nF).
28. Install C10, a .01uF ceramic capacitor (marked .01, 103, or 10nF).
29. Install C11, a .01uF ceramic capacitor (marked .01, 103, or 10nF).
30. Install R1, a 10K resistor
31. Install U2, the MAX7219 display driver (marked MAX7219). Check orientation and solder connections!
32. Install Q2, the NPN transistor marked 2N3904. Notice this time the lettered side is the flat side. Be sure and orient it the same as on the silk screen
33. Install R5, a 47K ohm resistor
34. Install R6, another 47K ohm resistor
35. Install R7, yet another 47K ohm resistor