SETTING UP
STEP 1: PLUG IN THE MONITOR
Plug the end of the power cord into an appropriate wall outlet. Be sure to insert the plug completely.
STEP 2: PLACE BATTERIES IN REMOTE
•Remove the battery compartment cover from the back of the remote by pushing down on and sliding off the cover.
•Insert fresh batteries. Make sure that the polarities (+ and
•Replace the cover.
STEP 3: TURN ON THE MONITOR
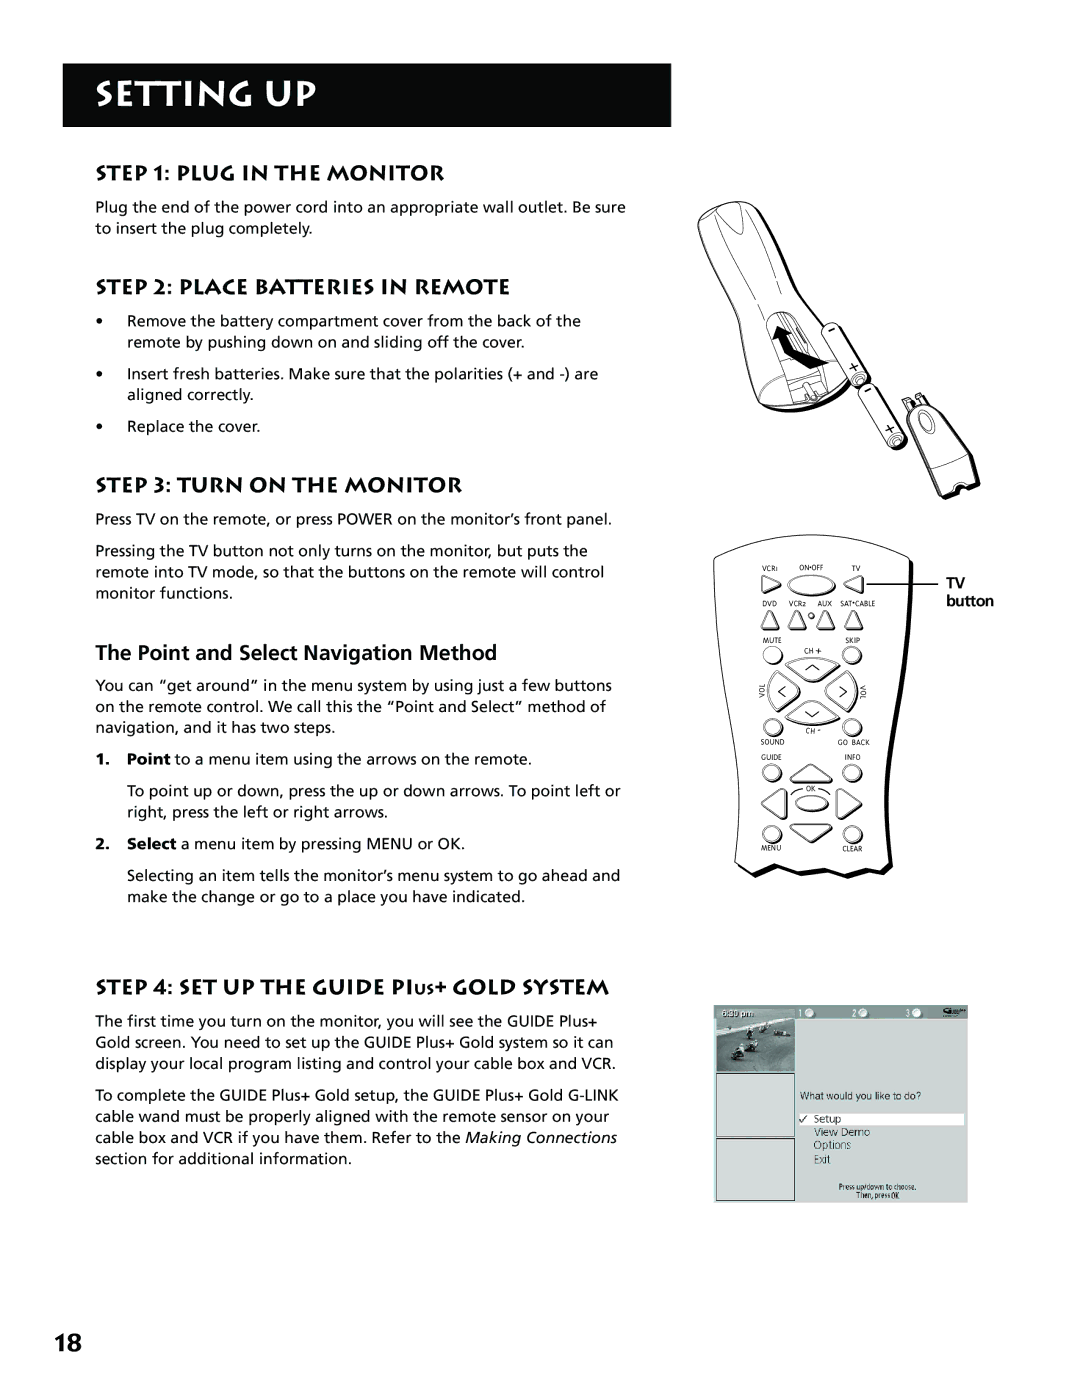
Press TV on the remote, or press POWER on the monitor’s front panel.
Pressing the TV button not only turns on the monitor, but puts the remote into TV mode, so that the buttons on the remote will control monitor functions.
The Point and Select Navigation Method
You can “get around” in the menu system by using just a few buttons on the remote control. We call this the “Point and Select” method of navigation, and it has two steps.
1.Point to a menu item using the arrows on the remote.
To point up or down, press the up or down arrows. To point left or right, press the left or right arrows.
2.Select a menu item by pressing MENU or OK.
Selecting an item tells the monitor’s menu system to go ahead and make the change or go to a place you have indicated.
STEP 4: SET UP THE GUIDE PIUS+ GOLD SYSTEM
The first time you turn on the monitor, you will see the GUIDE Plus+ Gold screen. You need to set up the GUIDE Plus+ Gold system so it can display your local program listing and control your cable box and VCR.
To complete the GUIDE Plus+ Gold setup, the GUIDE Plus+ Gold
VCR1 ON![]() OFF
OFF
DVD VCR2 AUX
MUTE
CH +
L
O
V
CH -
SOUND
GUIDE
OK
MENU
TV
SAT•CABLE
SKIP
V
O
L
GO BACK
INFO
CLEAR
TV button
18
