OWNER’S MANUAL
ASSEMBLY
UNFOLDING AND ADJUSTING HANDLEBAR
Unfolding Handlebar
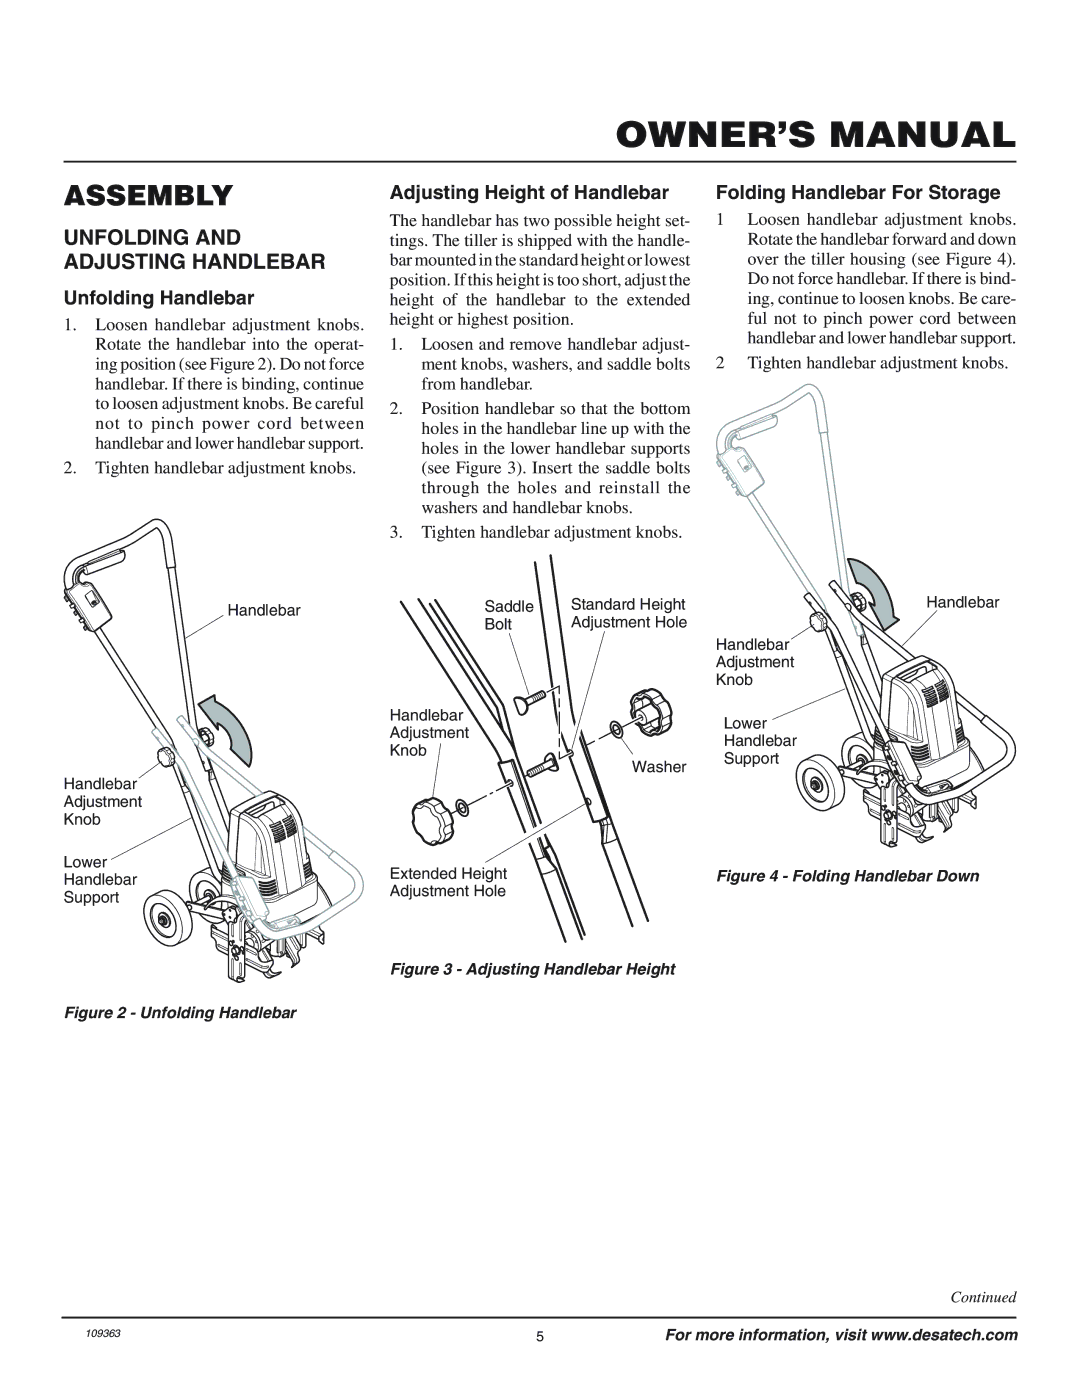
1.Loosen handlebar adjustment knobs. Rotate the handlebar into the operat- ing position (see Figure 2). Do not force handlebar. If there is binding, continue to loosen adjustment knobs. Be careful not to pinch power cord between handlebar and lower handlebar support.
2.Tighten handlebar adjustment knobs.
Handlebar
Handlebar
Adjustment
Knob
Lower
Handlebar
Support
Adjusting Height of Handlebar
The handlebar has two possible height set- tings. The tiller is shipped with the handle- bar mounted in the standard height or lowest position. If this height is too short, adjust the height of the handlebar to the extended height or highest position.
1.Loosen and remove handlebar adjust- ment knobs, washers, and saddle bolts from handlebar.
2.Position handlebar so that the bottom holes in the handlebar line up with the holes in the lower handlebar supports (see Figure 3). Insert the saddle bolts through the holes and reinstall the washers and handlebar knobs.
3.Tighten handlebar adjustment knobs.
Saddle | Standard Height |
Bolt | Adjustment Hole |
Handlebar
Adjustment
Knob
Washer
Extended Height
Adjustment Hole
Folding Handlebar For Storage
1Loosen handlebar adjustment knobs. Rotate the handlebar forward and down over the tiller housing (see Figure 4). Do not force handlebar. If there is bind- ing, continue to loosen knobs. Be care- ful not to pinch power cord between handlebar and lower handlebar support.
2Tighten handlebar adjustment knobs.
Handlebar
Handlebar
Adjustment
Knob
Lower
Handlebar
Support
Figure 4 - Folding Handlebar Down
Figure 3 - Adjusting Handlebar Height
Figure 2 - Unfolding Handlebar
Continued
109363 | 5 | For more information, visit www.desatech.com |