®
ELECTRIC TILLER
OPERATING TILLER
Continued
STARTING TILLER
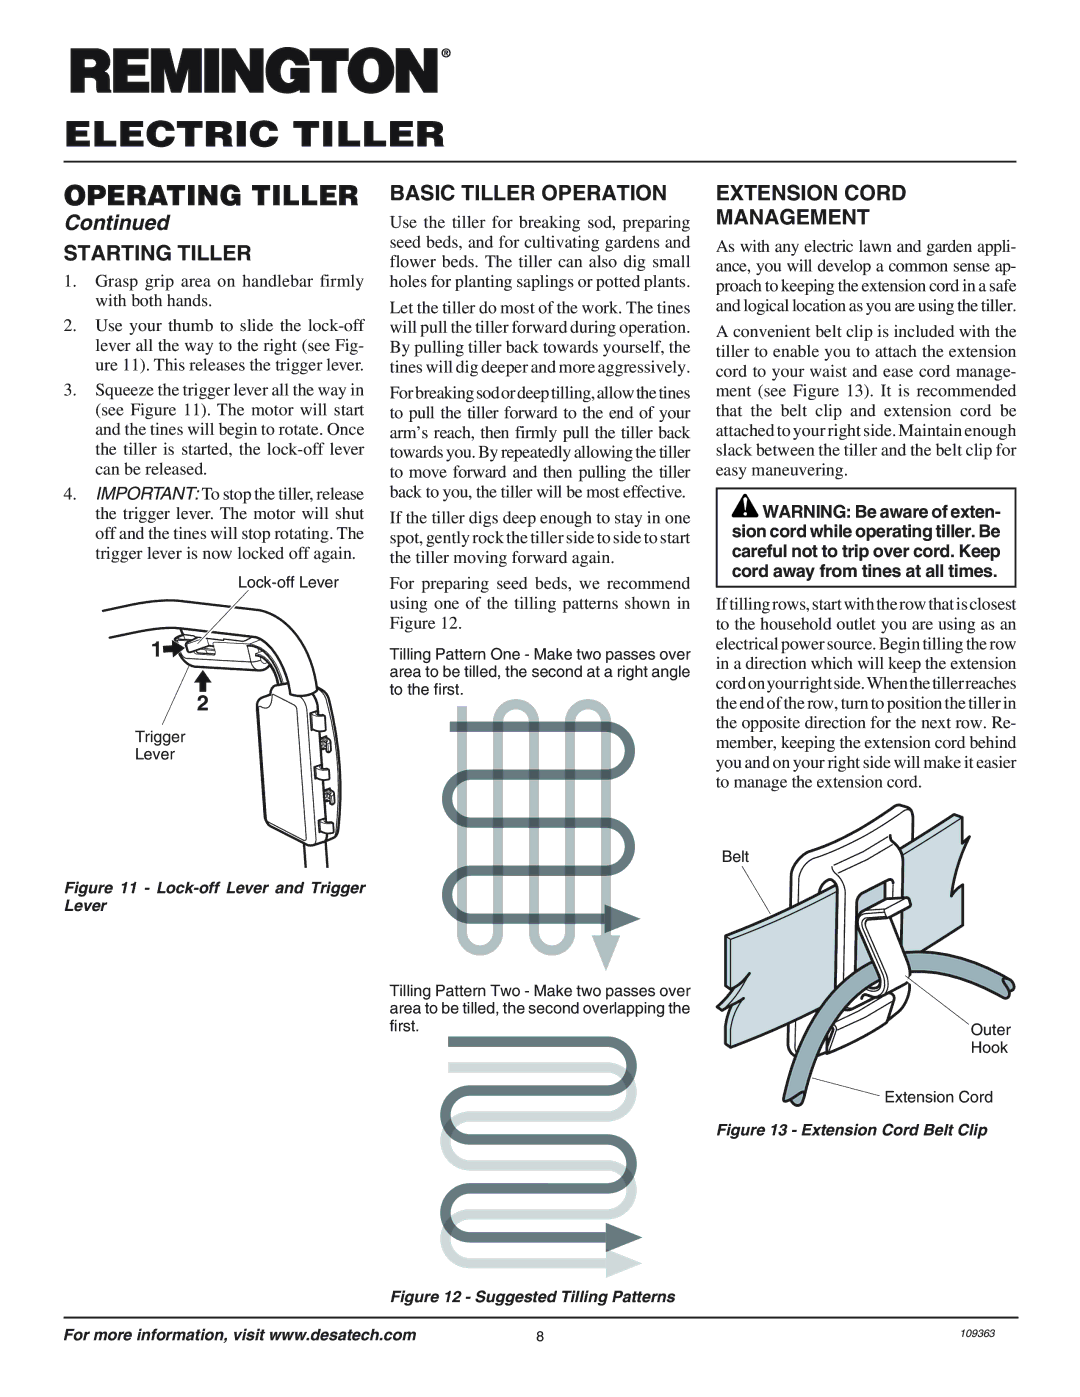
1.Grasp grip area on handlebar firmly with both hands.
2.Use your thumb to slide the
3.Squeeze the trigger lever all the way in (see Figure 11). The motor will start and the tines will begin to rotate. Once the tiller is started, the
4.IMPORTANT: To stop the tiller, release the trigger lever. The motor will shut off and the tines will stop rotating. The trigger lever is now locked off again.
1![]()
![]()
2
Trigger
Lever
Figure 11 - Lock-off Lever and Trigger Lever
BASIC TILLER OPERATION
Use the tiller for breaking sod, preparing seed beds, and for cultivating gardens and flower beds. The tiller can also dig small holes for planting saplings or potted plants.
Let the tiller do most of the work. The tines will pull the tiller forward during operation. By pulling tiller back towards yourself, the tines will dig deeper and more aggressively.
Forbreakingsodordeeptilling,allowthetines to pull the tiller forward to the end of your arm’s reach, then firmly pull the tiller back towards you. By repeatedly allowing the tiller to move forward and then pulling the tiller back to you, the tiller will be most effective.
If the tiller digs deep enough to stay in one spot, gently rock the tiller side to side to start the tiller moving forward again.
For preparing seed beds, we recommend using one of the tilling patterns shown in Figure 12.
Tilling Pattern One - Make two passes over area to be tilled, the second at a right angle to the first.
Tilling Pattern Two - Make two passes over area to be tilled, the second overlapping the first.
EXTENSION CORD
MANAGEMENT
As with any electric lawn and garden appli- ance, you will develop a common sense ap- proach to keeping the extension cord in a safe and logical location as you are using the tiller.
A convenient belt clip is included with the tiller to enable you to attach the extension cord to your waist and ease cord manage- ment (see Figure 13). It is recommended that the belt clip and extension cord be attached to your right side. Maintain enough slack between the tiller and the belt clip for easy maneuvering.
![]() WARNING: Be aware of exten- sion cord while operating tiller. Be careful not to trip over cord. Keep cord away from tines at all times.
WARNING: Be aware of exten- sion cord while operating tiller. Be careful not to trip over cord. Keep cord away from tines at all times.
If tilling rows, start with the row that is closest to the household outlet you are using as an electrical power source. Begin tilling the row in a direction which will keep the extension cordonyourrightside.Whenthetillerreaches the end of the row, turn to position the tiller in the opposite direction for the next row. Re- member, keeping the extension cord behind you and on your right side will make it easier to manage the extension cord.
Belt
Outer
Hook
Extension Cord
Figure 13 - Extension Cord Belt Clip
Figure 12 - Suggested Tilling Patterns
For more information, visit www.desatech.com | 8 | 109363 |