MOWER INFORMATION

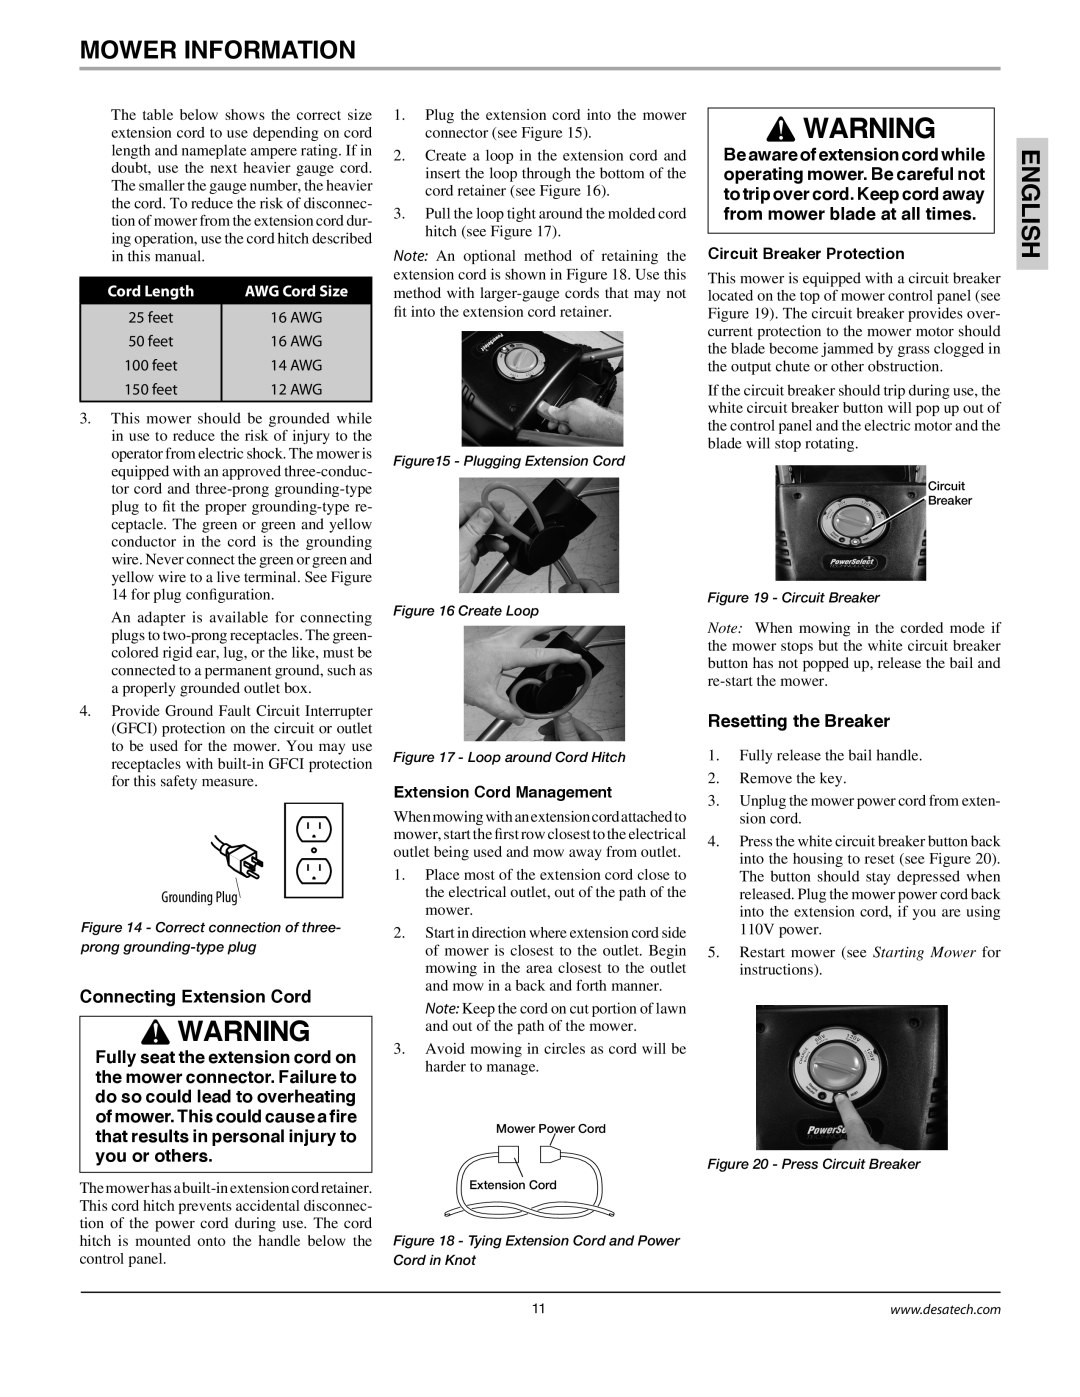
The table below shows the correct size extension cord to use depending on cord length and nameplate ampere rating. If in doubt, use the next heavier gauge cord. The smaller the gauge number, the heavier the cord. To reduce the risk of disconnec- tion of mower from the extension cord dur- ing operation, use the cord hitch described in this manual.

Cord Length

AWG Cord Size


25 feet

16 AWG

50 feet

16 AWG

100 feet

14 AWG

150 feet

12 AWG


3.This mower should be grounded while in use to reduce the risk of injury to the operator from electric shock. The mower is equipped with an approved three-conduc- tor cord and three-prong grounding-type plug to fit the proper grounding-type re- ceptacle. The green or green and yellow conductor in the cord is the grounding wire. Never connect the green or green and yellow wire to a live terminal. See Figure 14 for plug configuration.

An adapter is available for connecting plugs to two-prong receptacles. The green- colored rigid ear, lug, or the like, must be connected to a permanent ground, such as a properly grounded outlet box.

4.Provide Ground Fault Circuit Interrupter (GFCI) protection on the circuit or outlet to be used for the mower. You may use receptacles with built-in GFCI protection for this safety measure.

Grounding Plug

Figure 14 - Correct connection of three- prong grounding-type plug

Connecting Extension Cord

WARNING

Fully seat the extension cord on the mower connector. Failure to do so could lead to overheating of mower. This could cause a fire that results in personal injury to you or others.

The mower has a built-in extension cord retainer. This cord hitch prevents accidental disconnec- tion of the power cord during use. The cord hitch is mounted onto the handle below the control panel.

1.Plug the extension cord into the mower connector (see Figure 15).

2.Create a loop in the extension cord and insert the loop through the bottom of the cord retainer (see Figure 16).

3.Pull the loop tight around the molded cord hitch (see Figure 17).

Note: An optional method of retaining the extension cord is shown in Figure 18. Use this method with larger-gauge cords that may not fit into the extension cord retainer.

Figure15 - Plugging Extension Cord

Figure 16 Create Loop

Figure 17 - Loop around Cord Hitch

Extension Cord Management

When mowing with an extension cord attached to mower, start the first row closest to the electrical outlet being used and mow away from outlet.

1.Place most of the extension cord close to the electrical outlet, out of the path of the mower.

2.Start in direction where extension cord side of mower is closest to the outlet. Begin mowing in the area closest to the outlet and mow in a back and forth manner.

Note: Keep the cord on cut portion of lawn and out of the path of the mower.

3.Avoid mowing in circles as cord will be harder to manage.

Mower Power Cord

Extension Cord

Figure 18 - Tying Extension Cord and Power Cord in Knot

WARNING

Be aware of extension cord while operating mower. Be careful not to trip over cord. Keep cord away from mower blade at all times.

Circuit Breaker Protection

This mower is equipped with a circuit breaker located on the top of mower control panel (see Figure 19). The circuit breaker provides over- current protection to the mower motor should the blade become jammed by grass clogged in the output chute or other obstruction.

If the circuit breaker should trip during use, the white circuit breaker button will pop up out of the control panel and the electric motor and the blade will stop rotating.

Circuit

Breaker

Figure 19 - Circuit Breaker

Note: When mowing in the corded mode if the mower stops but the white circuit breaker button has not popped up, release the bail and re-start the mower.

Resetting the Breaker

1.Fully release the bail handle.

2.Remove the key.

3.Unplug the mower power cord from exten- sion cord.

4.Press the white circuit breaker button back into the housing to reset (see Figure 20). The button should stay depressed when released. Plug the mower power cord back into the extension cord, if you are using 110V power.

5.Restart mower (see Starting Mower for instructions).

Figure 20 - Press Circuit Breaker

ENGLISH

11

www.desatech.com

Page 11
Image 11
Remington Power Tools MPS6017A manual Connecting Extension Cord, Resetting the Breaker, Extension Cord Management

MPS6017A specifications

The Remington Power Tools MPS6017A is a versatile and powerful multi-purpose saw designed for both professionals and home enthusiasts. This tool stands out among its competitors due to its innovative features and user-friendly design, making it an essential addition to any toolbox.

One of the standout characteristics of the MPS6017A is its robust 6 AMP motor, delivering sufficient power for cutting through various materials, including wood, plastic, and metal. This motor ensures consistent performance, enabling users to complete tasks efficiently. The saw's variable speed control allows for a customizable cutting experience, making it suitable for a wide range of applications, from intricate cuts to heavy-duty tasks.

The MPS6017A is equipped with a patented laser guide system that enhances precision during cuts. This technology provides a visual reference line, ensuring accuracy and helping to achieve clean, straight cuts every time. Coupled with the adjustable cutting depth feature, users can easily select the appropriate depth for their specific project, offering flexibility and control.

Another noteworthy feature is the tool-less blade change system, which simplifies the process of swapping blades. This means that users can quickly and efficiently change blades without needing additional tools, significantly reducing downtime between cuts. The saw also supports a variety of blade types, accommodating different cutting styles and preferences.

In terms of design, the MPS6017A boasts a lightweight and ergonomic structure, providing comfort during extended use. The soft-grip handle adds to user comfort and reduces fatigue, making it ideal for prolonged projects. Furthermore, the integrated dust blower keeps the cutting line clear, enhancing visibility and ensuring accuracy.

Safety is paramount in the design of the MPS6017A. It includes features such as a safety lock switch and a protective blade guard, which help prevent accidental starts and protect users from potential injuries.

Overall, the Remington Power Tools MPS6017A is an exceptional multi-purpose saw that combines power, precision, and safety. Its range of advanced features and user-oriented design make it a reliable option for anyone looking to tackle a variety of cutting tasks with ease and precision. Whether for weekend DIY projects or professional applications, the MPS6017A is equipped to handle it all, making it a valuable investment for any toolkit.